Configure SAP Cloud Platform for on-premises systems
Overview
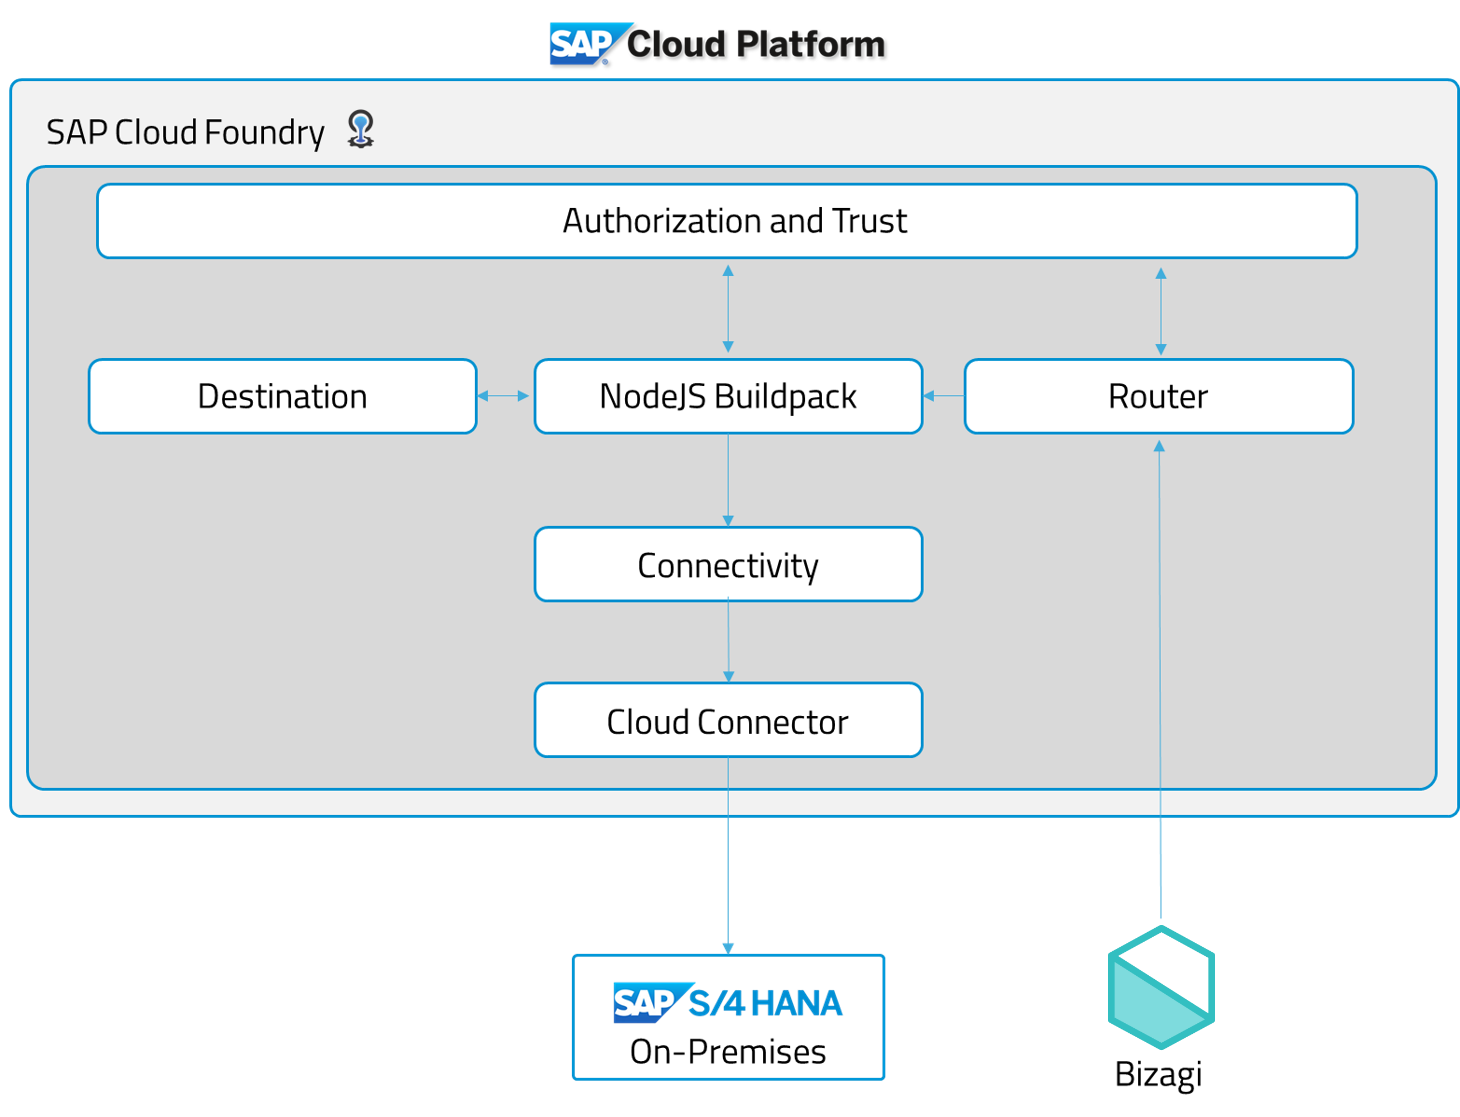
Bizagi uses SAP Cloud Platform as an integration tool to establish a connection between Bizagi and the SAP S/4 HANA on-premises system. This article explains how to perform the configurations needed for the integration (such as the SAP Cloud connector and the different SAP services) within the SAP Cloud Platform.
SAP Services
The services needed are described according to the following flow:
-
Router: When Bizagi calls the SAP Cloud Platform, it is redirected to the Router, which is the entry point for all business applications.
-
Authorization and Trust: As a security layer, SAP provides an authorization service, so Bizagi can get an authorization token to do invocations of SAP functions. If the authentication fails, Bizagi displays an error sent by the Authorization and Trust service.
-
Buildpack: To get the proper route to the on-premises system, there is a Destination service that holds the information of the location of the SAP on-premises system. Once the Buildpack gets the destination information, it uses the Connectivity service to establish a secure connection. This Buildpack allows determining the dependencies to download, build and run the application.
-
Destination: This service holds the information of the SAP system backend configuration.
-
Connectivity: This service establishes a connection between the SAP Cloud Platform and your SAP systems with isolated networks.
-
Cloud Connector: It is a link with on-premises systems, so the SAP Cloud Platform and its services can access through the connector. For further information, refer to the SAP Cloud Connector documentation.
The following diagram shows the flow described:
Requirements
Before you start performing configurations in the SAP Cloud Platform, verify that you have:
- Configured the SAP Cloud Foundry. For further information, refer to Enterprise Account in the Cloud Foundry Environment.
- An instance of the SAP Cloud Connector. For further information, see the Guide to install the Cloud Connector.
- A SAP S/4 HANA, ECC, or R/3 on-premises system with the OData layer exposed.
- Installed the Cloud Foundry Command Line Interface (CLI). To learn more about the installation process, refer to the How to install the CLI article.
Configuration steps
- Set the Cloud connector
- Define a new Destination configuration for the SAP system
- Set the Authorization and Trust service
- Set the Destination service
- Set the Connectivity service
- Install the Router and Buildpack
1. Set the Cloud connector
Get the information of your Cloud Foundry Subaccount. Access the SAP Cloud Platform cockpit and click your Subaccount:
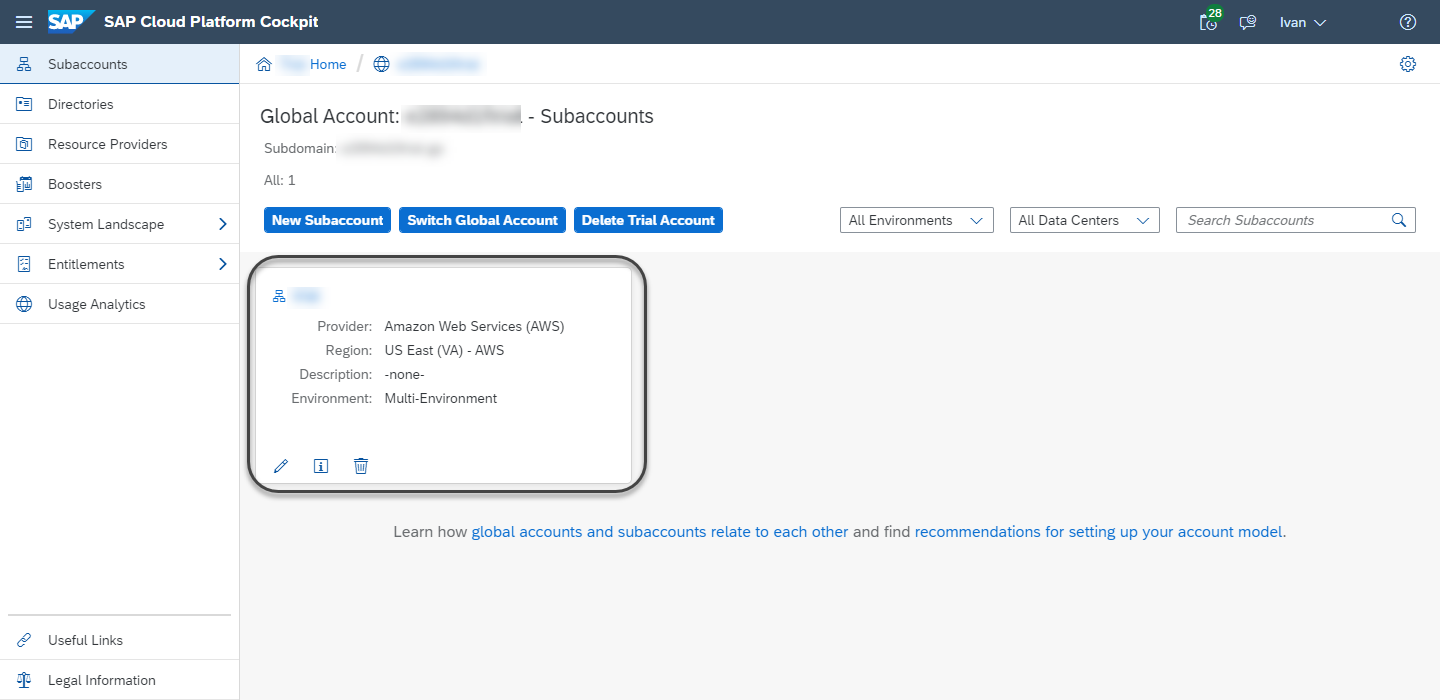
Get the following information:
- Subaccount ID.
- Region of the API endpoint: For example, this Subaccount is located in US East (VA) - AWS (see the image above).
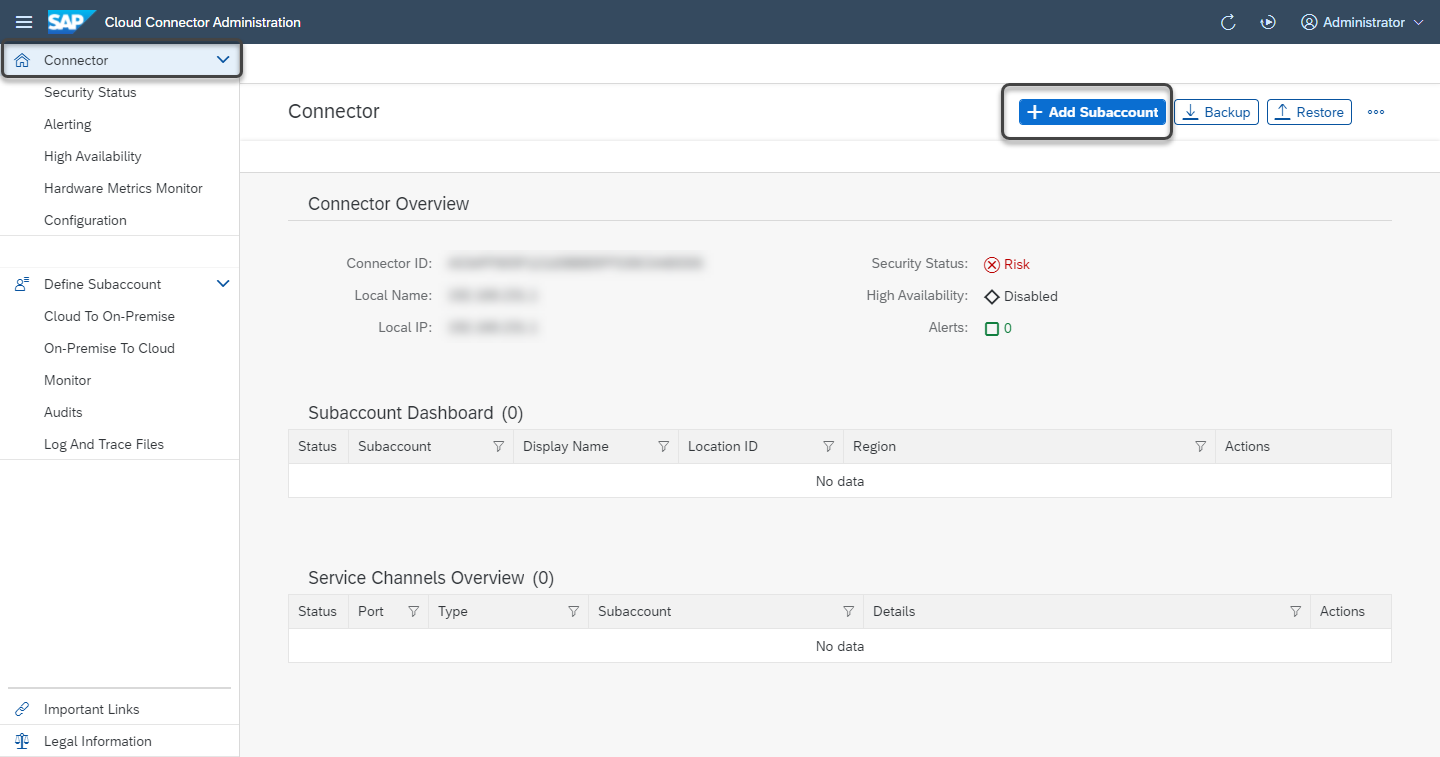
Now, access the Cloud Connector (usually located in http://localhost:8443). On the left panel, click the Connector module and then the Add Subaccount button.
Register the following information:
- Region: Region of the endpoint API obtained in the SAP Cloud Platform cockpit.
- Subaccount ID: Cloud Platform subaccount ID obtained in the cockpit.
- Display Name: Name of the connection to a Subaccount.
- Login Email: SAP Cloud Platform login email.
- Password: SAP Cloud Platform login password.
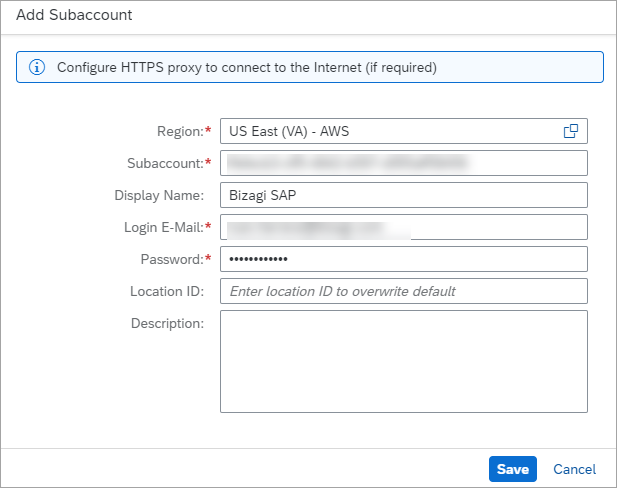
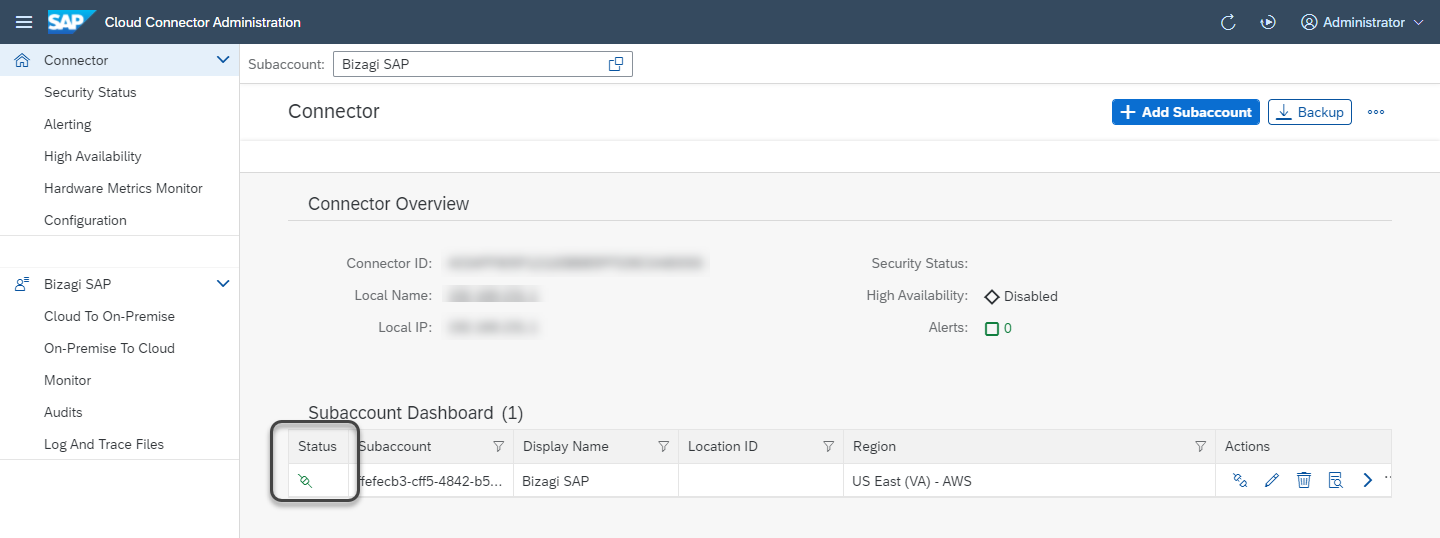
Click Save and review the Subaccount status.
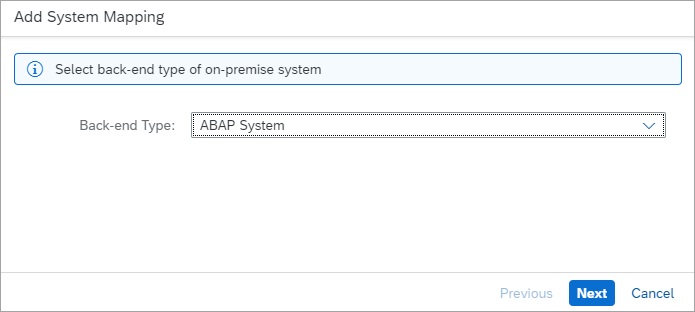
In the Cloud connector site, under the Subaccount created, click the Cloud To On-Premise module and then add a new system with the + icon.

Select ABAP System as the Back-end Type.
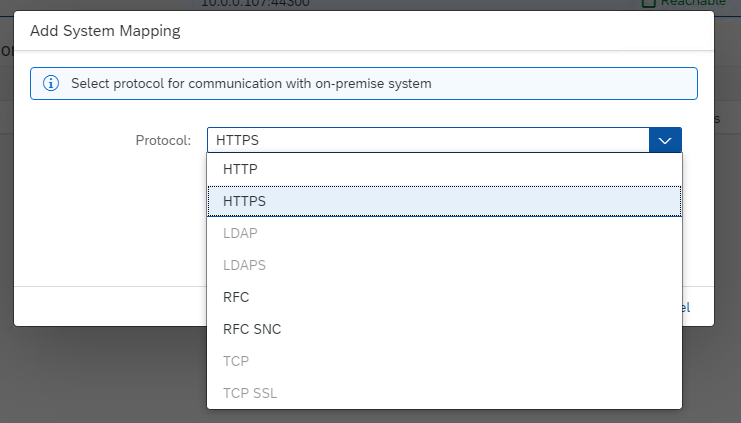
Select the HTTP or HTTPS Protocol according to your needs.
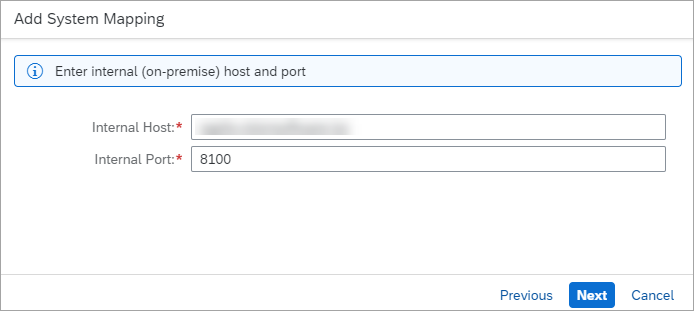
Register the SAP on-premises system Internal Host and Internal Port.
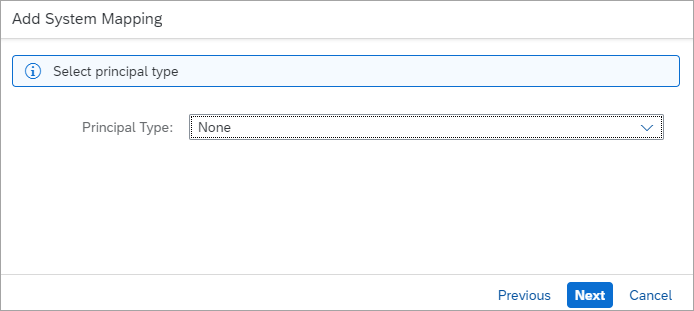
Set the Principal Type as None.
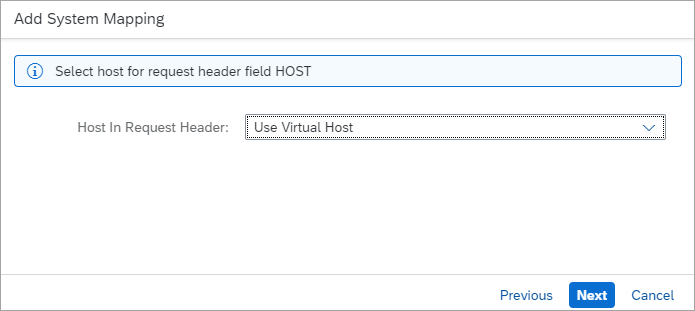
Select the Use Virtual Host option in the Host In Request Header field.
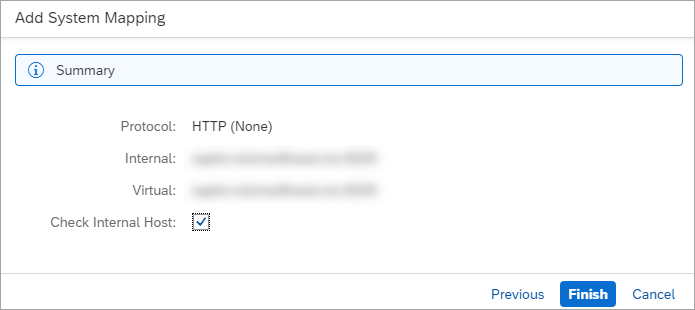
Set a description and click Finish.
If you select the Reachable checkbox inside the Check Result column, you can see if a system is reachable by the Cloud Connector.

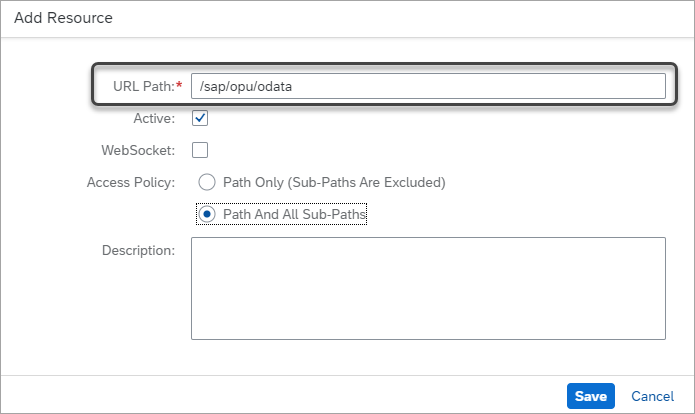
Now create a new Resource by clicking the + button.

Include the OData endpoint of your SAP on-premises system in the URL Path field.
/sap/opu/odata
Select the Path And All Sub-Paths Access Policy.
Define the on-premises destination in the Cloud Foundry
The Destination service stores the different configurations of services that you want to access from the SAP Cloud Platform. Therefore, you need to register the information related to your on-premises system.
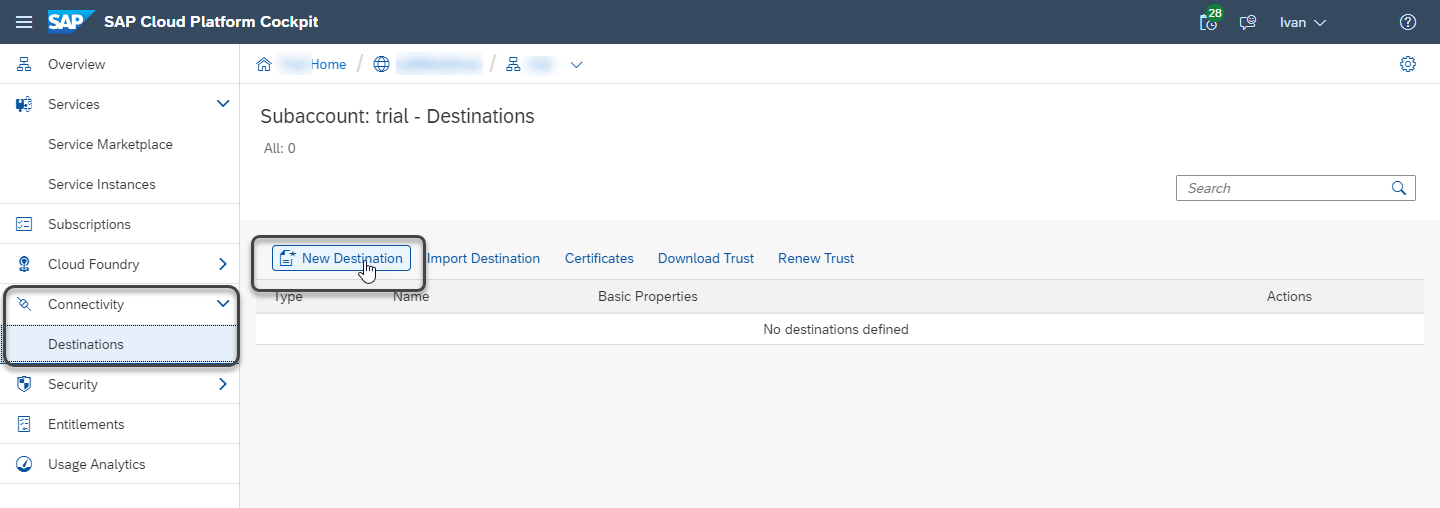
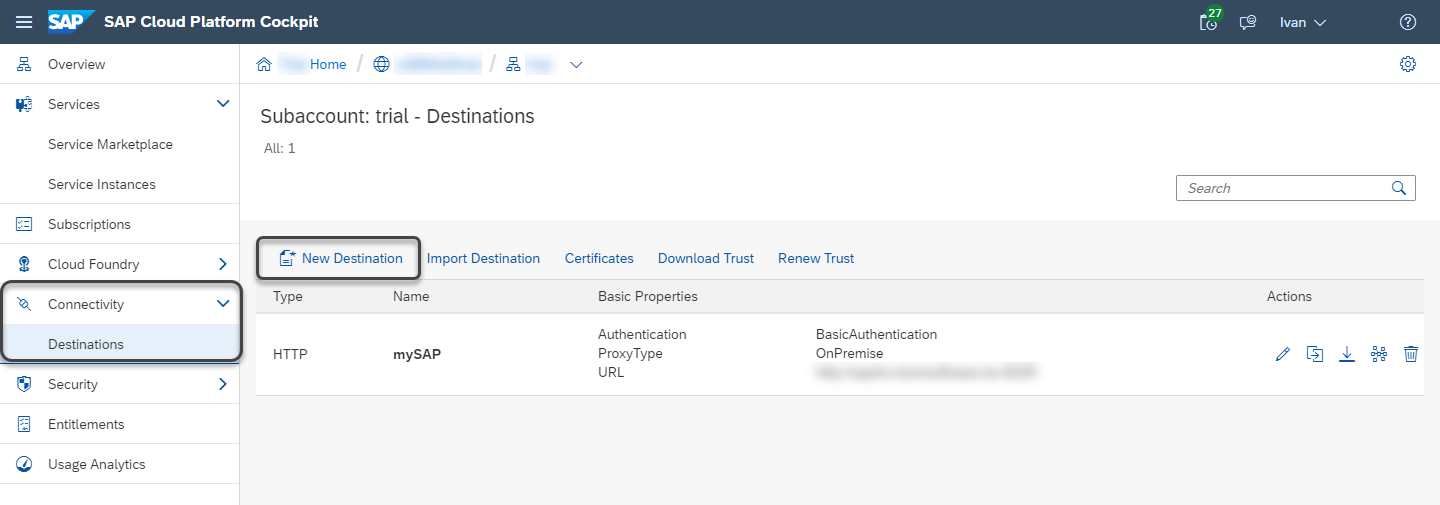
As the Cloud Platform administrator, you must access the SAP Cloud Platform cockpit, open the Connectivity module, select Destinations, and click the New Destination button.
Register the following information:
- Name: name of the new destination.
- Type: select the HTTP or HTTPS Protocol according to your needs.
- URL: URL of the on-premises system Virtual Host with Virtual Port.
- Proxy Type: select OnPremise.
- Authentication: select the BasicAuthentication option.
- User: username of the on-premises system user.
- Password: password of the on-premises system user.
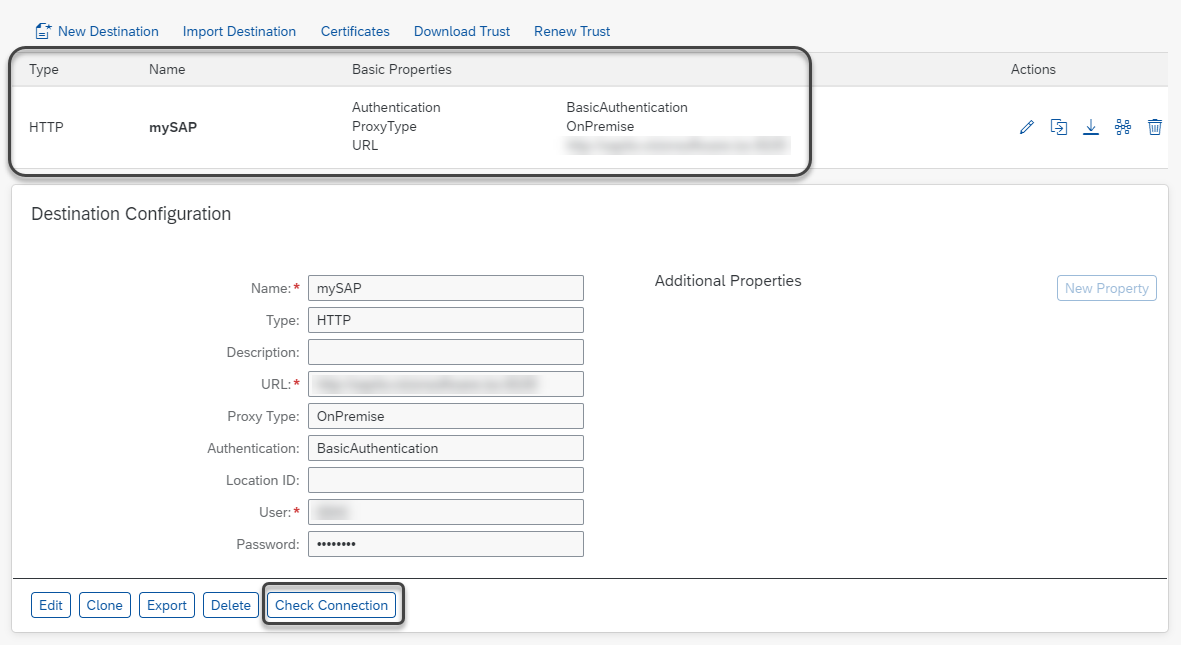
Click Save. After the destination is registered, verify the connection by clicking the Check Connection button.
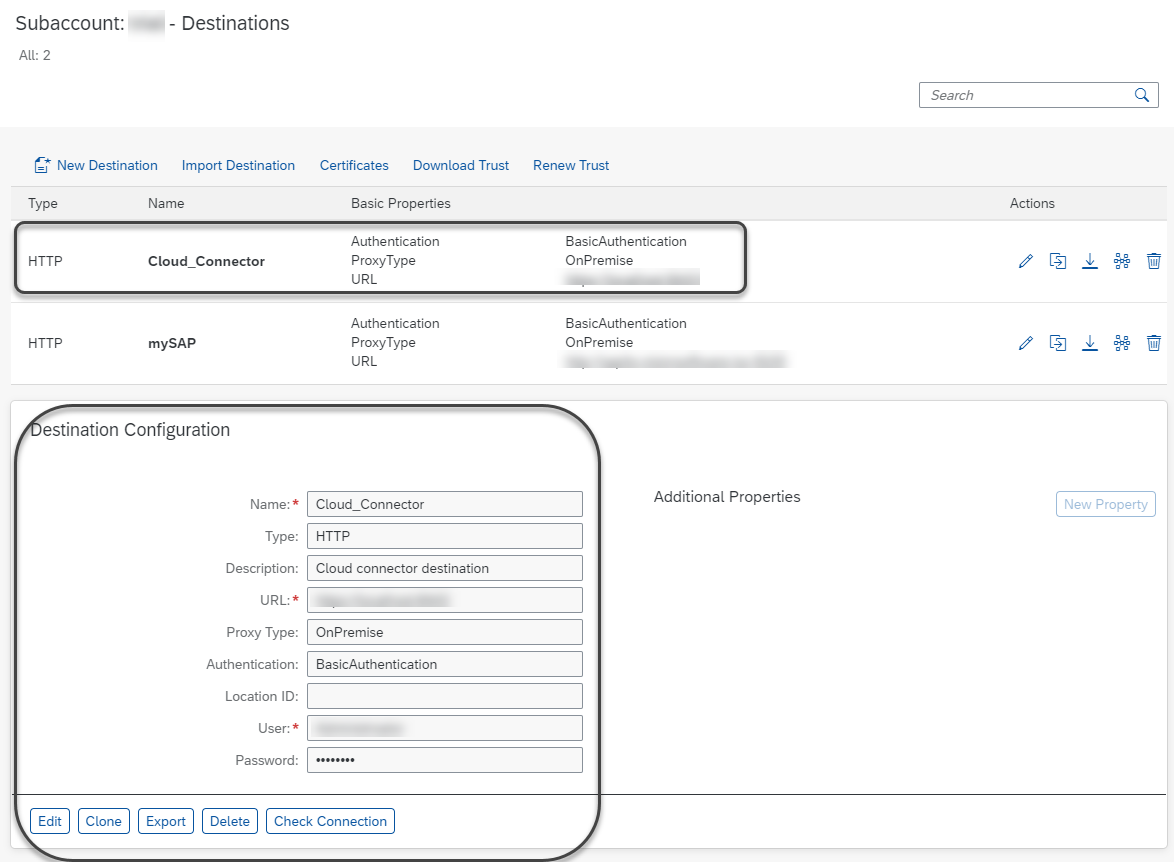
2. Define a new Destination configuration for the SAP system
A Destination in SAP holds the backend system configuration, so the SAP Cloud Platform can have the information access to it. To configure a Destination, access the SAP Cloud Platform cockpit, select your Subaccount, open the Connectivity module, select Destinations, and click the New Destination button.
Register the following parameters:
- Name: name of the new destination. If you have multiple systems, make sure you give a clear name.
- Type: select the HTTP or HTTPS Protocol according to your needs, as the connection to the on-premises system. The Connectivity service and the SAP Cloud Connector use HTTP or HTTPS connections.
- Description: brief description of the destination.
- URL: this must be the Virtual Host with Virtual Port of the SAP Cloud Connector (previously configured). For more information, refer to Set the Cloud Connector.
- Proxy Type: select OnPremise.
- Authentication: you must select the same authentication defined in the SAP Cloud Connector for OData. Therefore, select the BasicAuthentication option.
- User: on-premises SAP user with permissions to access the OData services.
- Password: user password.
Click Save and check the connection.
3. Set the Authorization and Trust service
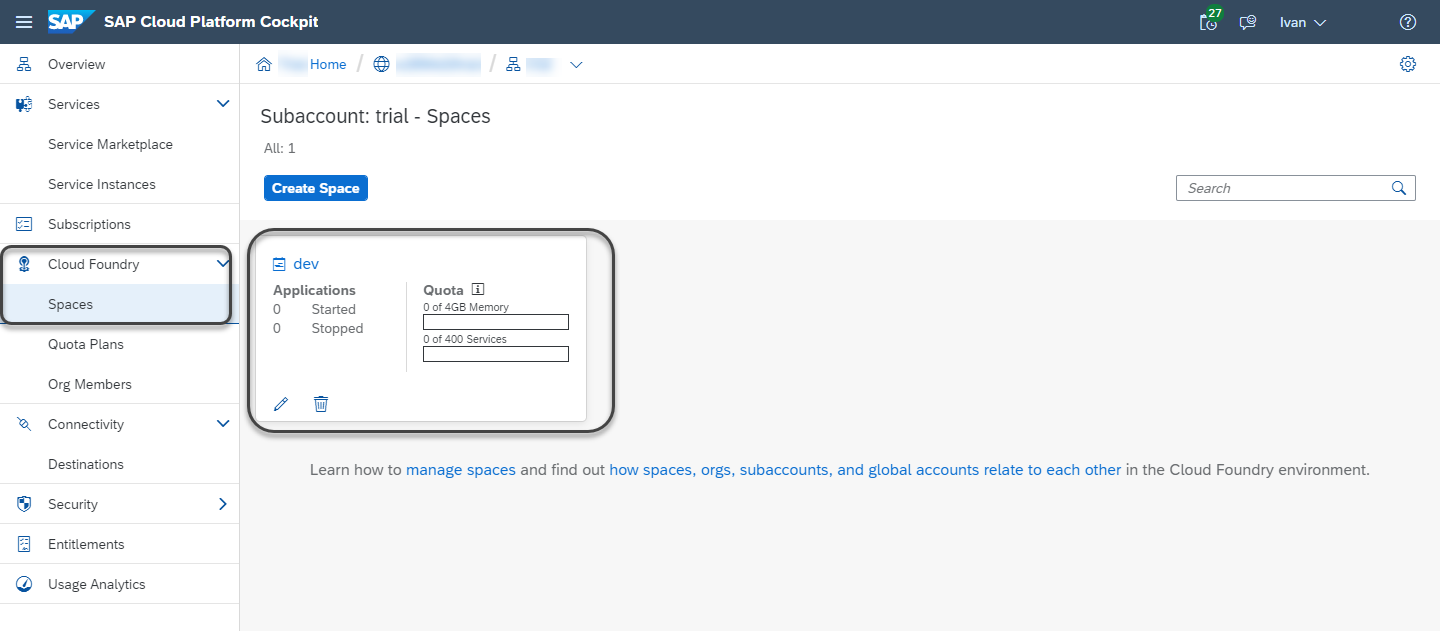
In the SAP Cloud Platform, select Cloud Foundry, open Spaces, and select the Foundry's space.
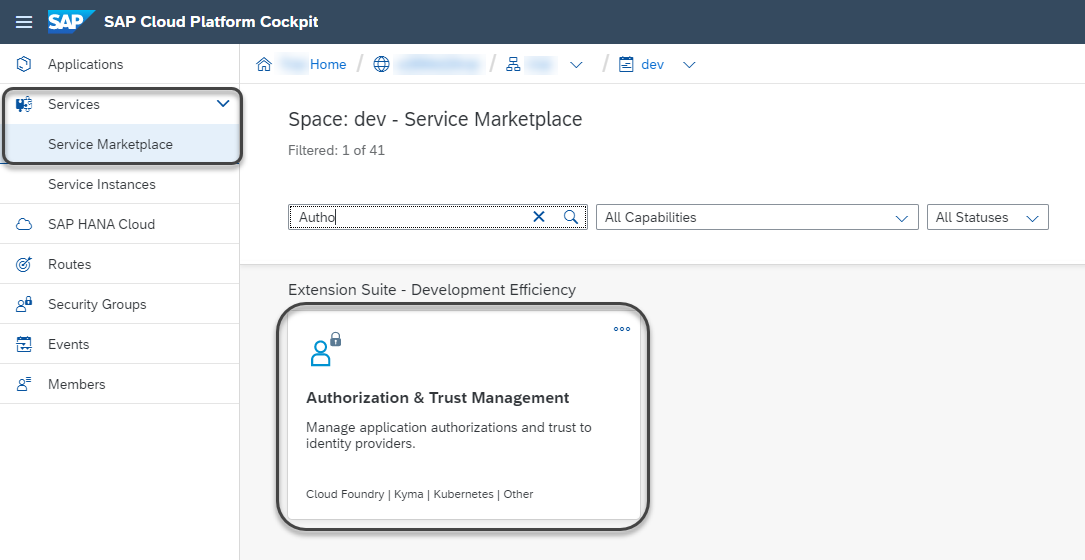
Select the Services module and click Service Marketplace. Search for Authorization & Trust Management.
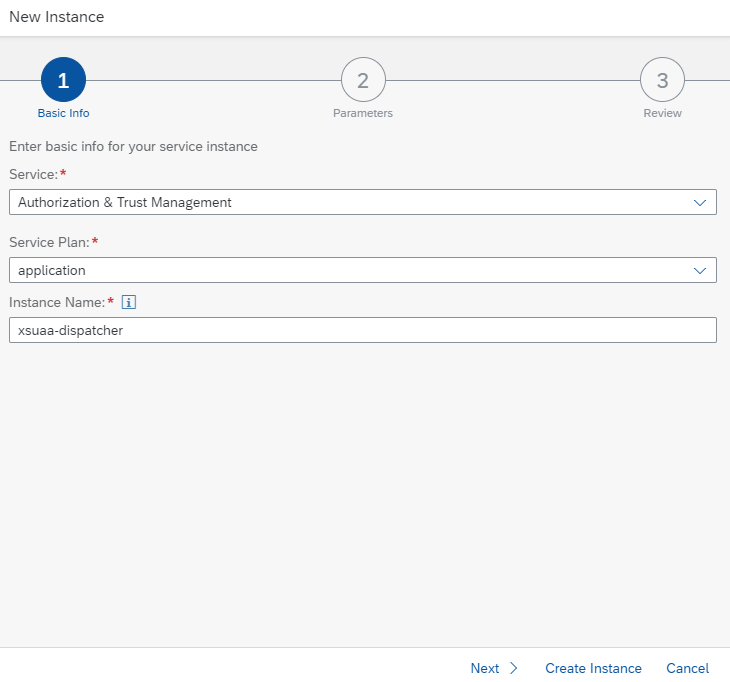
Create a new instance by clicking the Create Instance button.
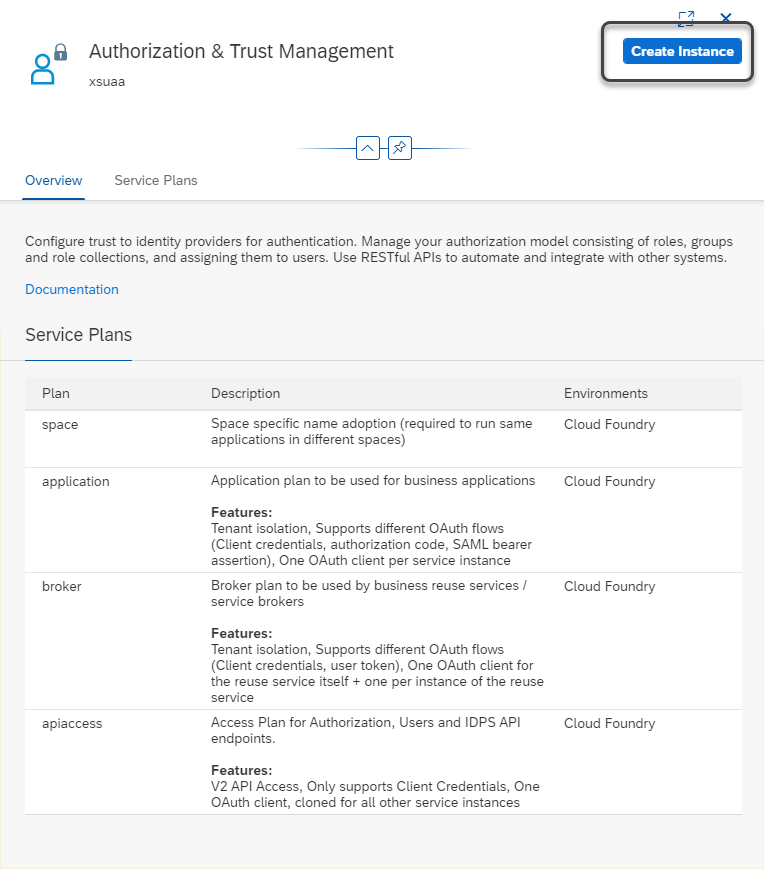
Select the application Service Plan and register the instance name as xsuaa-dispatcher. Then, click Next.
Note:
If you change the name, review the Buildpack manifest.
In step number two, enter a JSON with the following configuration:
{
   "xsappname": "sapapp",
   "tenant-mode": "dedicated",
   "oauth2-configuration": {
       "redirect-uris": [
           "https://build.bizagi.com/redirectOauth2.html"
       ]
   }
}
The configuration should look like this:
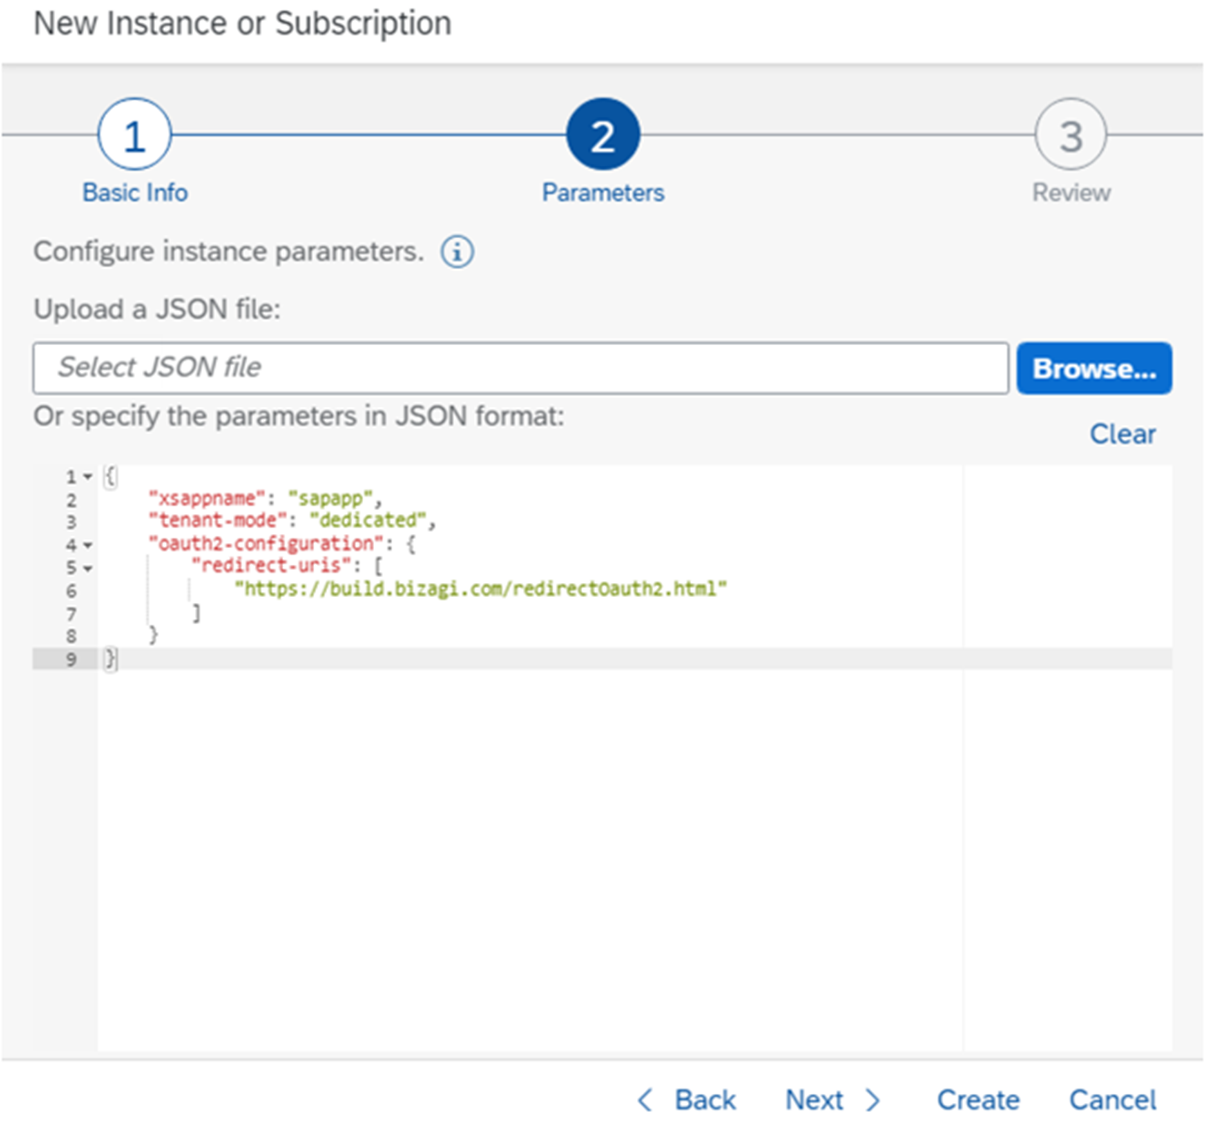
The redirect URI corresponds to the Bizagi callback URL to receive the authentication data with the OAuth 2.0 protocol.
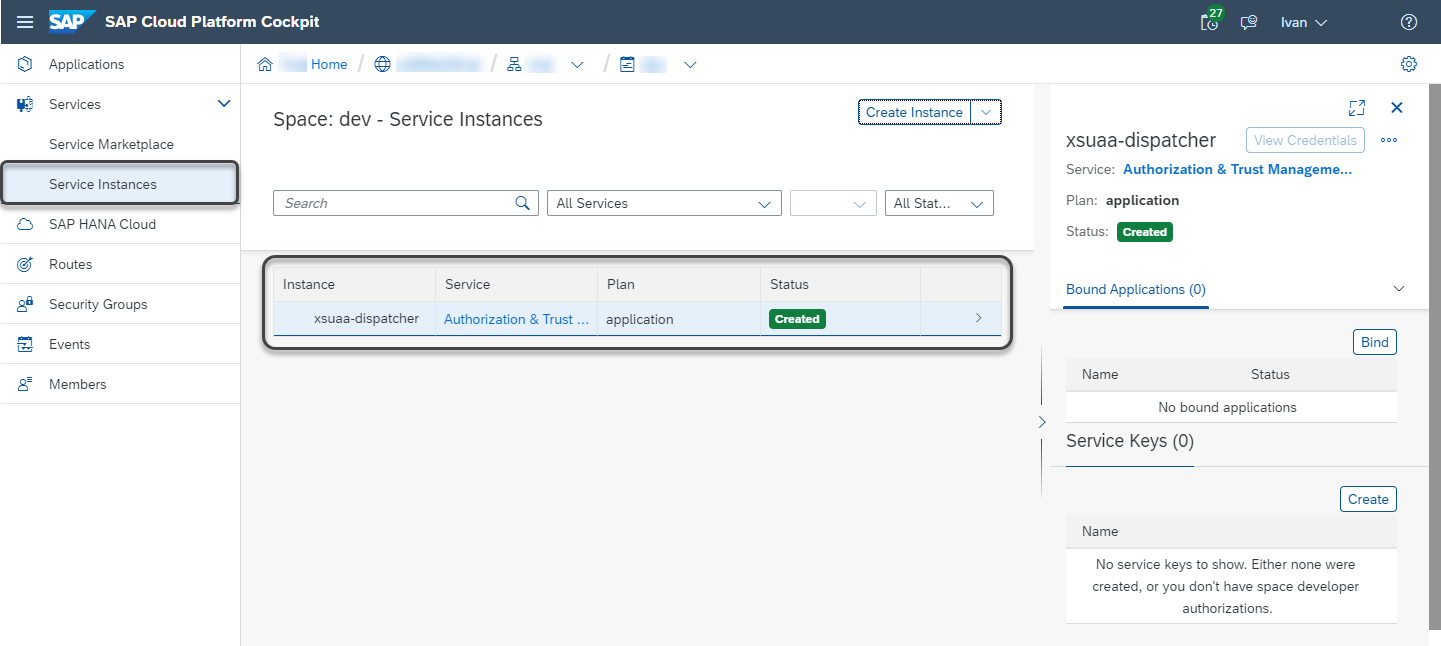
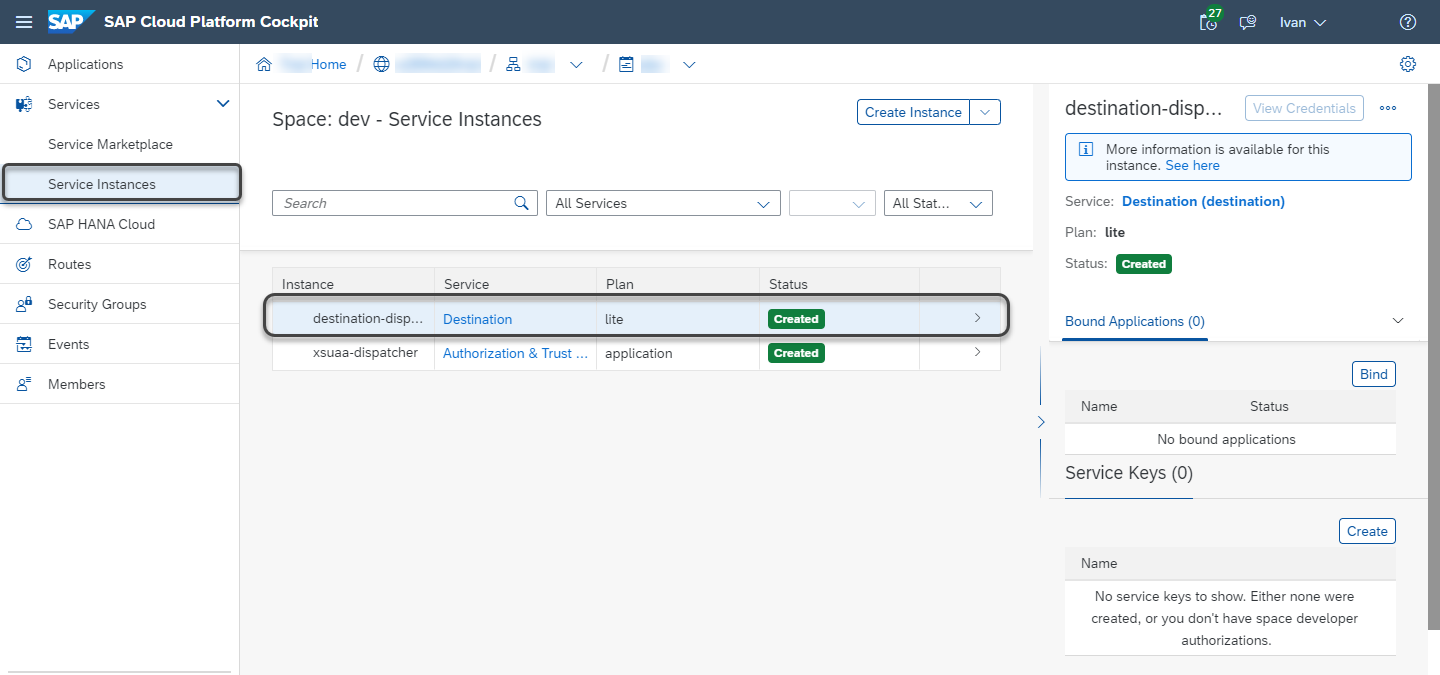
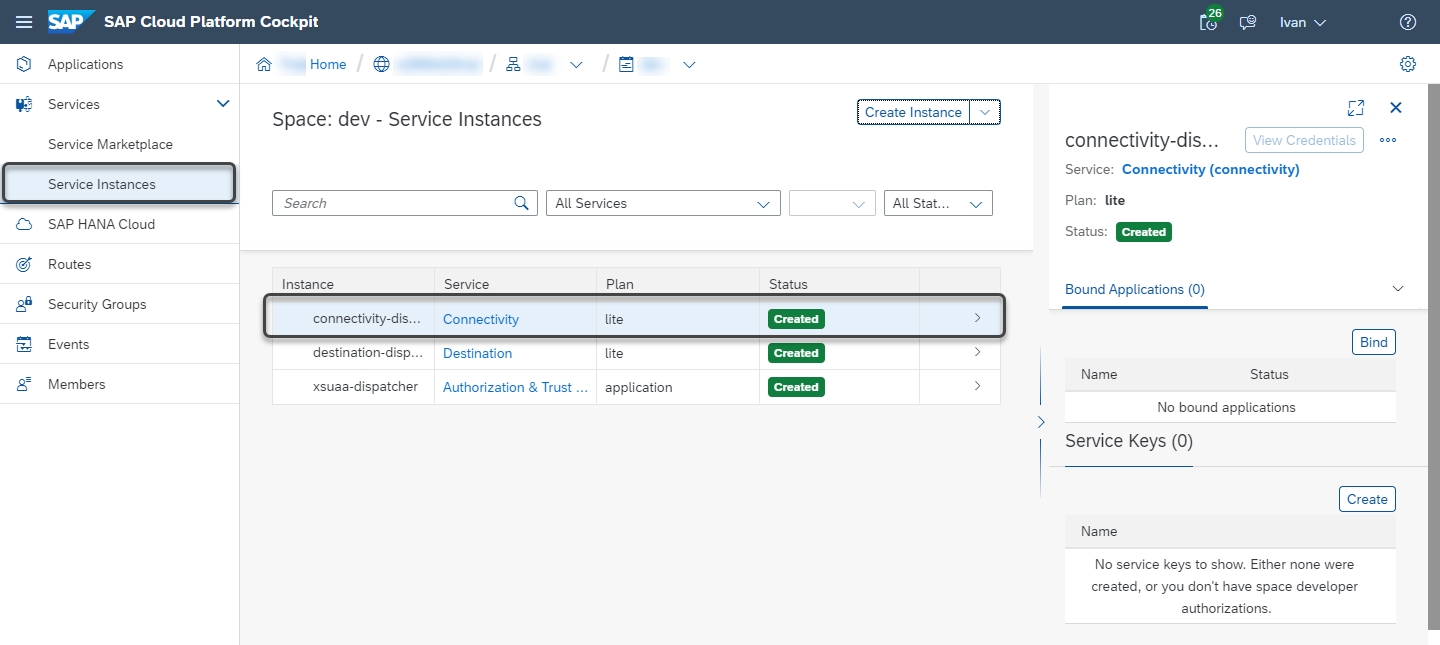
In the third step, review all the information and click the Create Instance button. After the instance is created, you can review it in the Service Instances module.
- Set the Destination service
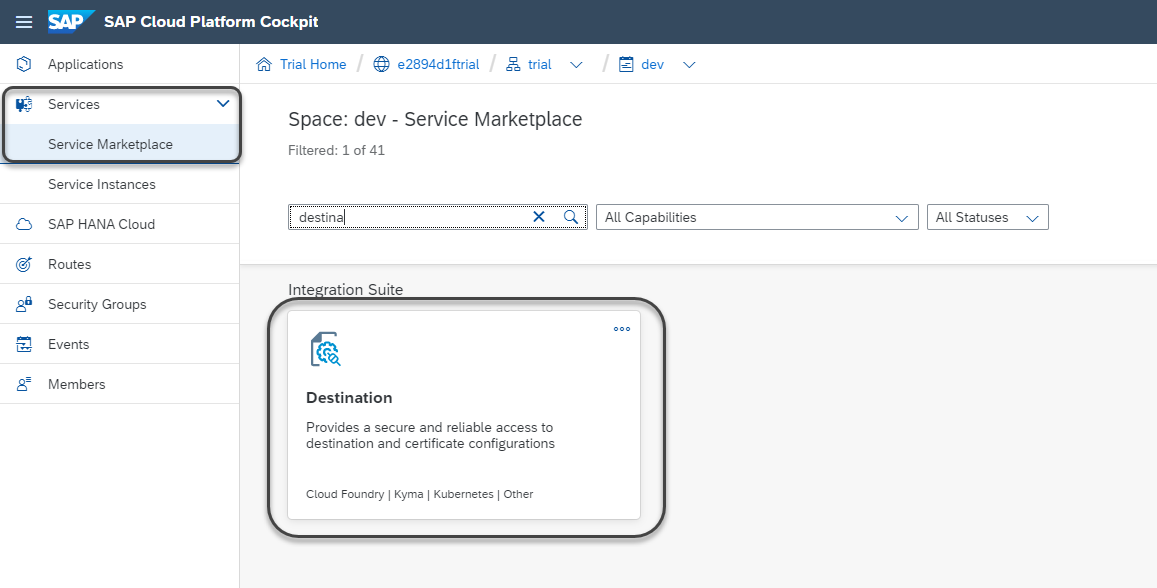
In the same Cloud Foundry, open the Service Marketplace again. Now search the Destination service.
Create a new instance.
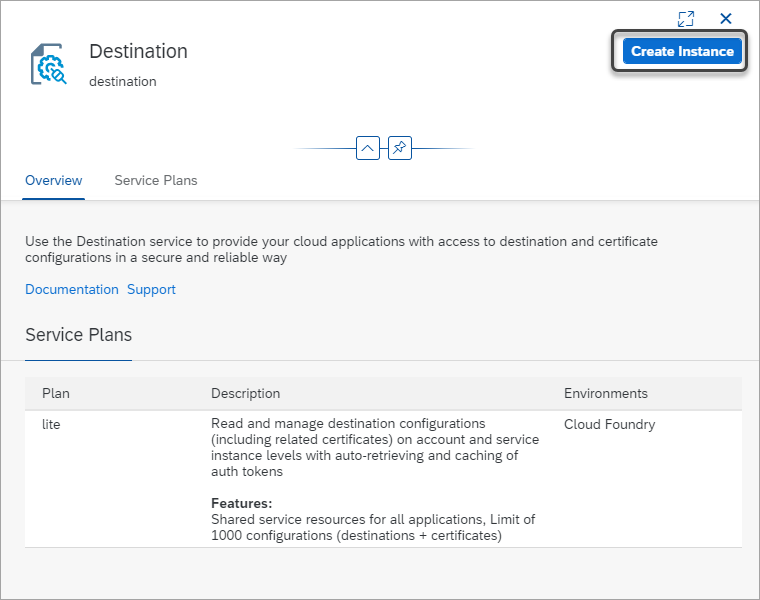
Select the lite Service Plan and register the Instance Name as destination-dispatcher.
Note:
If you change the name, review the Buildpack manifest.

In step number two, do not upload any JSON. Leave it empty and click Next. In step three, review all the information and click the Create Instance button. After the instance is created, you can review it in the Service Instances module.
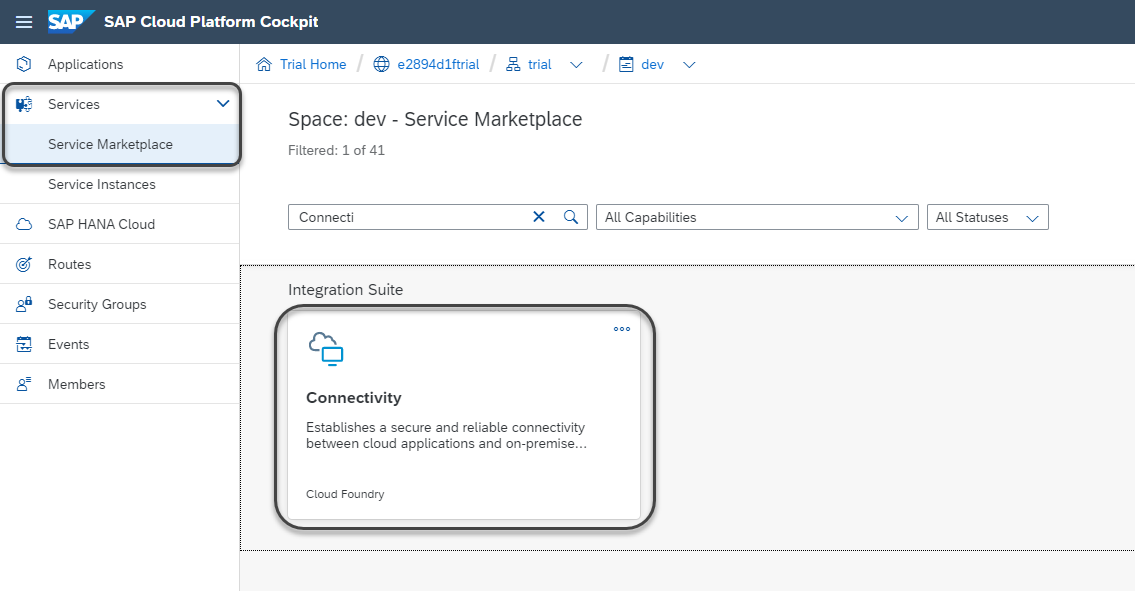
- Set the Connectivity service
In the same Cloud Foundry, open the Service Marketplace again. Now search the Connectivity service.
Create a new instance.
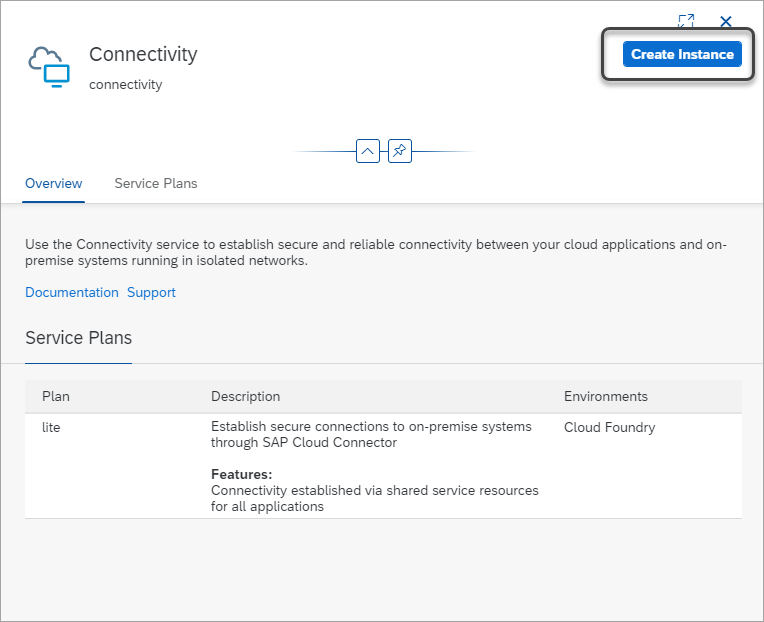
Select the lite Service Plan and register the Instance Name as connectivity-dispatcher.
Note:
If you change the name, review the Buildpack manifest.
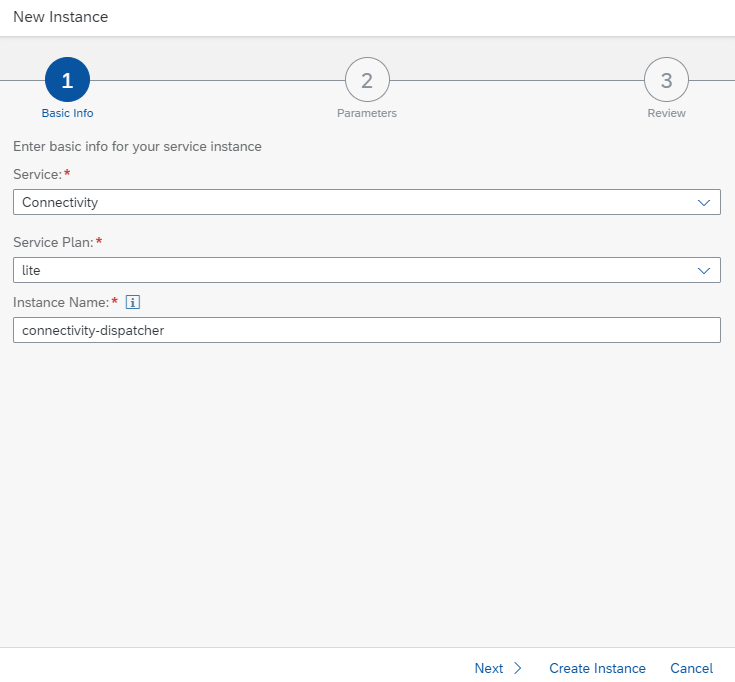
In step number two, do not upload any JSON. Leave it empty and click Next. In step three, review all the information and click the Create Instance button. After the instance is created, you can review it in the Service Instances module.
- Install the Router and Buildpack
The Buildpack contains a node JavaScript module that integrates all the services previously configured. This Buildpack is developed by Bizagi and must be installed in your SAP Cloud Platform. Before installing the pack, you must have:
- Downloaded and unzipped the Bizagi dispatcher file.
Note:
To guarantee you download the latest Bizagi dispatcher file version, make sure to clean the browser cache.
- Installed the Cloud Foundry Command Line Interface (CLI). To learn more about the installation process, refer to the How to install the CLI article.
- Obtained the Cloud Foundry URL.
- Reviewed the Buildpack manifest, making sure that the names of the services are the same installed in the SAP Cloud Foundry.
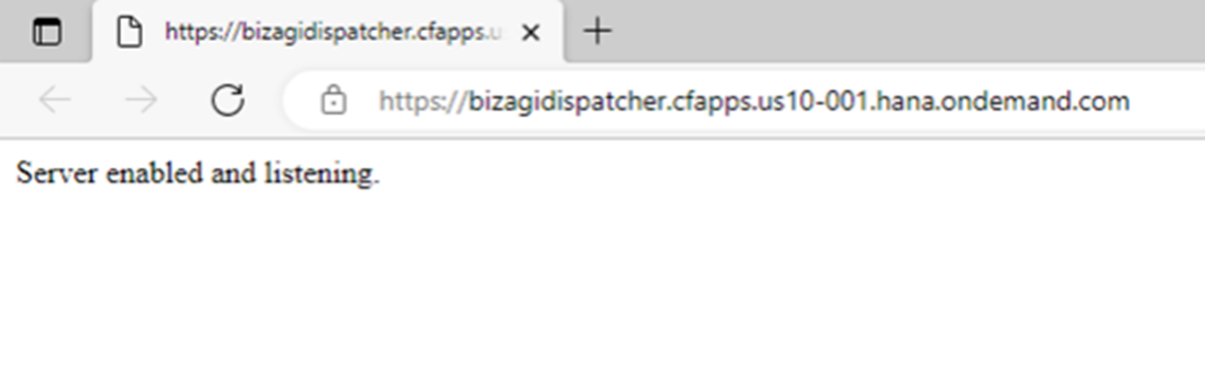
When testing the dispatcher status you should see the following:
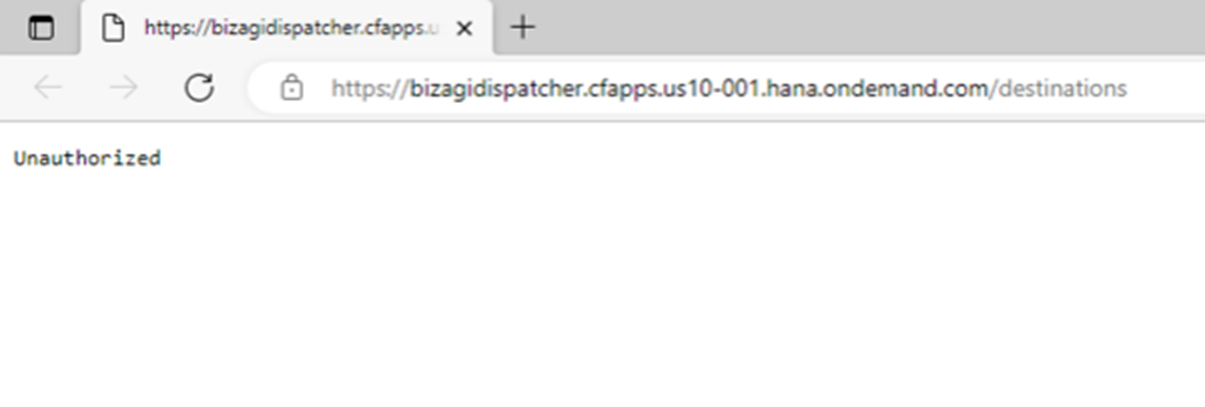
If you try to access the dispatcher's endpoints without authentication, the following error is displayed:
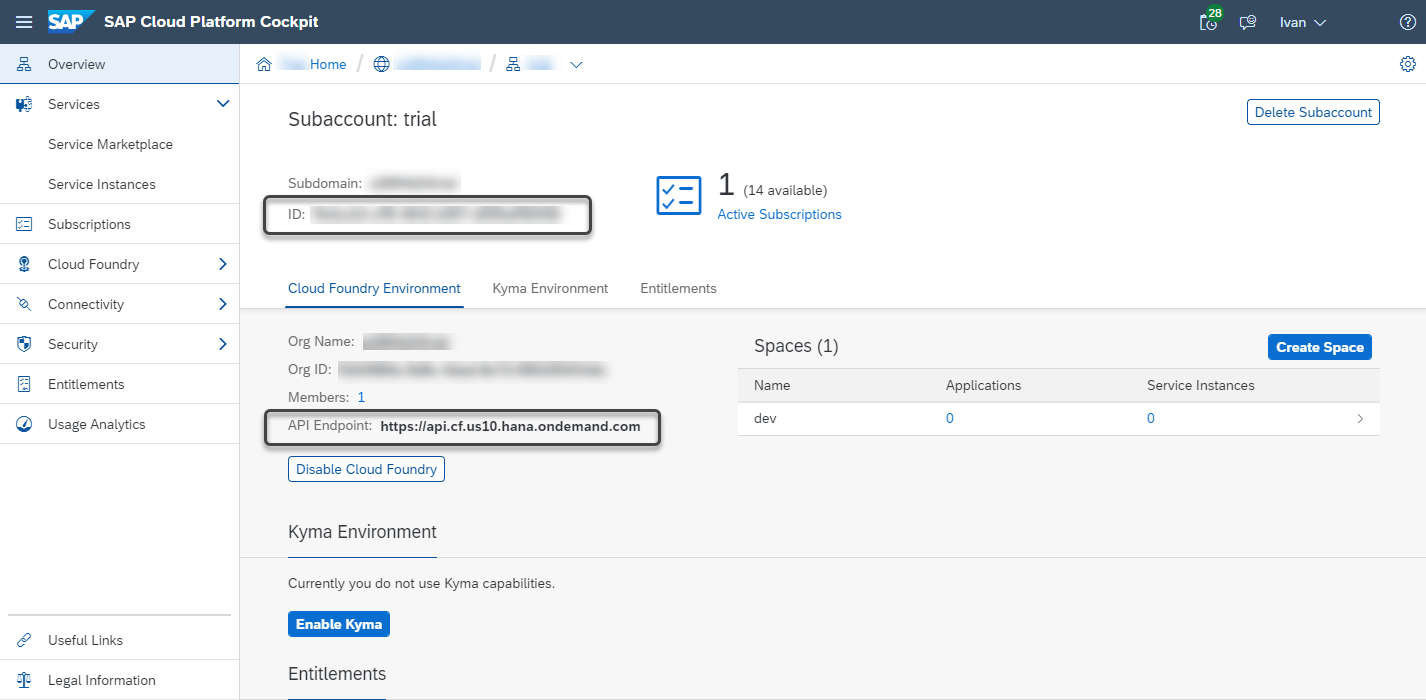
Get the Cloud Foundry URL
To execute the Command Line Interface (CLI), you need to obtain the Cloud Foundry URL where you are going to install the Buildpack. Access the SAP Cloud Platform cockpit and select your Subaccount.

Get the API endpoint.

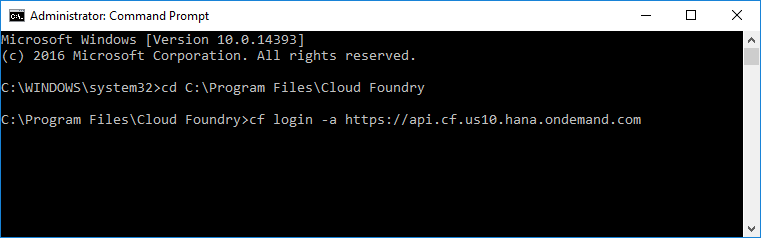
Open the Cloud Foundry CLI and login using the following command:
cf login -a <URL>
Where <URL> is the API endpoint previously obtained.
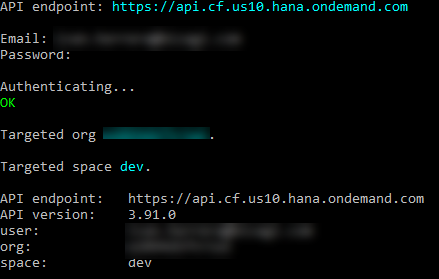
You are asked to register the email and password of a user with admin permissions to the Cloud Foundry. Once authenticated, the command looks as follows:
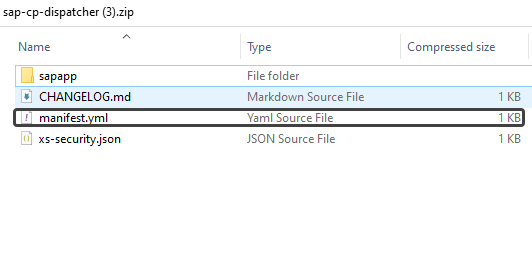
Review the Buildpack manifest
In the folder where you unzip the Bizagi Buildpack, you can find the manifest. This manifest is a YAML file that contains the name of the SAP Cloud Foundry services that are used in the Cloud integration.
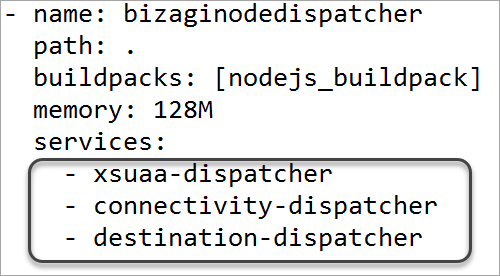
Review that the names of the services match the names registered in the manifest:
Install the Bizagi Buildpack in your SAP Cloud Platform
In the same command prompt, change the directory to the folder where you unzipped the Bizagi dispatcher file. Execute the following command:
cf push

Finally, you must see that all instances have started and the Buildpack is installed correctly.
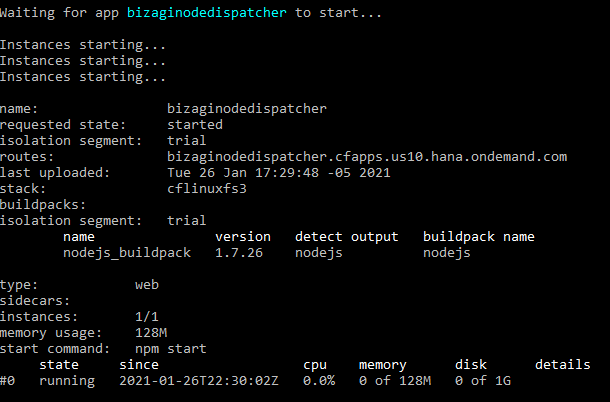
Access the Cloud Foundry. In the Spaces section, you must see an application running.
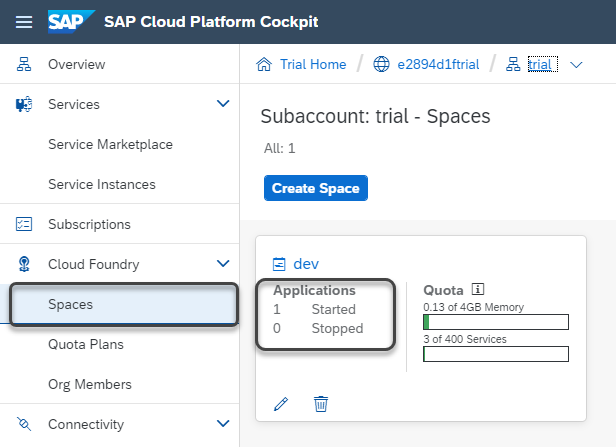
If you click the Space, you can see the application installed.

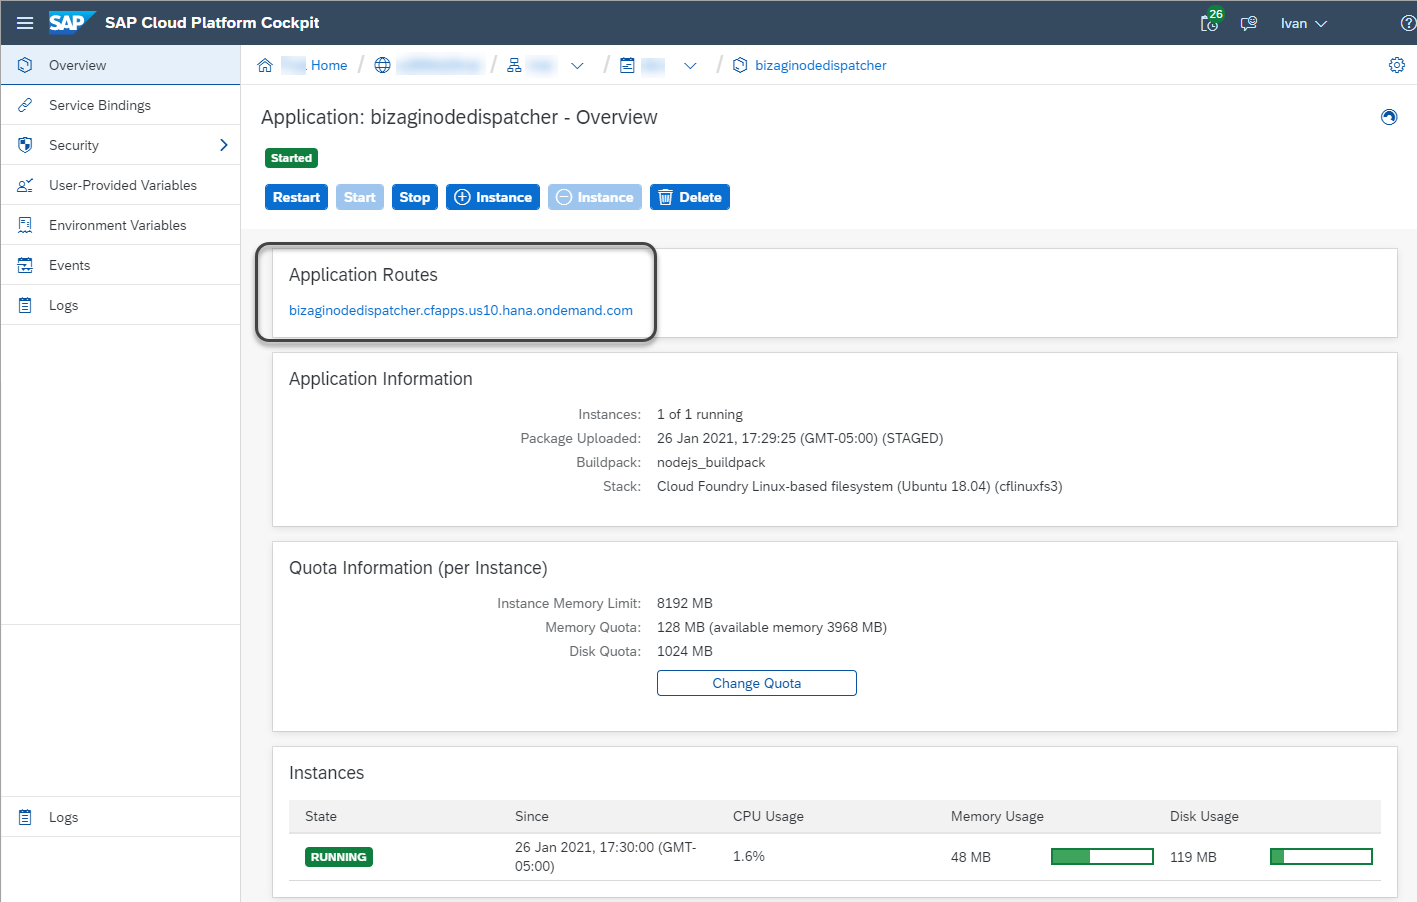
By clicking the application, you can see the details of the Bizagi application installed in the Cloud Foundry. It is important to save the Application Route.
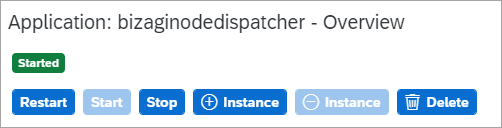
Finally, you must click the Start button and make sure the application has started.
Next steps
- Configure the SAP Cloud Platform connector in Bizagi
- Set the Bizagi process where you want to execute the SAP action
Security
The users enabled to authenticate are those configured for the Subaccount in the Users section within Security:
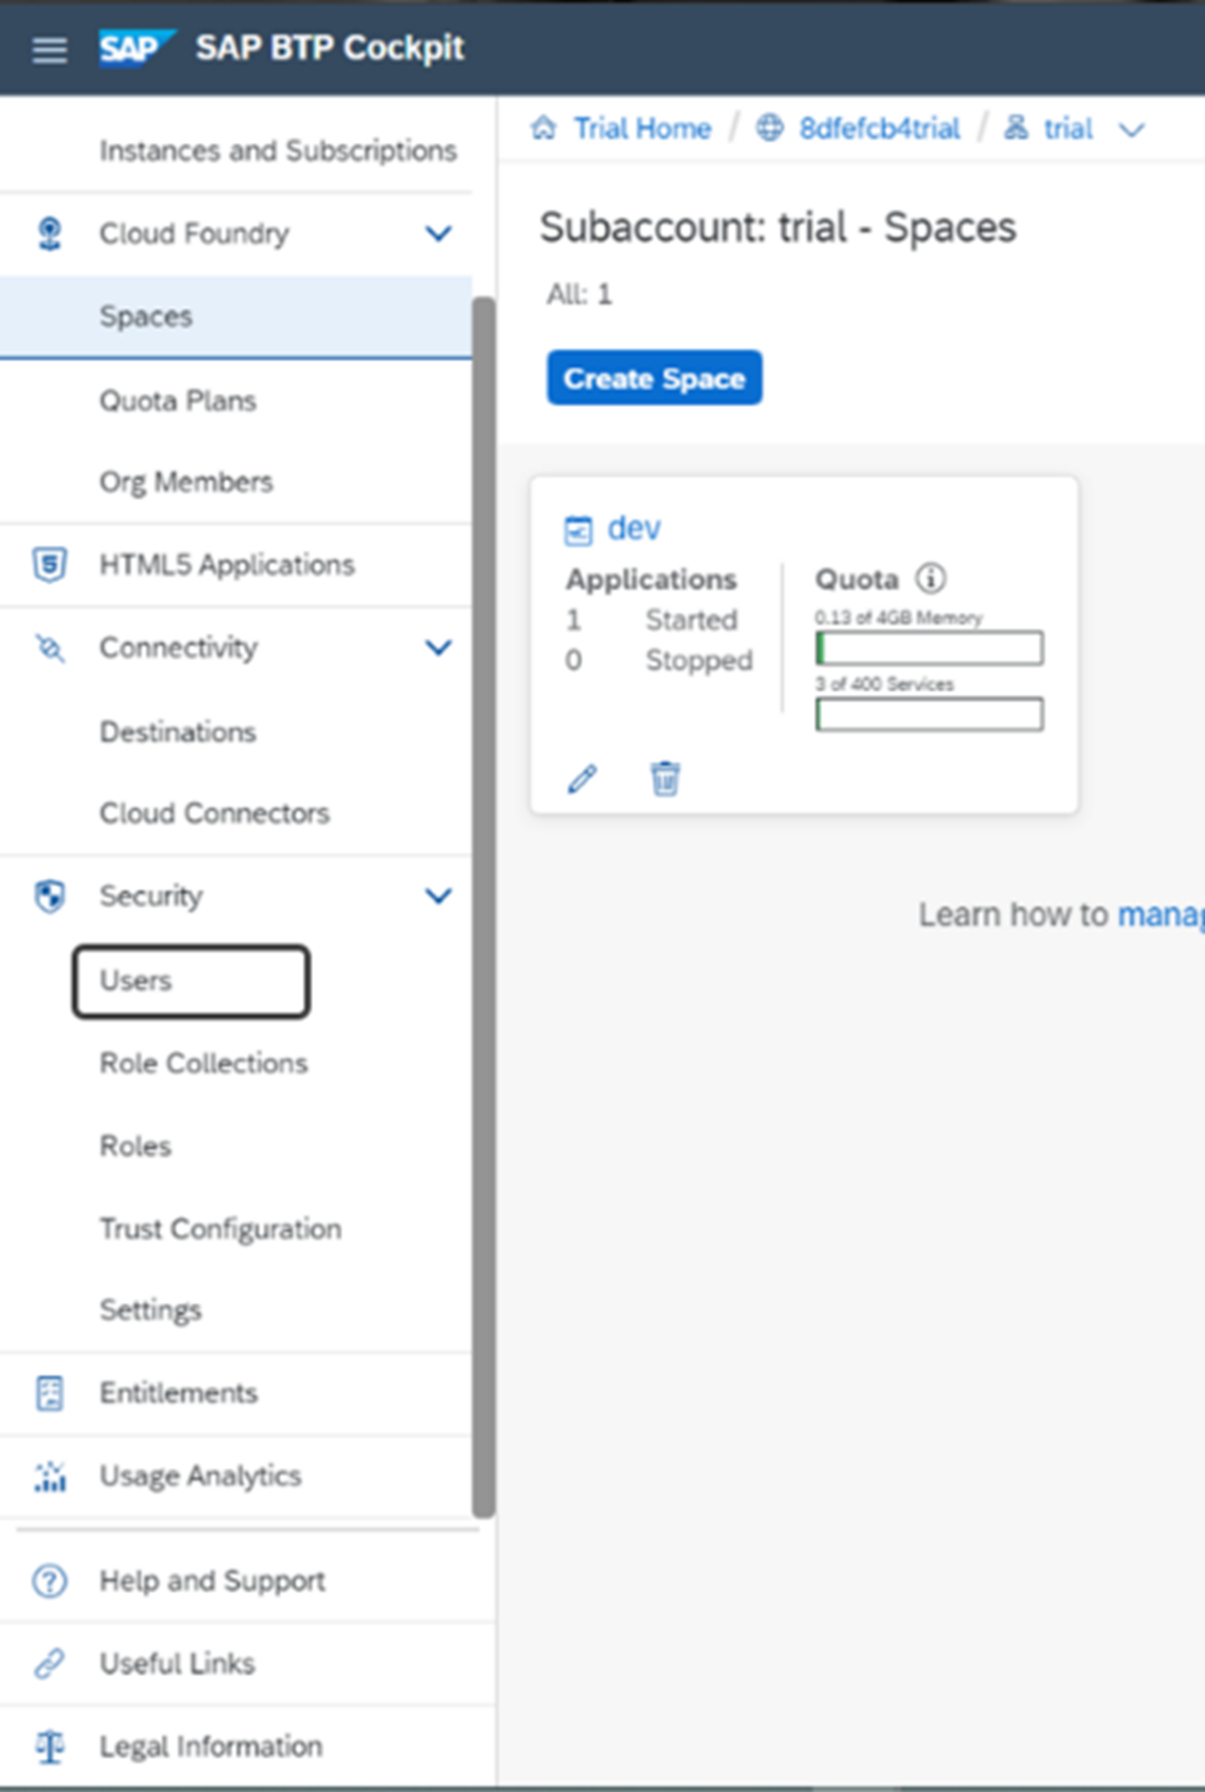
The users list should look like this:
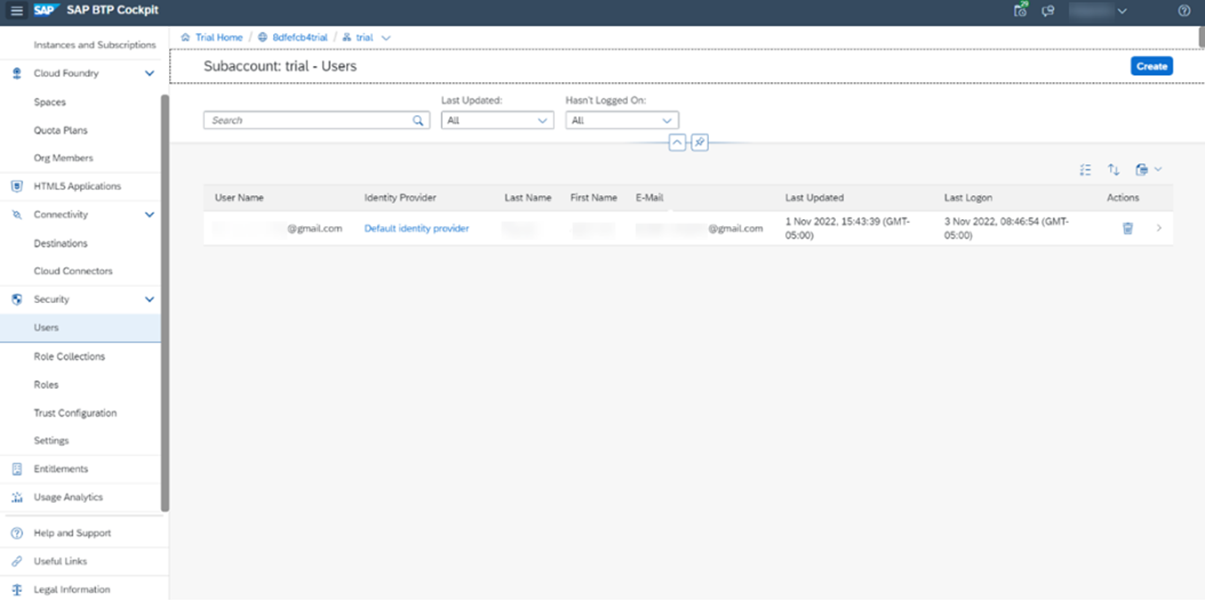
For the users to be able to authenticate with OAuth 2.0 from Bizagi, they must be included in SAP with an SAP Universal ID. If you have not registered, you can obtain the ID in the Create SAP user accounts link or register with SAP Universal ID.
Troubleshooting
In the dispatcher's installation procedure, you must use the Cloud Foundry CLI. If you get an error like the following when performing the cf push to provision the dispatcher in the Cloud Foundry Space:
Applying manifest file [Ruta local dispatcher]\manifest.yml... For application 'bizaginodedispatcher': Routes cannot be mapped to destinations in different spaces
You must modify the name property inside the manifest.yml file.