Using the IIS as an SMTP Server
Prerequisites
To use and set the SMTP Server service from the IIS, make sure you have the required features and role services installed.
SMTP service is available only for Windows server operating systems (such as Windows Server 2012 and 2008).
Installation of the SMTP Server feature is done through the Server management options:
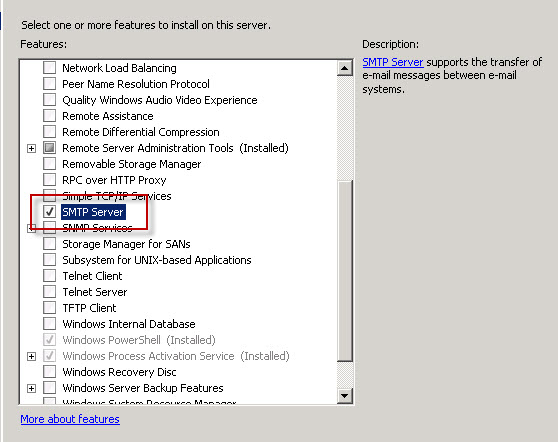
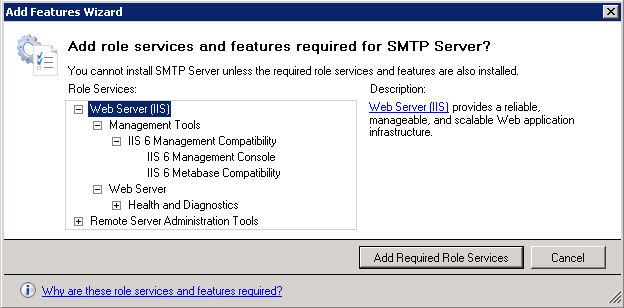
This requires additional server roles from the IIS Web server (such as the IIS 6 Management console and Remote Server Admin Tools):
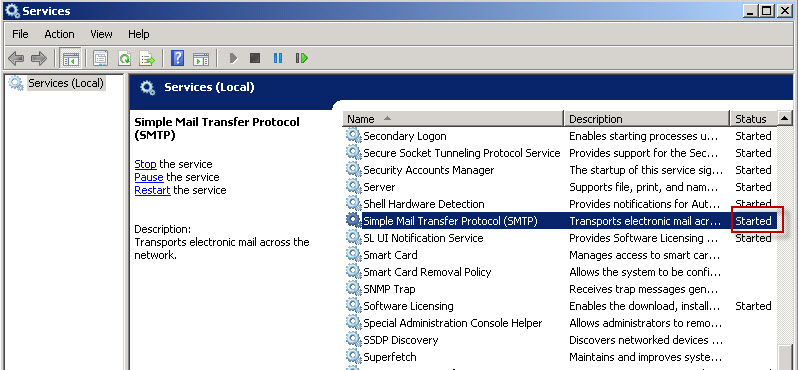
Once this feature is installed, make sure that the SMTP service is running, and set to start in automatic mode:
What You Need to Do
Once you have the SMTP service installed, carry out the following steps to setup an SMTP server:
- Create a domain for the SMTP server
- Configure the SMTP server in the IIS
- Configure email server parameters in Bizagi
Procedure
Follow the steps described below.
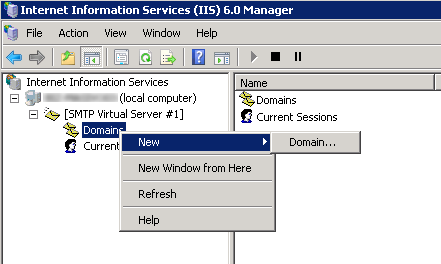
1. Create a domain for the SMTP server
1.1 Create a new domain
To follow best practices, create an SMTP domain to handle notifications from your Bizagi processes.
To start, right-click Domains and select New->Domain.
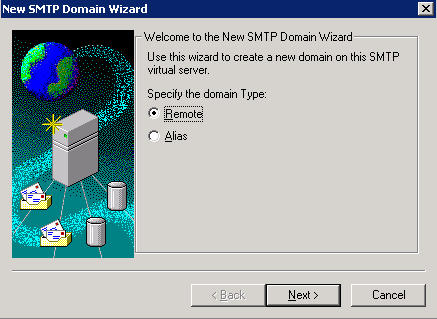
1.2 Specify that it is a remote domain
Choose Remote as the domain type and click Next.
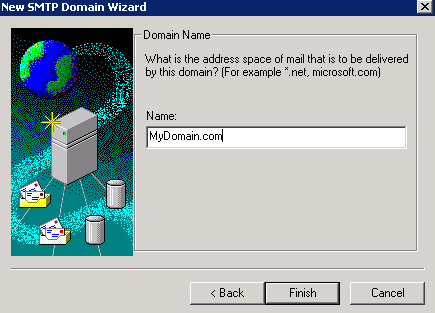
1.3 Name the domain accordingly
Name this domain to match the domain of your sent notifications, and click Finish.
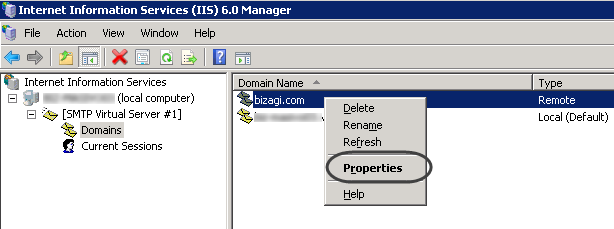
1.4 Set further options for the domain
Right-click the newly created domain and select Properties.
This SMTP server should be the one authorized to send email notifications (make sure that Allow incoming mail to be relayed to this domain is enabled).
It needs to support relay.
In the Route Domain box of the properties window, select Use DNS to route to this domain.

Configure outbound security as needed, according to the credentials you need to provide to your corporate SMTP server.

Click OK.
For more information about SMTP domains, refer to Microsoft's official documentation at http://www.microsoft.com/technet/prodtechnol/WindowsServer2003/Library/IIS/e2156172-7118-4ff2-9a6a-1b7dd52580fa.mspx?mfr=true.
2. Configure the SMTP server in the IIS
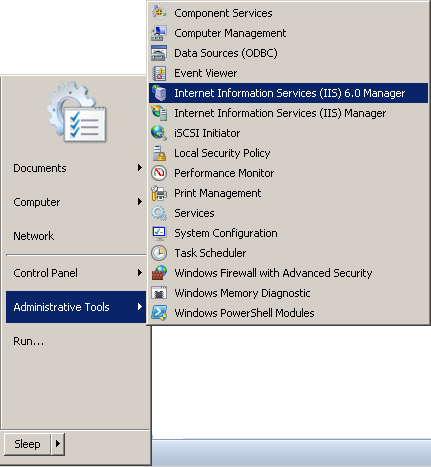
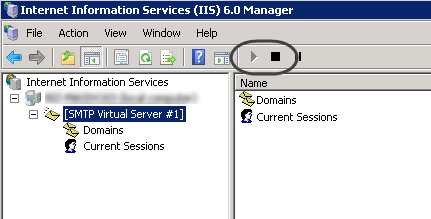
2.1. Launch IIS Manager 6.0
Configure the SMTP service through the IIS 6 Management Console (even when you have a newer version of IIS).
You can use the Start -> Administrative Tools -> Internet Information Services 6.0 option to launch it, or use the Server management options.
2.2. Configure the SMTP server properties
We strongly recommend that you adjust the settings to comply with best security practices.
To verify the settings, right-click and select properties:
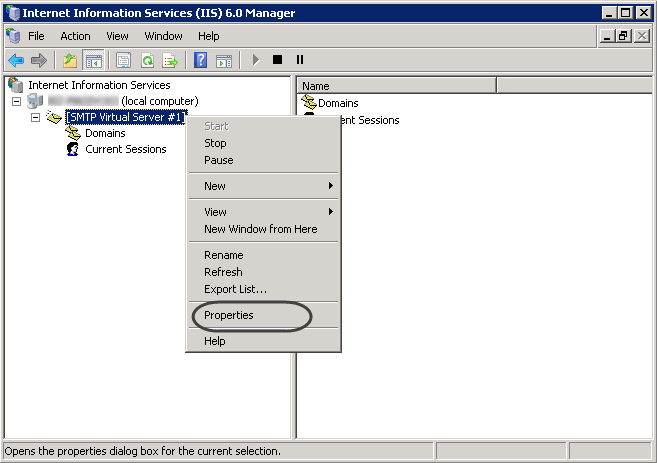
Review the following configuration:
-
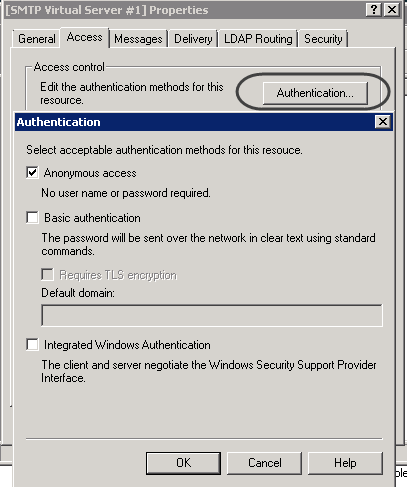
Authentication should be anonymous access:
-
Connection should be allowed only from the Bizagi server (in this case it is local, and is referred to as localhost):

-
Relay should be allowed only from the Bizagi server (localhost):

-
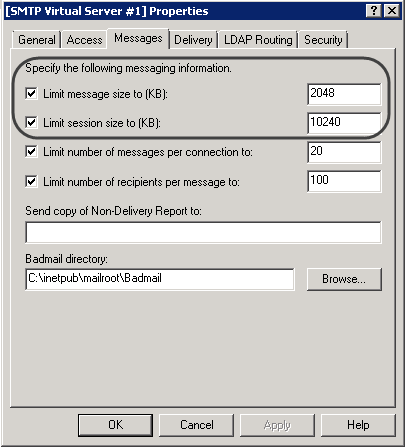
For the Messages options, tune the parameters to configure: allowed limit message size (according to your permitted and expected increment in file size put by email attachments), allowed limit session size (similar to the previous parameter, but for grouping more than one email in the same activity or Bizagi transaction), limit number of messages per connection to (similar to the previous parameter, but limiting the number of messages when grouping more than one email instead of using file size as criteria), and limit number of recipients per message to (sets the maximum number of recipients in a same email).
Review whether your processes in Bizagi send email notifications which may exceed the default settings.
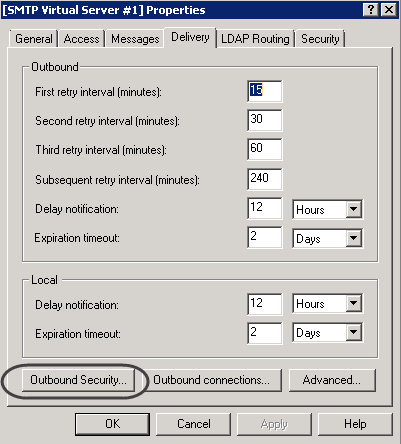
For Delivery options,
-
Under the delivery settings, specify the outbound security options with anonymous access and TLS encryption:

-
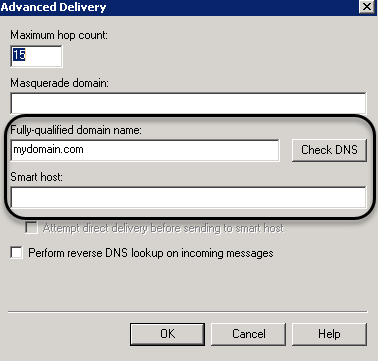
Use the Advanced options to specify the domain created in your SMTP server. Leave the Smart host empty.
Finally, make sure that the service is still in a started mode after you have completed your changes:
3. Configure the Email server parameters in Bizagi
Once the SMTP is setup, configure the environment parameters for your Bizagi project.
In the production or testing environments you may do this through the Bizagi Management Console as provided by Automation Server. Reference the local server (localhost) as the SMTP server.
For this part, provide information for the Email configuration section.
Check the Enable Email check box and specify a sender account that uses the expected domain:

Click OK to save changes and make sure you perform an IISReset on your IIS.