User Configured Notifications
Overview
User-configured notifications are messages sent by email to any valid email address. These notifications apply to a particular Process and Activity and can include any business information from the case. The content and sending requirements are defined during Process development.
User-configured messages are created in the Activity Actions menu during the fourth step of the Process Wizard and are called E-Mails. They can be sent when an Activity is created, saved, or exited (On Enter, On Save, or On Exit actions).
How to Create an Email
-
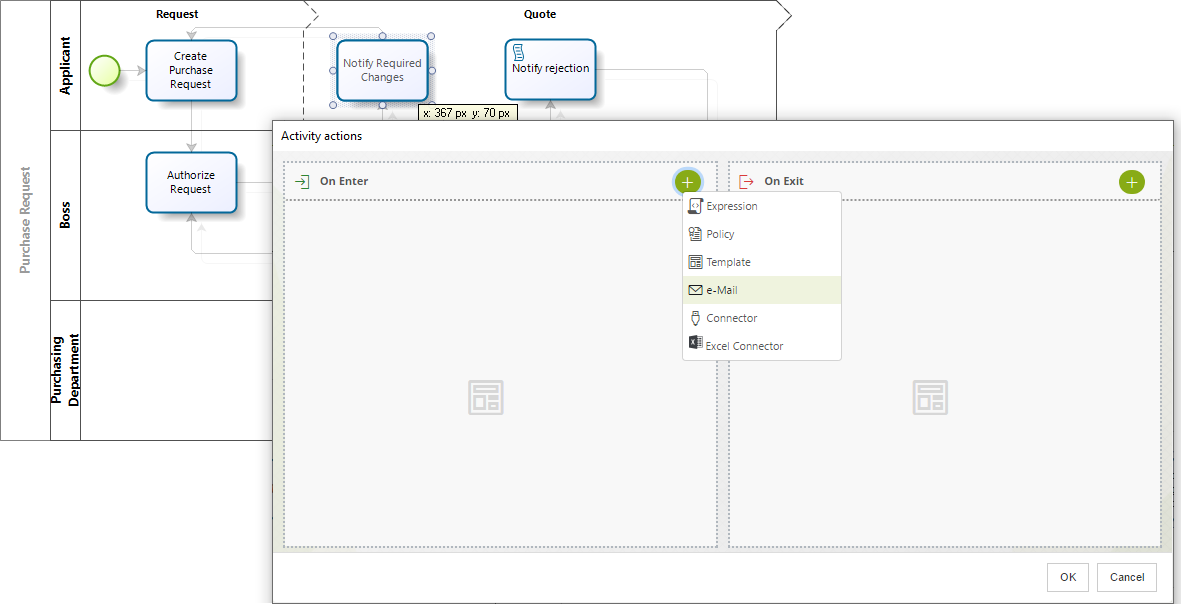
Open the Process Wizard: On the fourth step of the Process Wizard, select Activity Actions. A new window displays the Process diagram.
-
Select an Activity:
- Click the Activity in the Process where the email will be configured.
- In the Activity Actions Window, click the Plus symbol in the bottom left corner and select the email option.
-
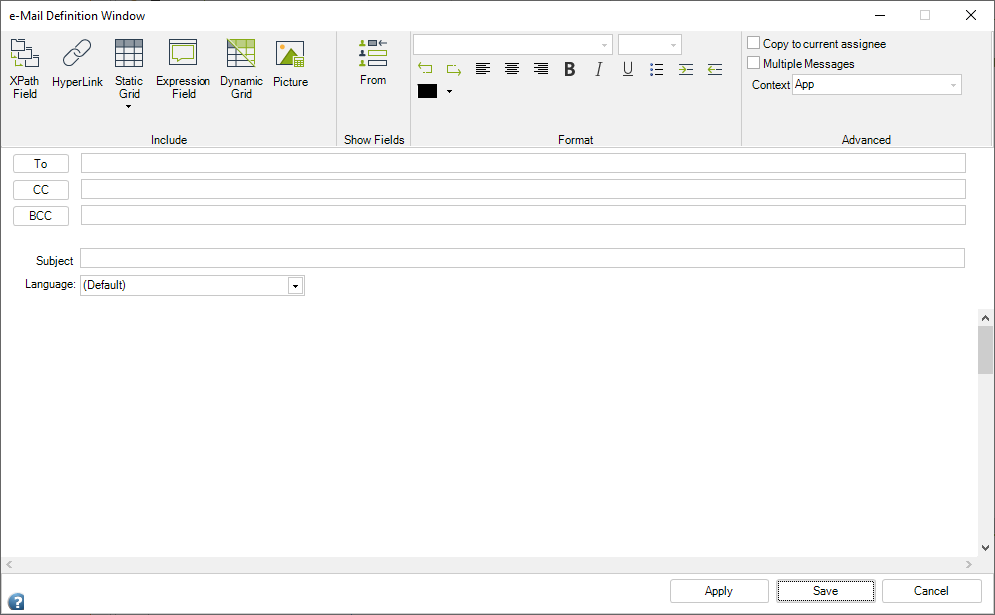
Email Configuration Window: A window appears to define the required information.
-
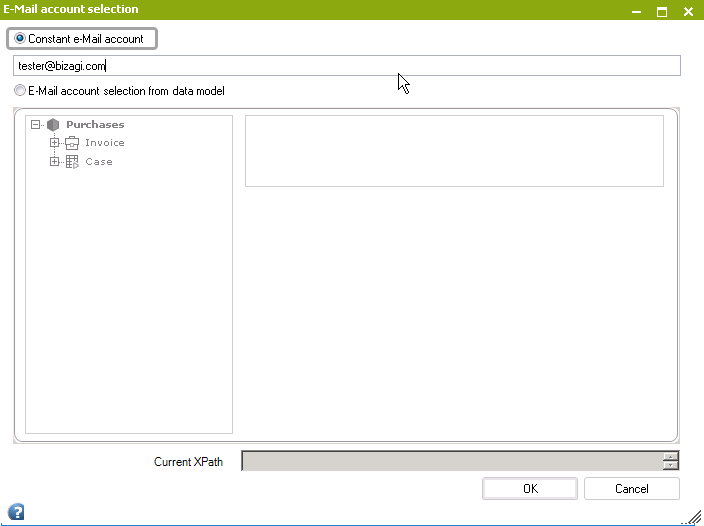
Addressees:
- Click To to specify recipients.
- You can send the email to:
- A constant account (enter each address separated by a semicolon).
- An account from the data model (select the relevant attribute).
-
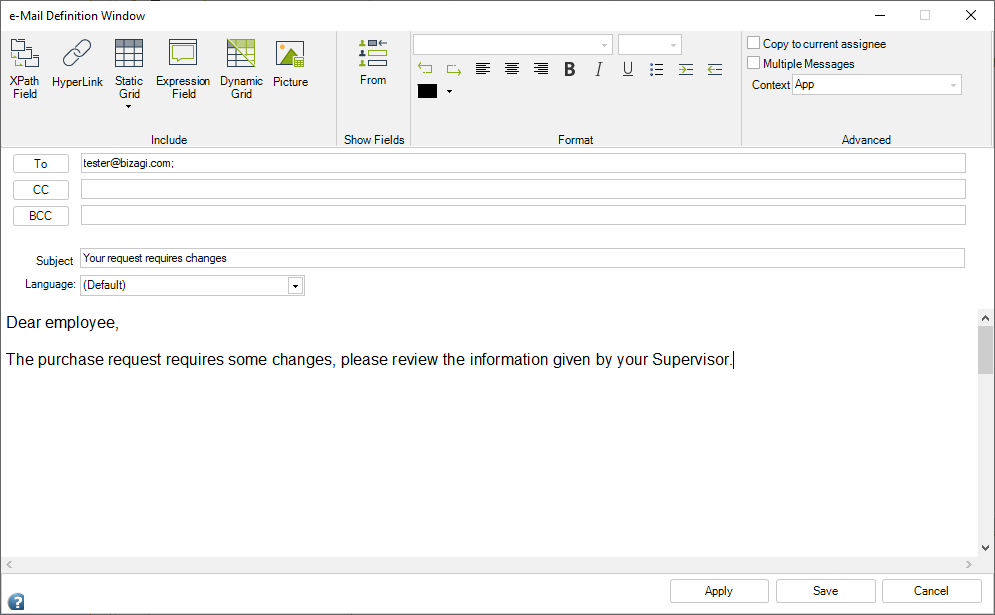
Compose the Message:
- Define the subject and body of the email.
- Click Save when done.
User Interface Explained
Ribbon
The Ribbon includes the following options for designing emails:
| GROUP | MENU OPTION | DESCRIPTION |
|---|---|---|
| Include | XPath Field | Navigate the data model to include attributes. Refer to Include Process and Case Information. |
| HyperLink | Add hyperlinks to the email. Refer to Include Hyperlinks. | |
| Static Grid | Add tables with a fixed number of columns and rows. Refer to Include Tables or Collections. | |
| Expression Field | Include information returned by a rule. Refer to Include Information Returned by a Rule. | |
| Dynamic Grid | Include tables displaying information stored in collections. Refer to Include Tables or Collections. | |
| Picture | Add an image to the email. | |
| Show Fields | From | Set the sender's email. Use with caution to avoid security issues or emails being flagged as spam. Testing is recommended. |
| Format | Various | Customize text (font, size, alignment, color, bold, italics, underlines, bullets, etc.). |
| Advanced | Copy to Current Assignees | Sends a copy to the current task assignee. |
| Multiple Messages | Create templates and send multiple messages based on conditions. | |
| Set Conditions | Define Boolean conditions to determine which email is sent. | |
| Context | Adjust the template context based on the recipient field. Refer to Context Changes in Emails. |
Message
| FIELD | DESCRIPTION |
|---|---|
| TO | Select the recipients. Options include constant accounts or attributes in the data model. |
| CC | Select the recipients to be copied. Options include constant accounts or attributes in the data model. |
| BCC | Select recipients for blind carbon copy. Options include constant accounts or attributes in the data model. |
| Subject | Define the email subject. |
| Language | Choose the language for text in localizable tags. |
| Message Body | Define the email body content. |
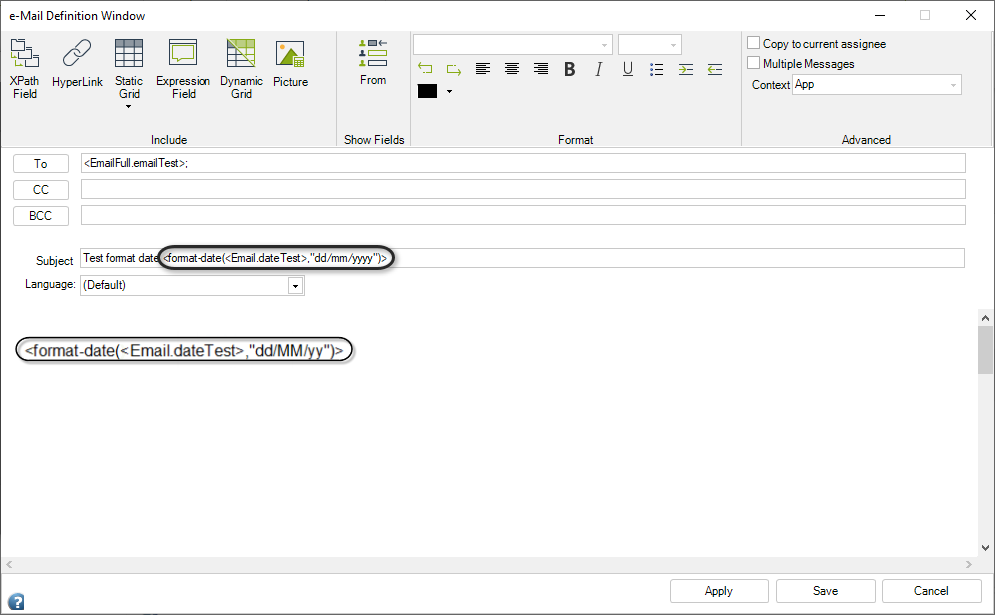
How to Include Formatted Dates
To format dates in notifications, include the function: <format-date(<XPath>,"format")> in the Subject or Message Body.
Supported Date Formats:
| Format | Example |
|---|---|
| dddd, MMMM dd, yyyy | Thursday, October 10, 1991 |
| M/yy | 10/91 |
| d/M/y | 10/10/91 |
| d-MMM | 10-Oct |
Supported Time Formats:
| Format | Example |
|---|---|
| HH:mm | 22:25 |
| hh:mm tt | 10:25 PM |
| hh:mm:ss tt | 10:25:00 PM |
Supported Date & Time Formats:
| Format | Example |
|---|---|
| dddd, MMMM dd, yyyy HH:mm | Thursday, October 10, 1991 22:25 |
| M/yy HH:mm | 10/91 22:25 |
| MM-dd-yy hh:mm:ss tt | 10-10-91 10:25:00 PM |
| d-MMM hh:mm tt | 10-Oct 10:25 PM |
Notes:
- Only the listed formats are supported.
- Dynamic grids do not support date formats.
- The XPath attribute must be of the Date-Time type.