Include Tables or Collections
Include Tables or Collections
Overview
There are two types of tables that can be included in emails: Static and Dynamic.
-
Static tables: These have a fixed number of columns and rows, defined at development time. The information is either fixed text or attributes from the data model without one-to-many relationships.
Example of a static table in the Work Portal:

Example of how the static table appears in the email:

-
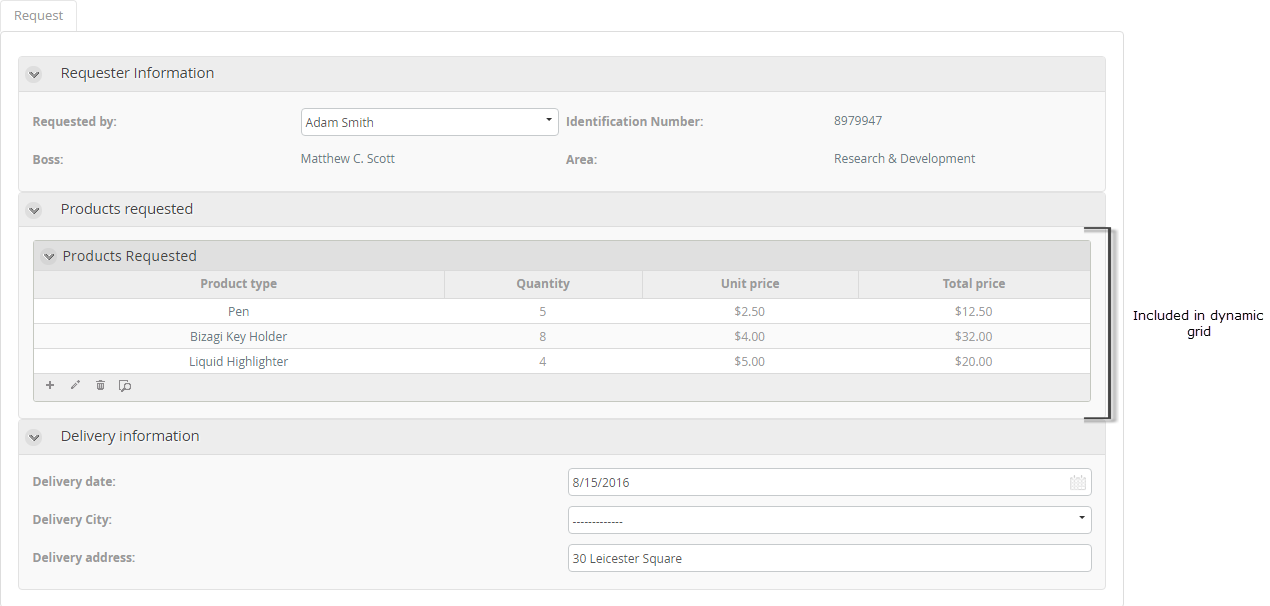
Dynamic tables: These display information stored in collections or one-to-many relationships, similar to how they appear as tables in the Work Portal.
Example of a collection in the Work Portal:
Example of how the dynamic table appears in the email:

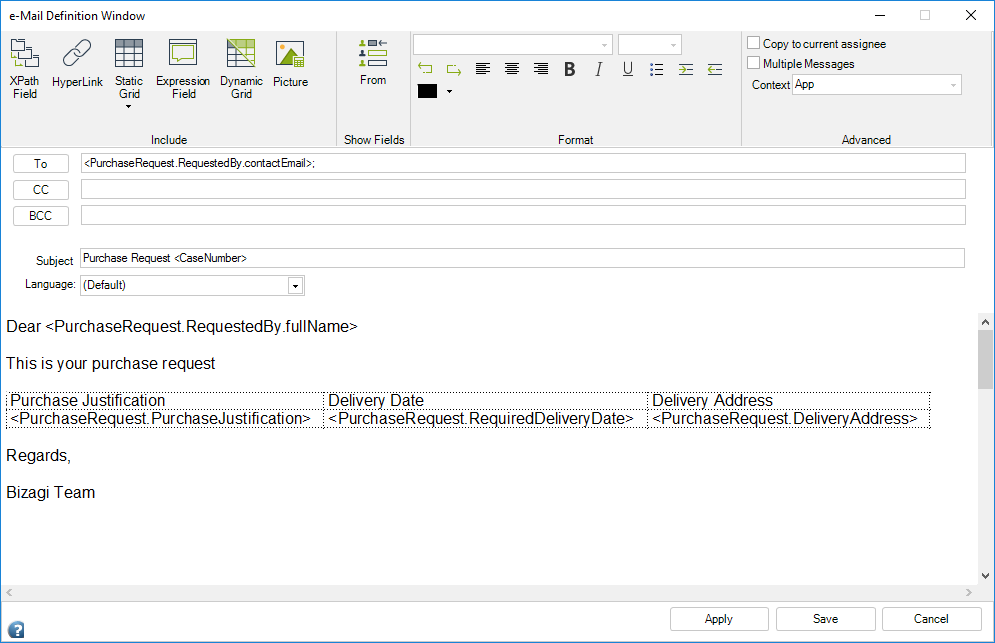
Example to Include a Static Table
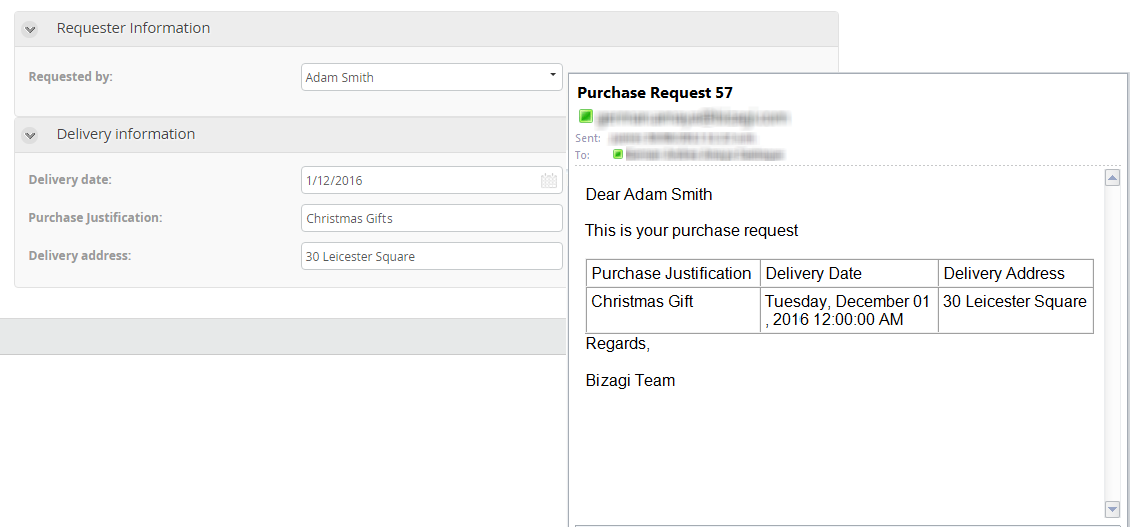
Suppose you want to send an email confirming the products and delivery details of a Purchase Request after it has been approved. You need to include attributes like Purchase Justification, Delivery Date, and Delivery Address in a table for a structured look.
Example of information in the Work Portal and how it appears in the email:
Steps:
-
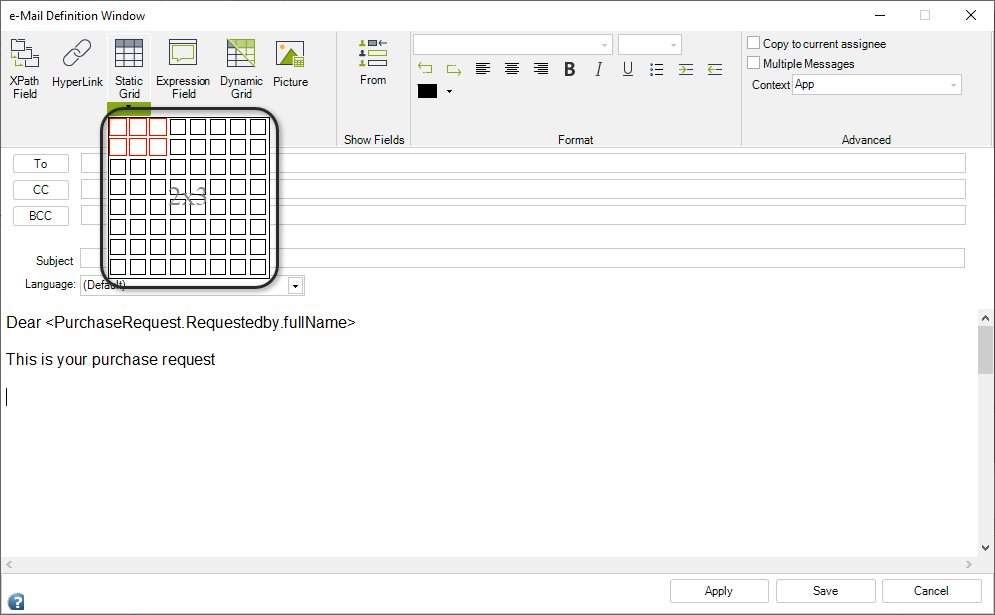
Insert a Static Table
- Click the Static Table button in the ribbon and select the number of rows and columns (e.g., three columns and two rows).
- Click the Static Table button in the ribbon and select the number of rows and columns (e.g., three columns and two rows).
-
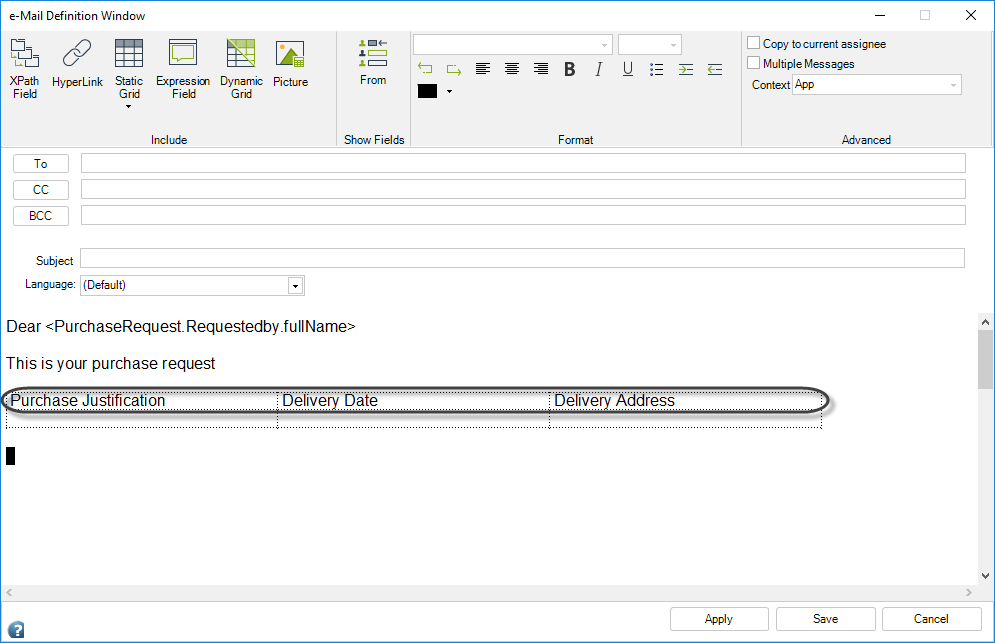
Create the Table Header
- Use the first row to define the column headers.
- Use the first row to define the column headers.
-
Include Data Model Information
- Place the cursor in a table field and insert data model attributes using angle brackets
< >or the XPath Field button.
- Place the cursor in a table field and insert data model attributes using angle brackets
-
Save the Email
- When the email configuration is complete, click Save.
- When the email configuration is complete, click Save.
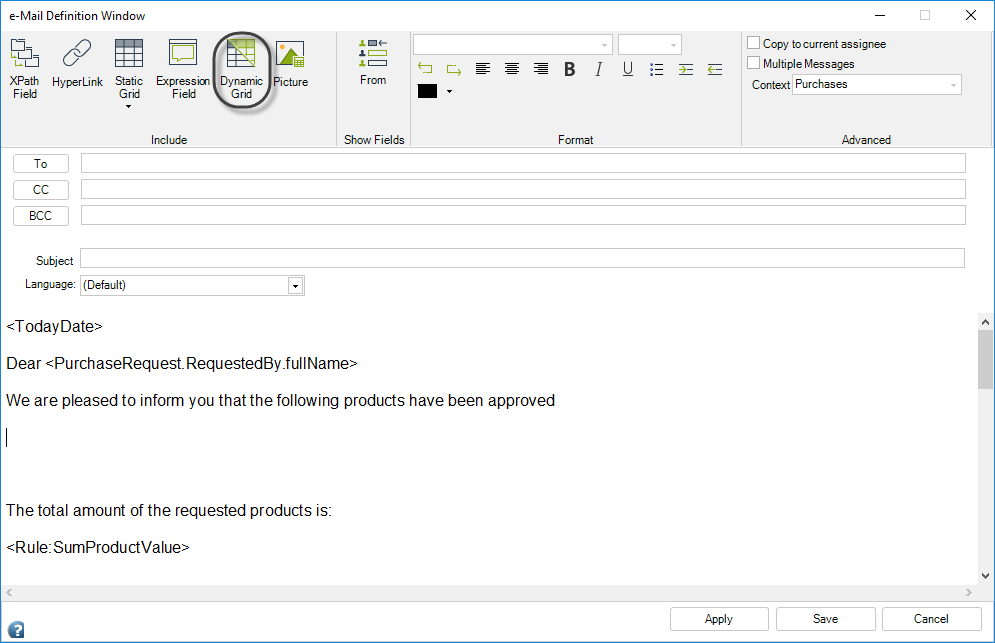
Example to Include a Dynamic Table
Suppose you need to send an email to a client after their Loan Request is approved. The email will list approved loans (products) in a table.
Data Model Example
Notice the one-to-many relationship between the Process Entity, Request, and the Products entity.

Email Example
The email should display a table like this:

Steps:
-
Insert a Dynamic Table
- Place the cursor where the table should appear.
- Click the Dynamic Table button in the ribbon.
-
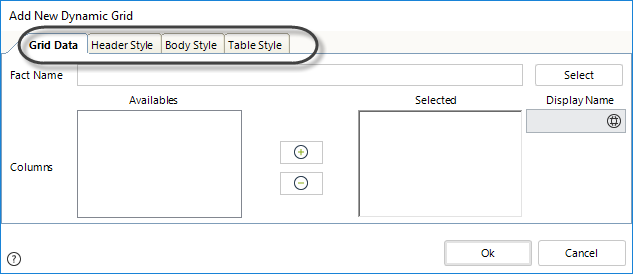
Configure Table Properties
-
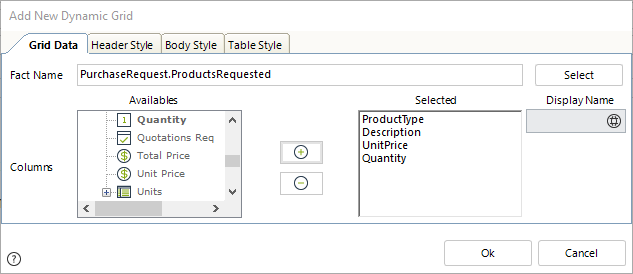
A new window will appear with four tabs: Grid Data, Header Style, Body Style, and Table Style.
-
Grid Data:
-
Select the collection XPath (e.g.,
PurchaseRequest.ProductsRequested) and apply filters if necessary.
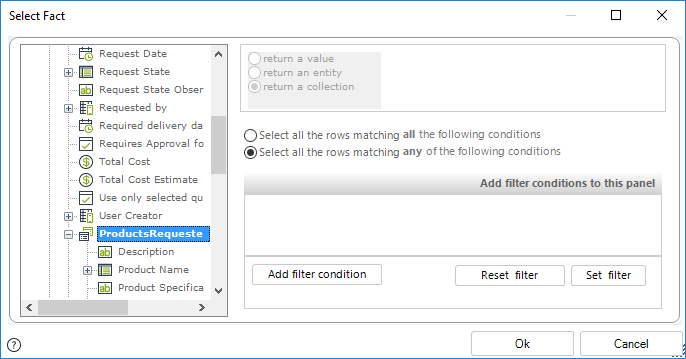
-
Define the columns to display and optionally customize their display names.
-
-
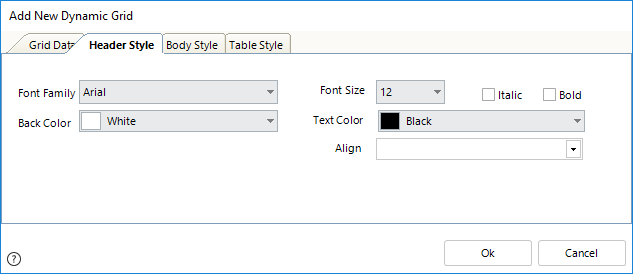
Header Style:
- Configure the header background color, text alignment, and font properties.
- Configure the header background color, text alignment, and font properties.
-
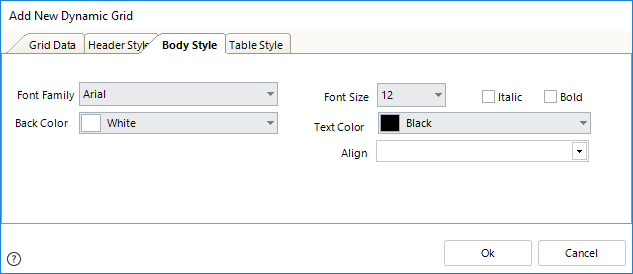
Body Style:
- Configure the body background color, text alignment, and font properties.
- Configure the body background color, text alignment, and font properties.
-
Table Style:
- Set table alignment (left, right, or centered) and enable headers.

- Set table alignment (left, right, or centered) and enable headers.
-
-
Finalize the Table
- Click OK to include the table in the email body.
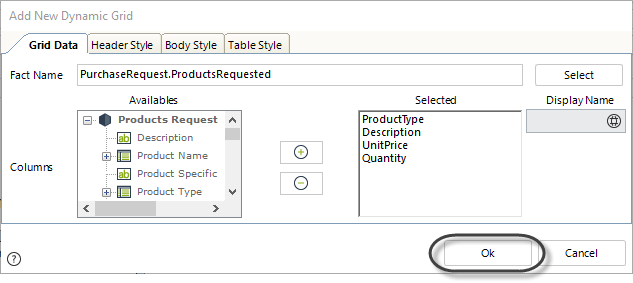
- Click OK to include the table in the email body.
-
Edit or Remove the Table
- Double-click the table to edit it or delete it by selecting the table icon and pressing Backspace.
-
Save the Email
- Click Save to complete the email configuration.

- Click Save to complete the email configuration.