Preconditions or Decision Trees
Overview
Preconditions contain logical conditions that allow or restrict the execution of elements found in the lower hierarchy. They allow you to define a condition hierarchy to organize the execution of actions based on simple logic.
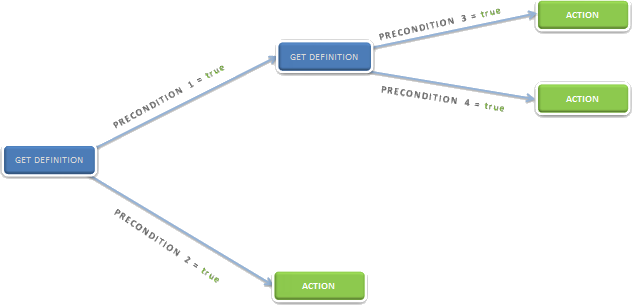
In other words, Preconditions allow you to build decision trees. Each Precondition creates a branch of the tree, and the nodes execute actions.
Thus, each Precondition is triggered by the evaluation of a parent condition. The decision tree starts by reviewing conditions, and according to the result, it will make a decision or fulfill an action. Bizagi Preconditions can have as many levels of nesting as needed.
The following image presents a decision tree where, based on certain conditions, a person decides what to do on a weekend:
If the parents are visiting, the plan will definitely be to go to the cinema. If the parents are not visiting, then a new condition is evaluated to assess the weather. If it is sunny, they will play tennis; otherwise, the alternative option is to go to the cinema.

Each branch of the tree is a Precondition that can be established by multiple steps. A single Precondition does not determine an action but is merely an evaluator that leads to an action. Therefore, at the end of each path or branch, a Policy Rule, a Decision Table, or a Rules Group must be created, which will be responsible for the last validation and execution of the required action according to the result of the validation.
Steps to Create Preconditions
-
Go to the fourth step of the Bizagi Process Wizard and select Activity Actions.
-
Click the shape where the policy is to be created and select On Enter, On Save, or On Exit to create the policy.
Select the Policy item.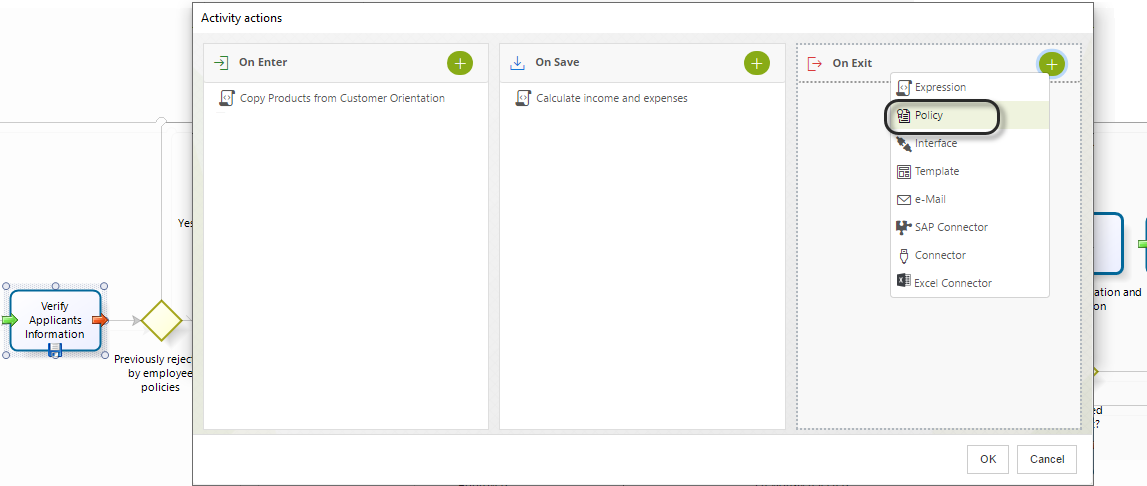
-
Click New on the upper left corner. In a new window, enter the name, display name, and description of the policy.
Click OK.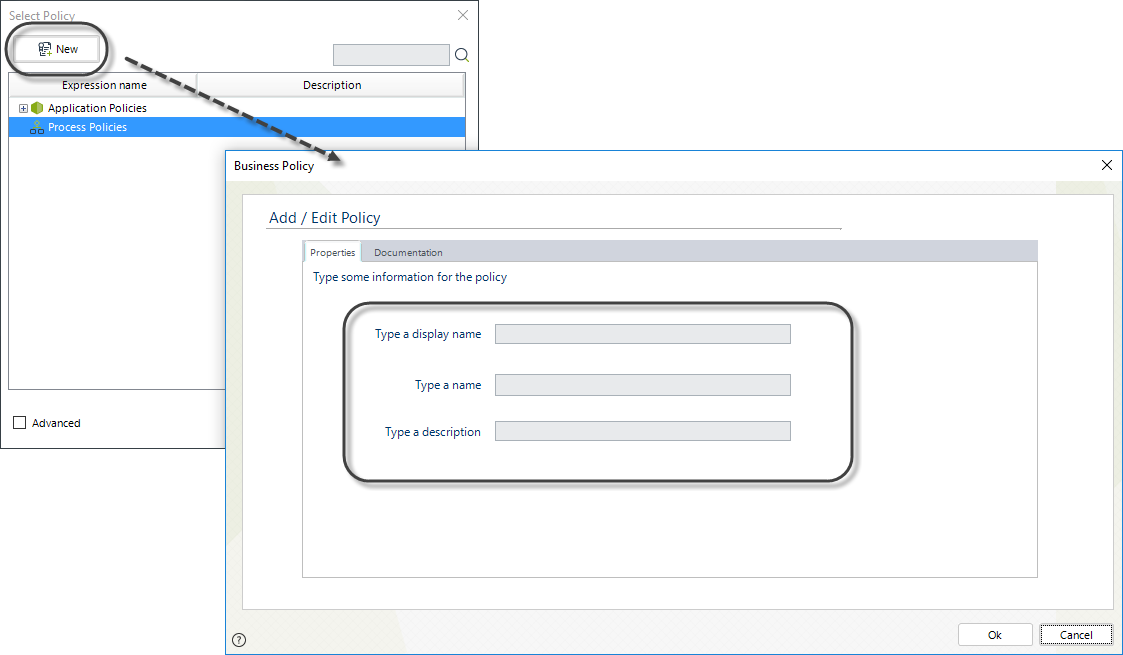
-
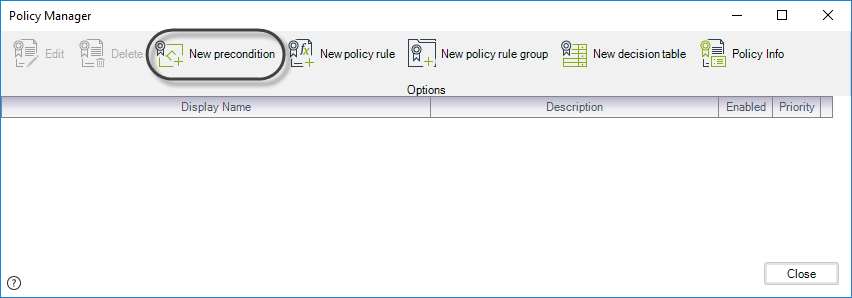
In the Policy Manager, select New Precondition.
-
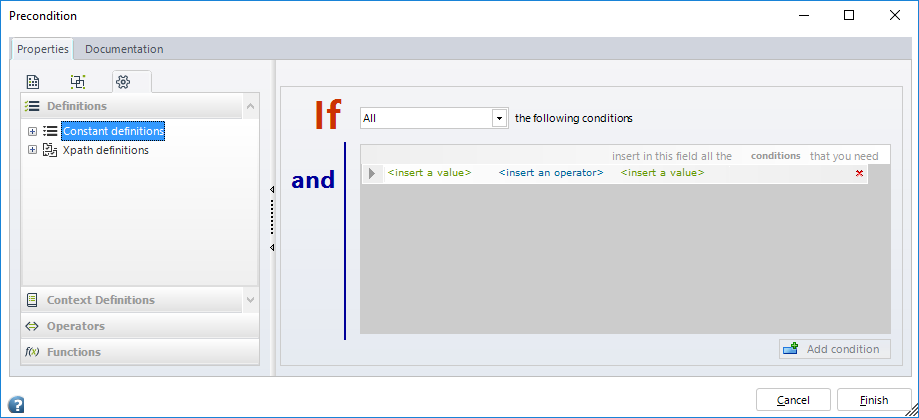
The following window will be displayed. Unlike the editor of Policy Rules, this interface does not have the Then and Else sections.
-
Include the condition to be evaluated. Drag and drop Vocabulary definitions to the If condition box on the left.
Click the Add Condition button to include as many options as necessary to evaluate the rule.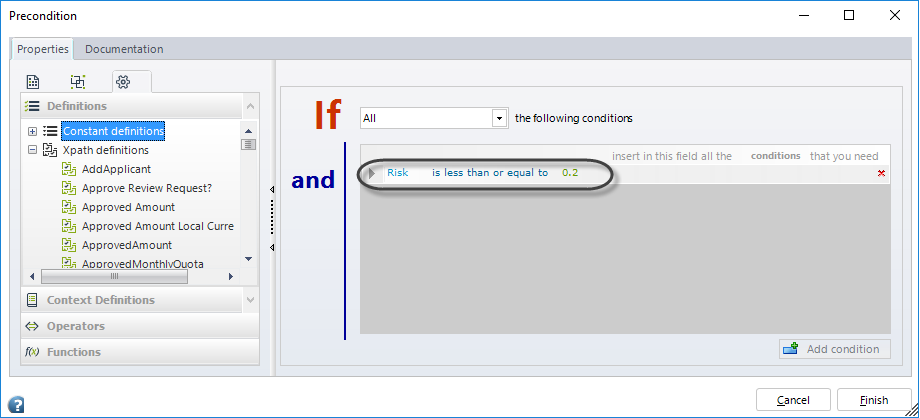
-
Once you have included the required conditions, save the changes by clicking the Finish button.
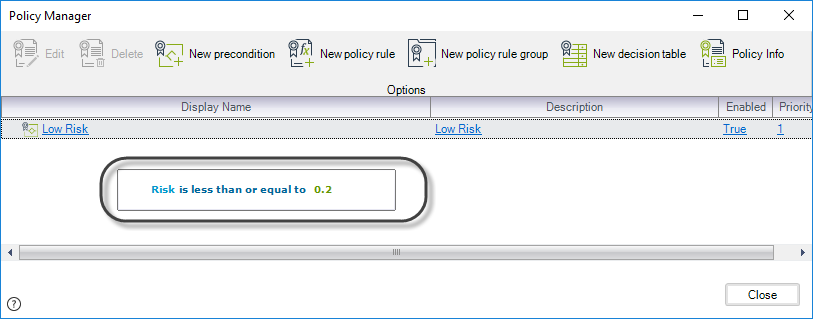
The Precondition is now displayed in the Policy Manager.
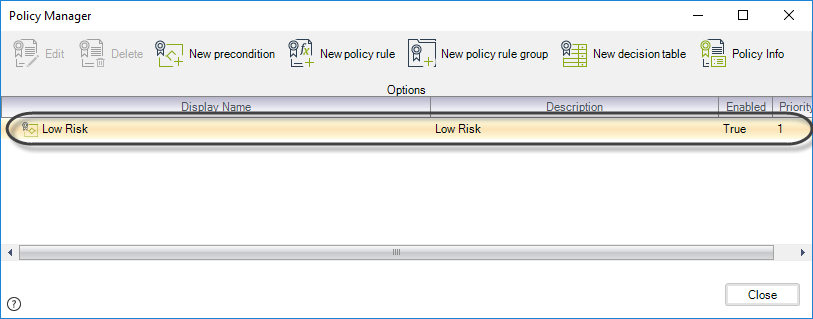
When the cursor is hovered over the Precondition, a tooltip will show a quick view of the content of the Precondition.
-
Right-click the Precondition to create branches that will be evaluated when the Precondition is fulfilled.
In this manner, a hierarchy of branches (Preconditions) and action elements (Policy Rules, Decision Tables, or Policy Rule Groups) can be created.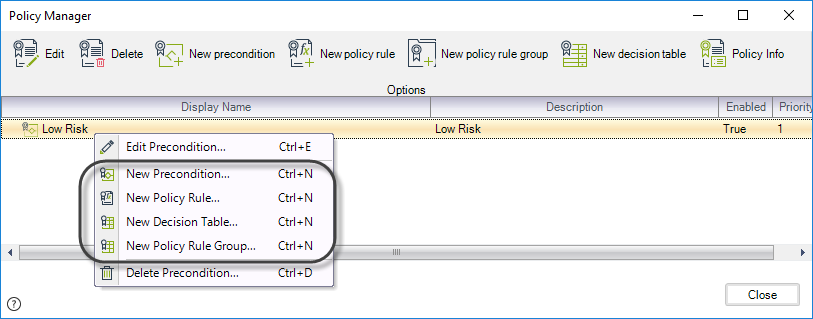
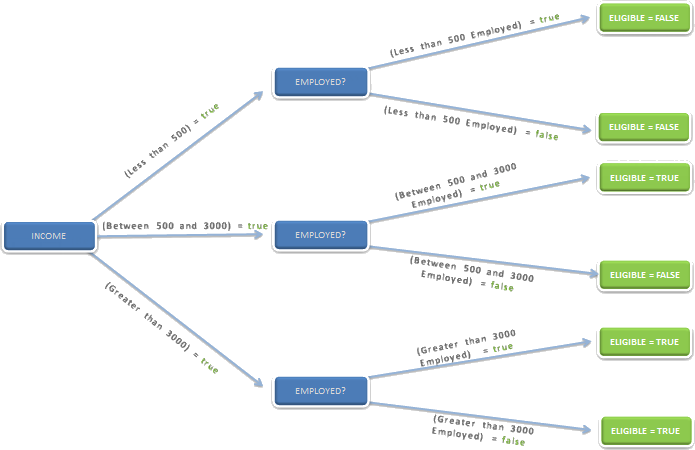
Example: Bank Loan Policies
Imagine you work in a bank. The bank has set policies for the amount a Client can request in loan products based on their income and employee status. The conditions are listed below:
- If their income is less than US$500, the client will not be eligible.
- If their income is between US$500 and US$3,000, eligibility depends on the employee status.
- If their income is greater than US$3,000, the client is always eligible.
Decision Table
| Income | Employed? | Eligible? |
|---|---|---|
< 500 | YES/NO | NO |
> 500 and < 3000 | YES | YES |
> 500 and < 3000 | NO | NO |
> 3000 | YES/NO | YES |
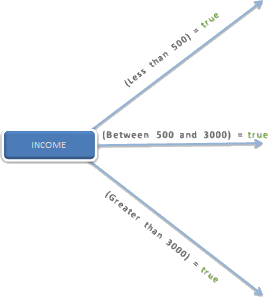
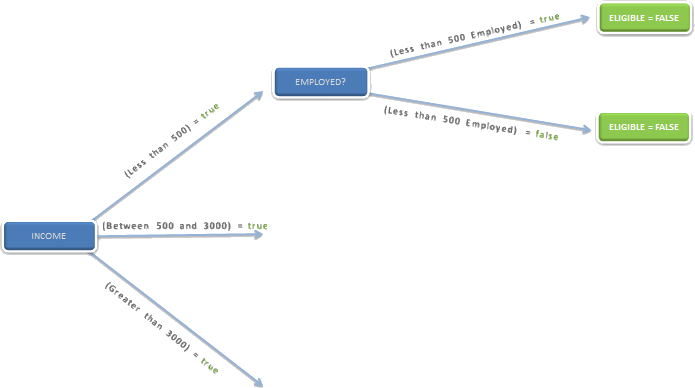
This situation can be represented as a Decision Tree, illustrated below:

Steps to Create the Decision Tree
-
Go to the fourth step of the Bizagi Process Wizard and select Activity Actions.
Click the shape where the policy will be created and select On Enter, On Save, or On Exit to create the policy.
Select the Policy item. -
In the Policy Manager, select New Precondition.
-
Create the conditions related to the first Precondition. In this case, define the first range for the client's income.
Click Finish.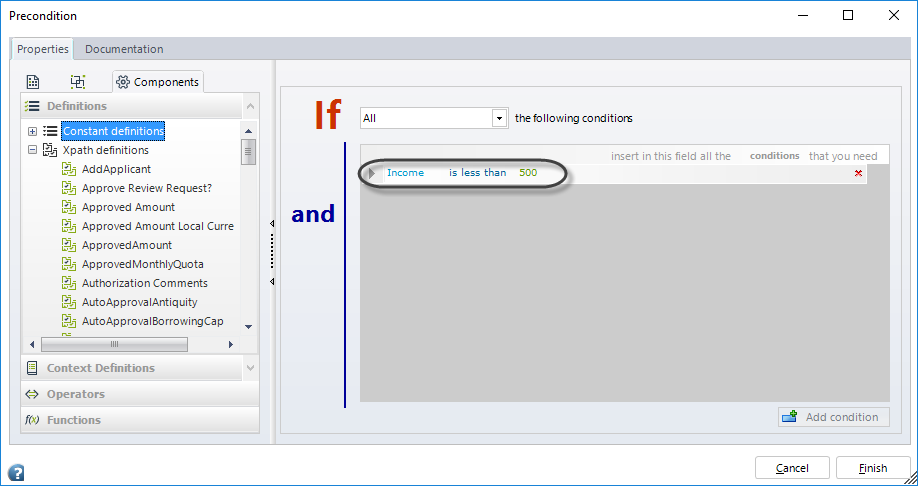
-
Type a Name, Display Name, and Description for the Precondition.
Click Finish.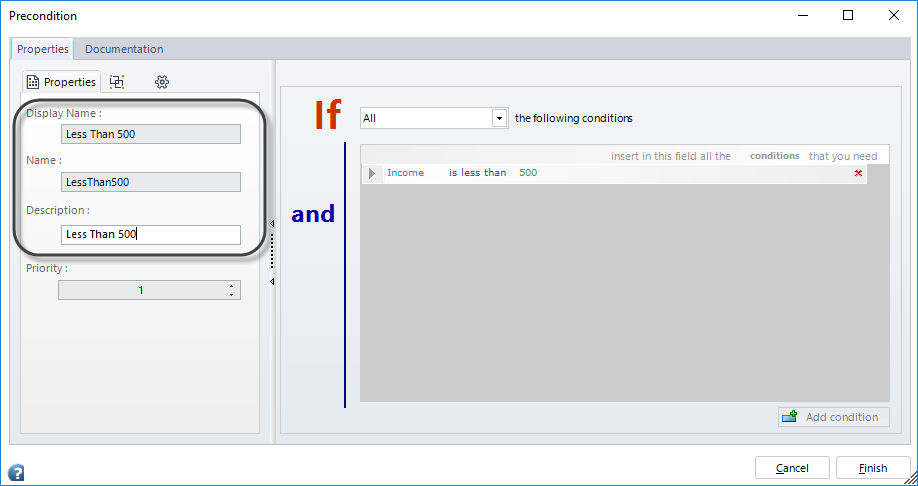
-
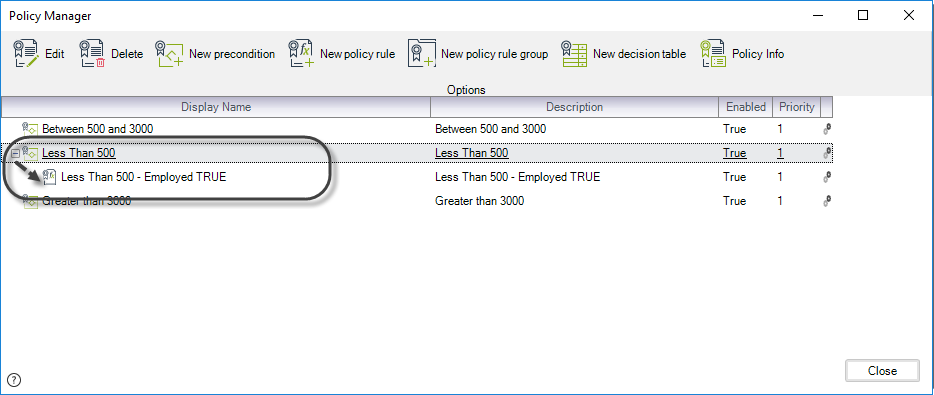
Repeat the previous steps to create Preconditions for the remaining ranges of the client's income.
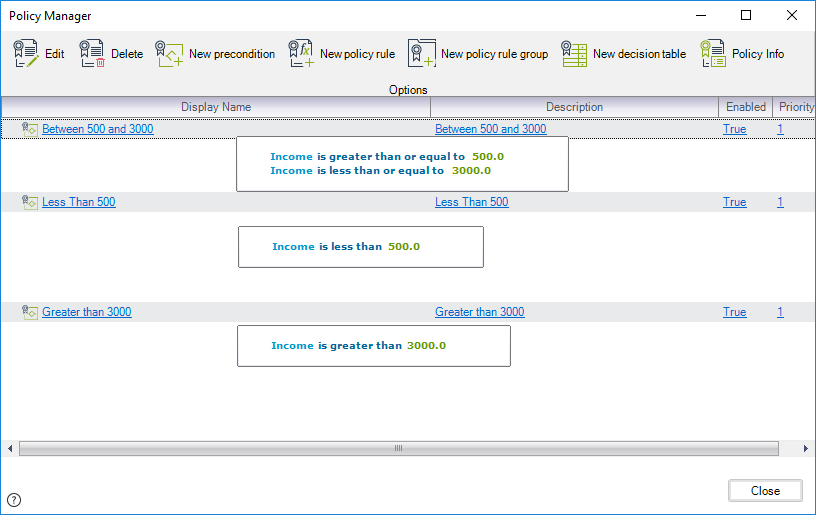
At this point, the first part of the Decision Tree looks like this:
-
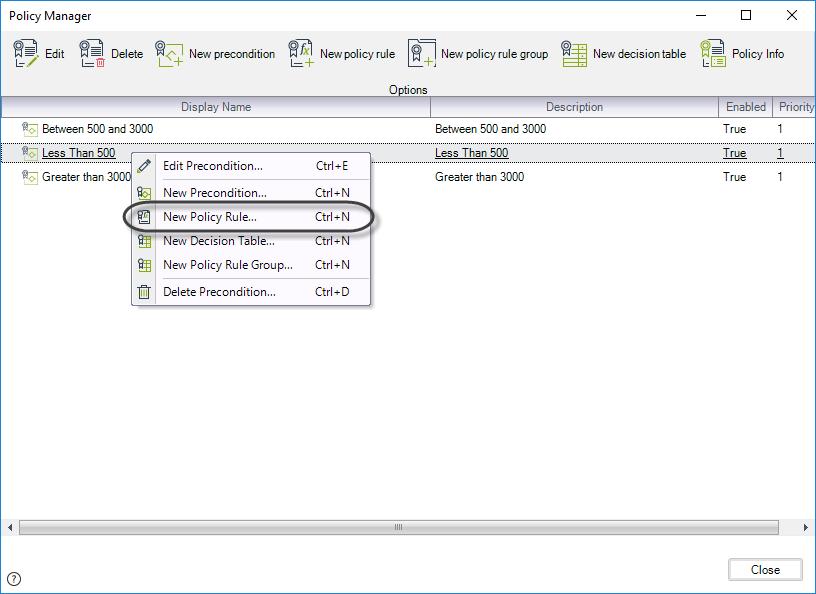
Right-click a Precondition and select New Policy Rule to define a lower hierarchy level.
-
Include the necessary conditions and the final action. Type a Name, Display Name, and Description for the Policy Rule.
Click Finish.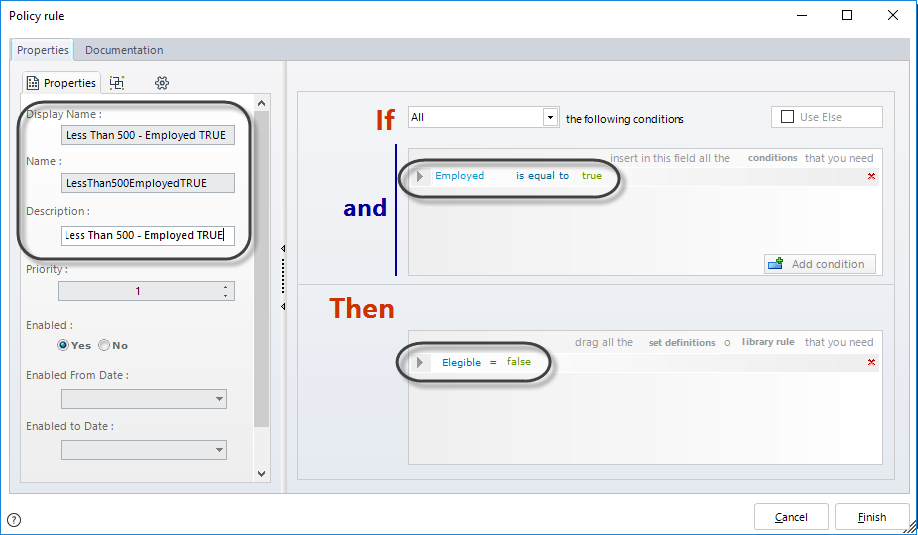
The new Policy will appear as a child node of the Precondition where it was created.
-
Repeat the previous step for all the child Policy Rules. In this example, two more Rules are required:
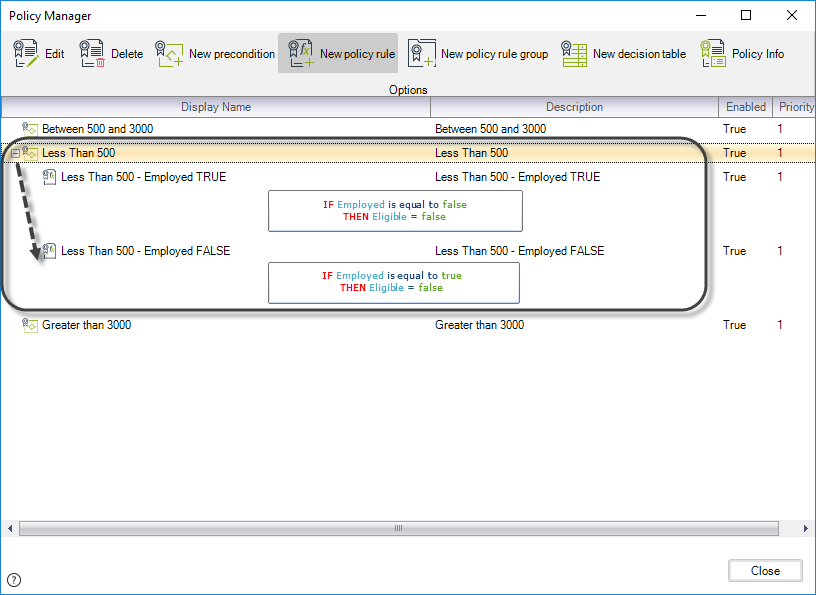
At this stage, the Decision Tree looks as follows:
-
Repeat the steps for all the Preconditions.
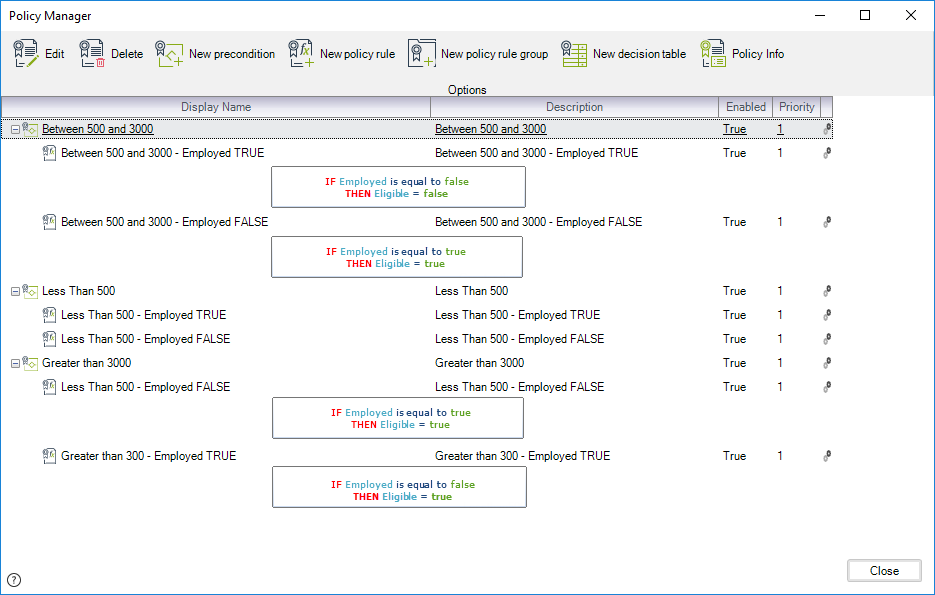
Complete Decision Tree
Once all elements have been created, the complete Decision Tree appears as shown below: