Configure Email Integration Using Gmail
Overview
The following article provides a reference to configure Bizagi's Email Integration feature by using a Gmail account.
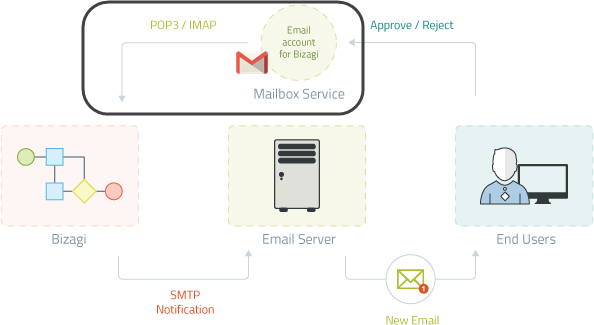
This article specifically illustrates the relevant steps for Gmail, needed when choosing to use its mailbox service.
Prerequisites and prior steps in Bizagi when using Email integration (such as setting the connection to your SMTP Email server or ensuring that your task has the ideal characteristics for Email integration) are not depicted below, but are described at .
Important Note
Important: Gmail has stopped supporting the second step of this manual: Less secure apps & your Google Account.
- If you already have this step configured, you can continue using it.
- If you don't have it configured, you cannot use Gmail as a client for Email integration with Bizagi.
For more information, visit Google Support.
What You Need to Do in Bizagi
The following list illustrates an outline of the steps you need to carry out in order to enable a Gmail account for this use.
-
Enable IMAP/POP3 in Your Gmail Settings
Enable the retrieval of messages from Gmail through the IMAP or POP3 protocol.
-
Enable Gmail Security
Allow Bizagi to access your Gmail dedicated account with adequate security settings.
-
Configure Email Integration in Bizagi
Once you have enabled IMAP or POP3 in your Gmail settings and granted access from external applications, configure Email integration by specifying the corresponding parameters as instructed by Gmail.
Example
The below reference shows an example for either IMAP or POP3 use, though for testing and evaluation purposes, it is recommended to use IMAP.
1. Enable IMAP/POP3 in Your Gmail Settings
The first step is enabling the retrieval of messages from Gmail through the IMAP or POP3 protocol. These protocols are not enabled by default. To do so, carry out these steps:
1.1 Sign in to Gmail with the account you will set for Bizagi's dedicated use.
-
Once this feature is set up, do not mark/read new emails, or Bizagi will not fetch them.
1.2 Click on the Settings menu (represented by the gear icon) located at the top right, and select Settings.

1.3 Click Forwarding and POP/IMAP.
-
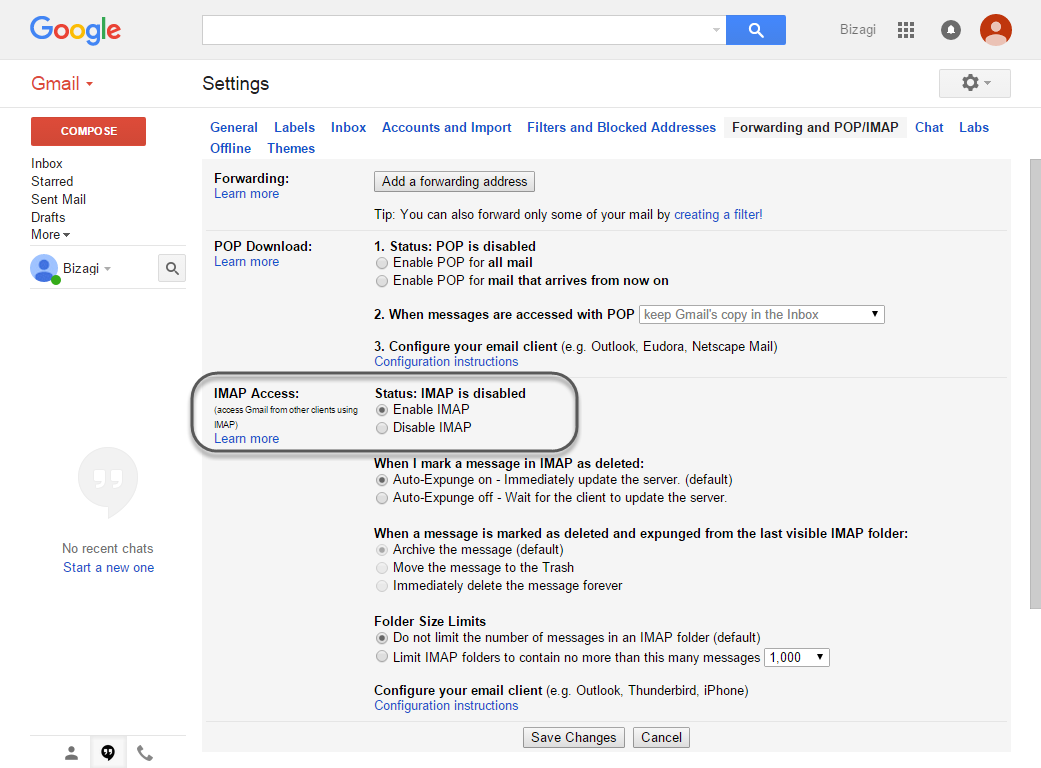
For IMAP (recommended option):
- Locate the IMAP Access section and tick the Enable IMAP radio button.
- You may leave the remaining options as set by default.
-
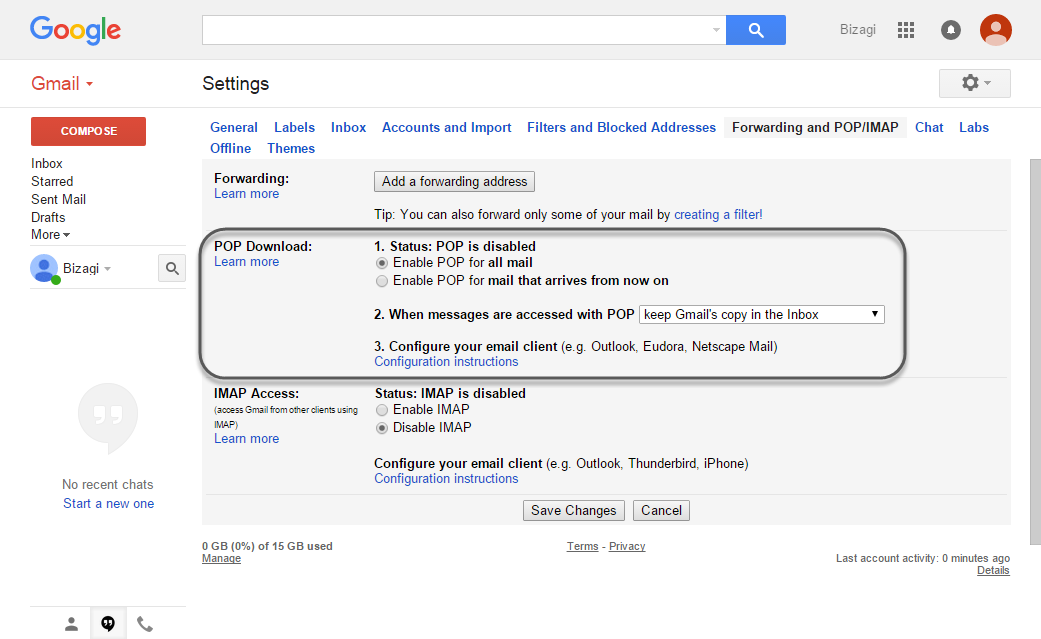
For POP3:
- Locate the POP Download section and select Enable POP for all mail.
- Then, configure what to do with your messages after your POP client has fetched mails (for instance, you may choose to leave a copy).
1.4 Click Save Changes to apply the setting in Gmail.
2. Enable Gmail Security
The next step is configuring Gmail security to allow access to this dedicated account.
Important: Gmail has stopped supporting this feature. If you have this step configured, you can continue using it. If you don’t have it configured, you cannot use Gmail as a client for Email integration with Bizagi.
For more information, visit Google Support.
To allow access from external applications, follow these steps:
2.1 Access Google My Account Security. You may need to specify the credentials of your dedicated account again.
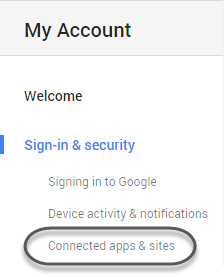
2.2 Click Connected apps & sites. This option is located in the left section, under Sign-in & security.
2.3 Enable access from external applications. Scroll down until reaching the Allow less secure apps option, and toggle the control to its right.
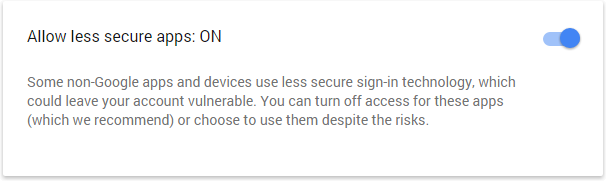
This will automatically enable access from Bizagi to the current Gmail account. At this point, you may sign out or leave Gmail settings.
Note: The Allow less secure apps option is not available for accounts that have two-step verification enabled. To allow access to the dedicated account, you must create an Application password and then use it in Bizagi when configuring Email integration from the Environment options.

3. Configure Email Integration in Bizagi
Once you have enabled IMAP or POP3 in your Gmail settings and granted access from external applications, configure Email integration by specifying the corresponding parameters as instructed by Gmail.
To do so, follow these steps:
3.1 Open the Environment configuration and locate the Popular tab to configure the Email integration section.
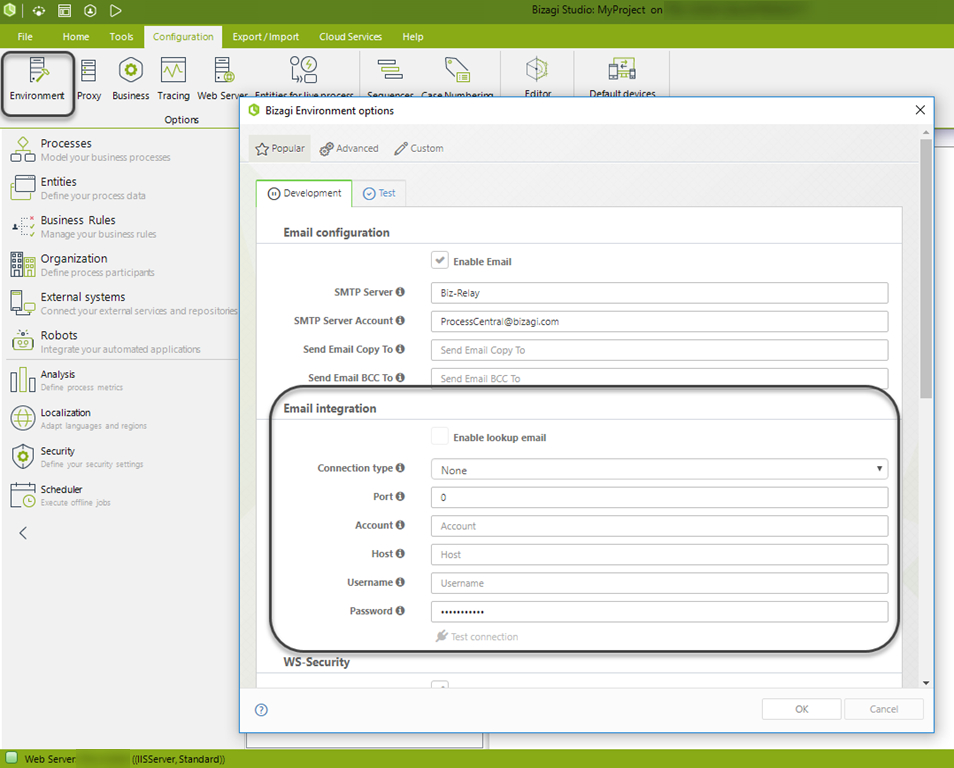
Note: Recall that at this point you need to have already configured the connection to your SMTP server as shown above.
3.2 Configure the parameters according to the table presented below and your specific account:

| PARAMETER | VALUE |
|---|---|
| Enable lookup email | Yes |
| Connection type | IMAP / POP3 (depending on the option enabled in Step 2) |
| Enable SSL | Yes |
| Port | - For IMAP: 993 - For POP3: 995 |
| Account | Your account's email address (including @gmail.com or @your_domain.com) |
| Host / Mailbox service | - For IMAP: imap.gmail.com - For POP3: pop.gmail.com |
| Username | Your email address (username@gmail.com or username@your_domain.com) |
| Password | Your Gmail password |
Click OK and close this window.
At this point, all settings relevant to Email integration using a Gmail mailbox service are completed!