File Print Button
Use
The File Print control allows users to print multiple files related to a case simultaneously with a single click.
Considerations
-
Supported File Types:
- File-type attributes
- Document templates
- Images
- ECM files
-
Features:
- Files can be printed or exported into a single PDF. A PDF reader must be installed.
- Any file from the data model can be included, even if it is not visible in the form where the control is configured.
-
Browser Behavior:
- Internet Explorer: Opens the print dialog by default.
- Firefox: Opens the generated PDF.
-
Unsupported Formats:
- Microsoft Word 95 documents (
.doc) - SVG images (
.svg) - PowerPoint XML 2003
- Encrypted Microsoft Word documents (
.doc/.docx) - Encrypted PowerPoint files (
.ppt/.pptx) - Encrypted Excel files (
.xls/.xlsx) - Encrypted or password-protected PDFs
- Microsoft Word 95 documents (
Properties
Every control has properties that allow customization in the Work Portal. Below are the properties exclusive to the File Print control:
Basic Tab
| PROPERTY | DESCRIPTION |
|---|---|
| Button Caption | The text entered will appear inside the button. |
| Source | Defines the associated files (attributes of the data model) to print. |
Format Tab
| PROPERTY | DESCRIPTION |
|---|---|
| Value Horizontal Align | Defines the button's alignment. Options: right, left, justified, centered. |
| Format | Define the font size, font color, and background color for the button. |
Example
In a Purchase Request Process, the Purchases department needs to keep a physical record of supplier selection processes.
Scenario:
At least 3 quotations must be evaluated before selecting a supplier. The purchase assistant must print all quotations and the purchase order in one step.
Steps to Configure the Control:
-
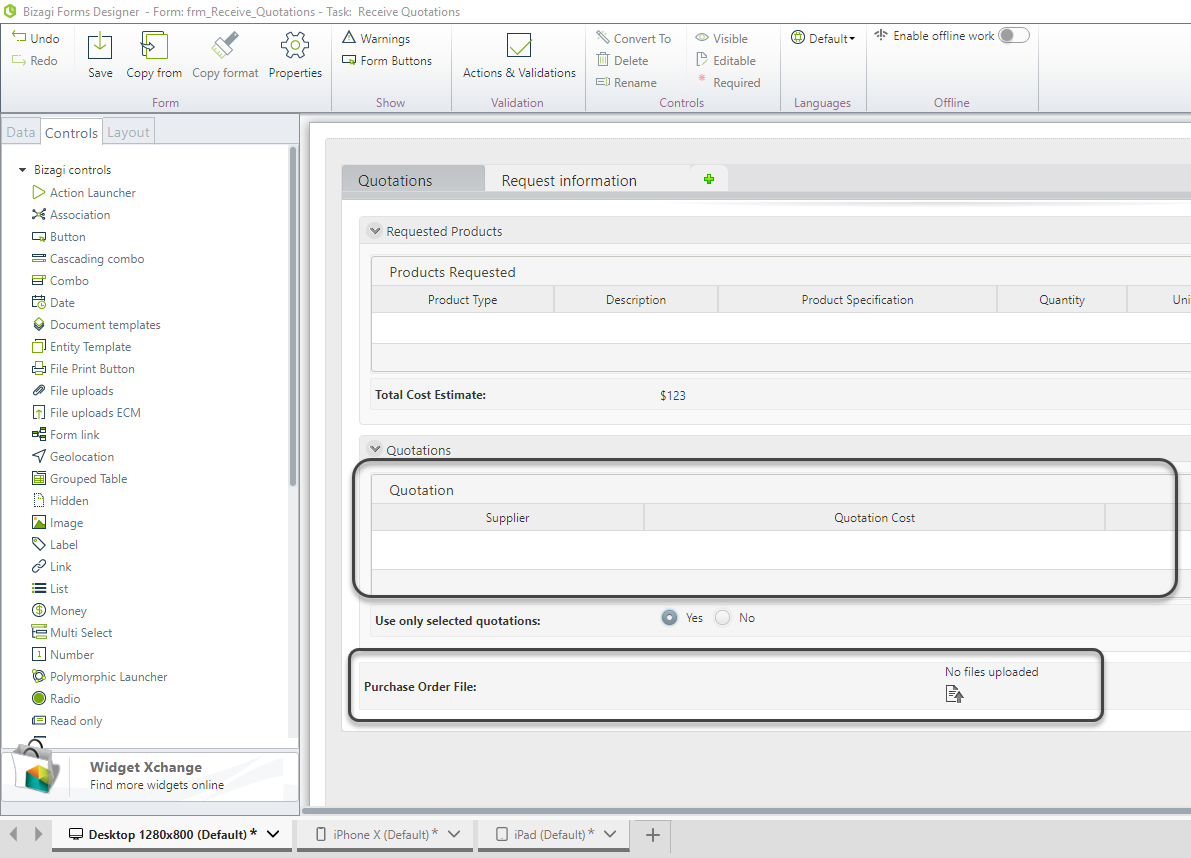
Navigate to the form where the control will be included, such as the last activity in the Purchase Request Process.
- The form should contain a file type attribute for storing the purchase order and a collection for recording quotations.
-
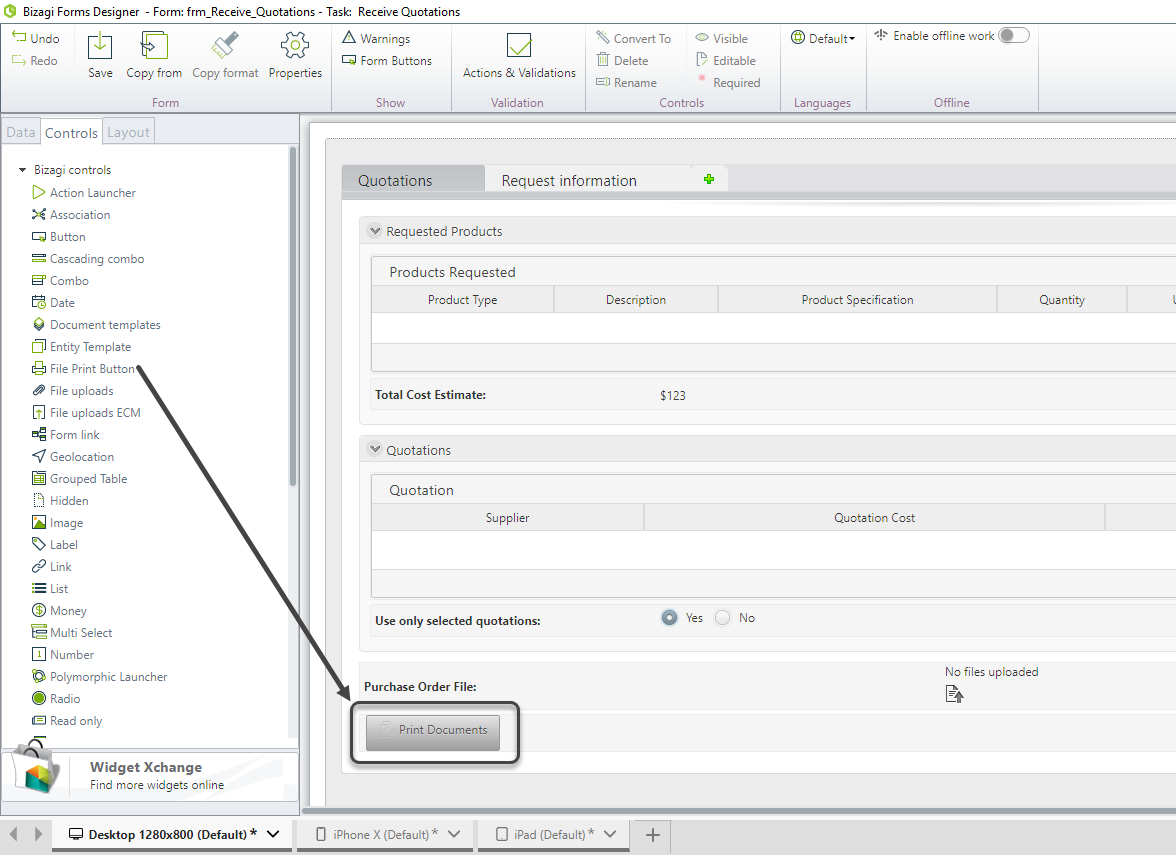
Drag and drop a File Print Button control from the Controls tab.
-
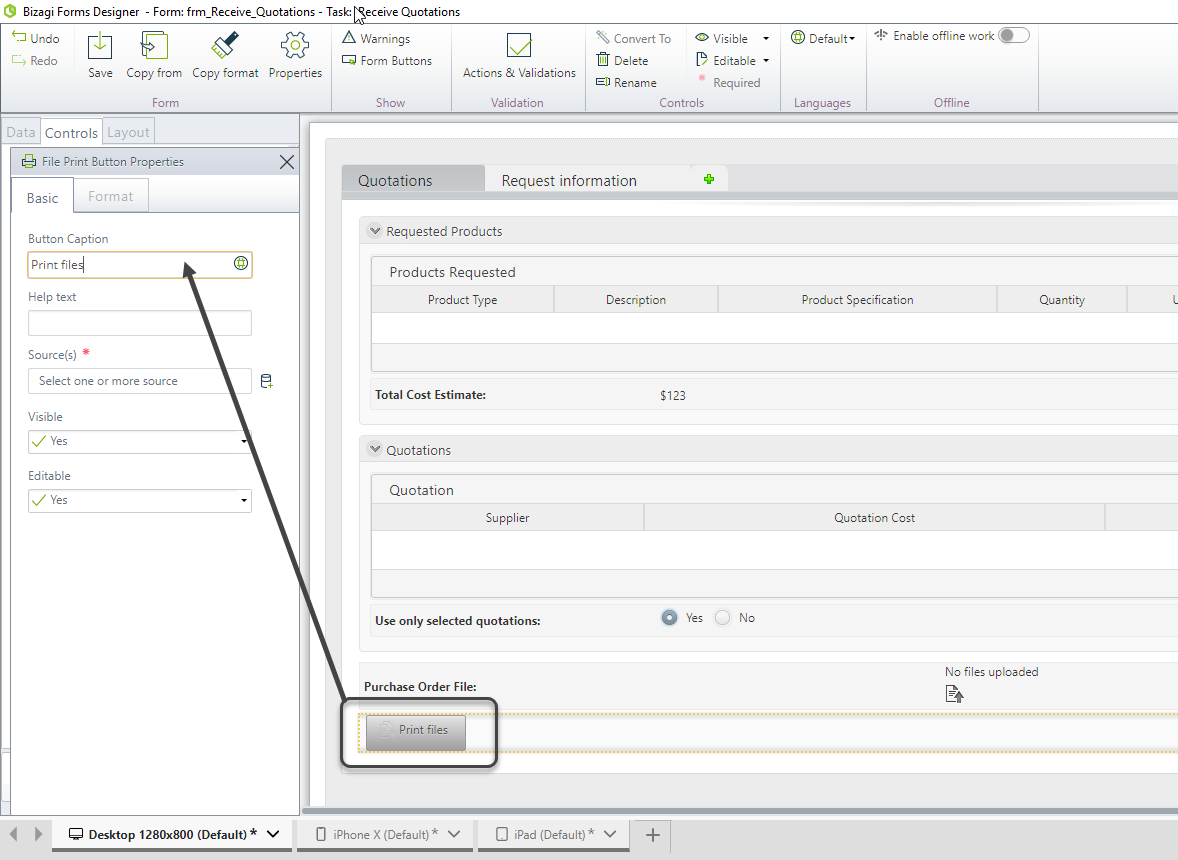
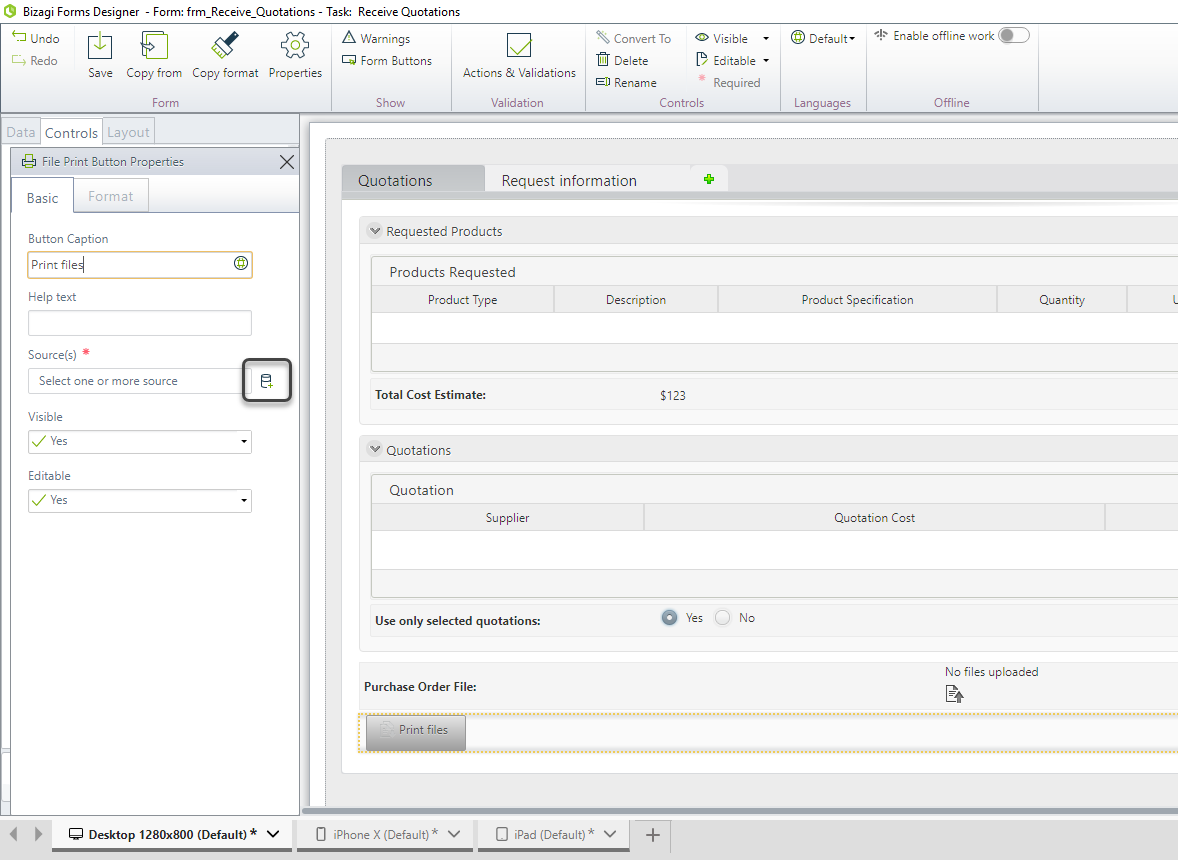
Click the control to display its properties and type a caption for the button.
-
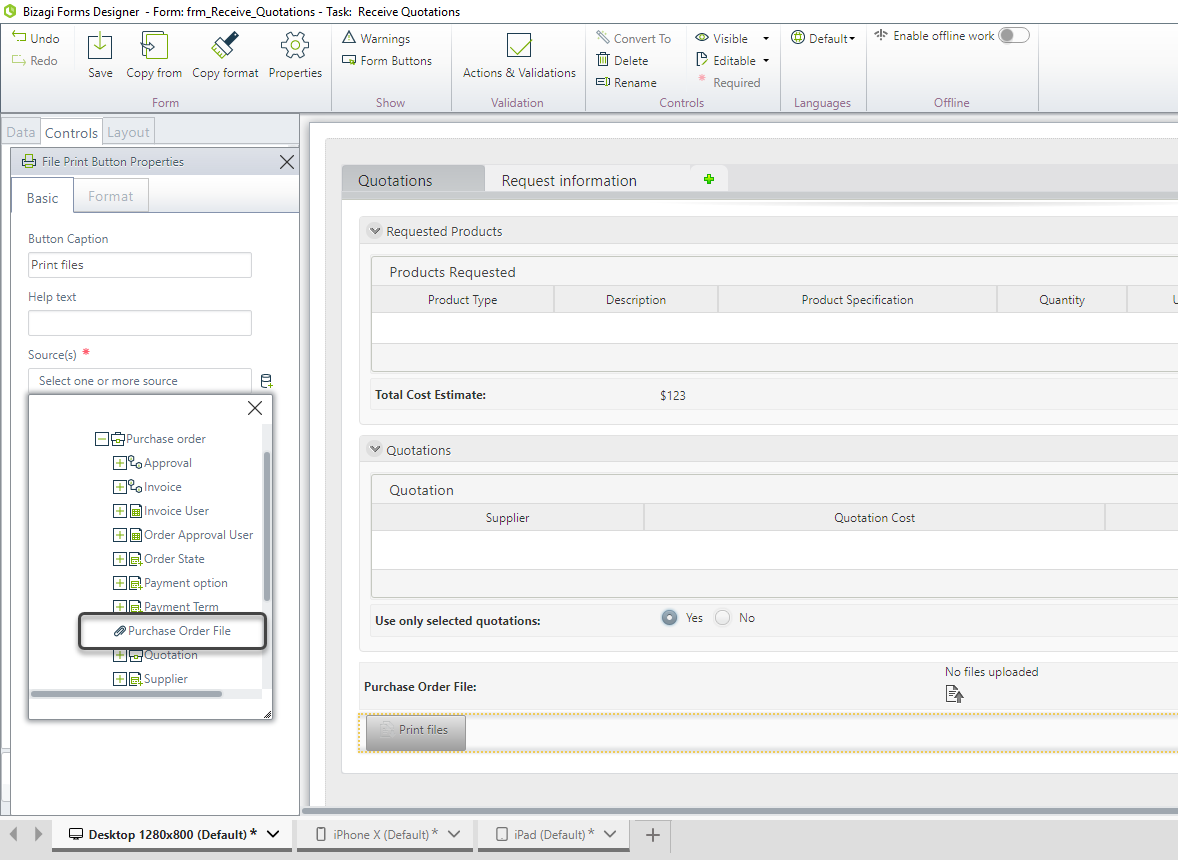
In the Source property, click the Add icon to associate files.
-
Navigate the Data Model and include the files to be printed. For instance, add the purchase order file.
-
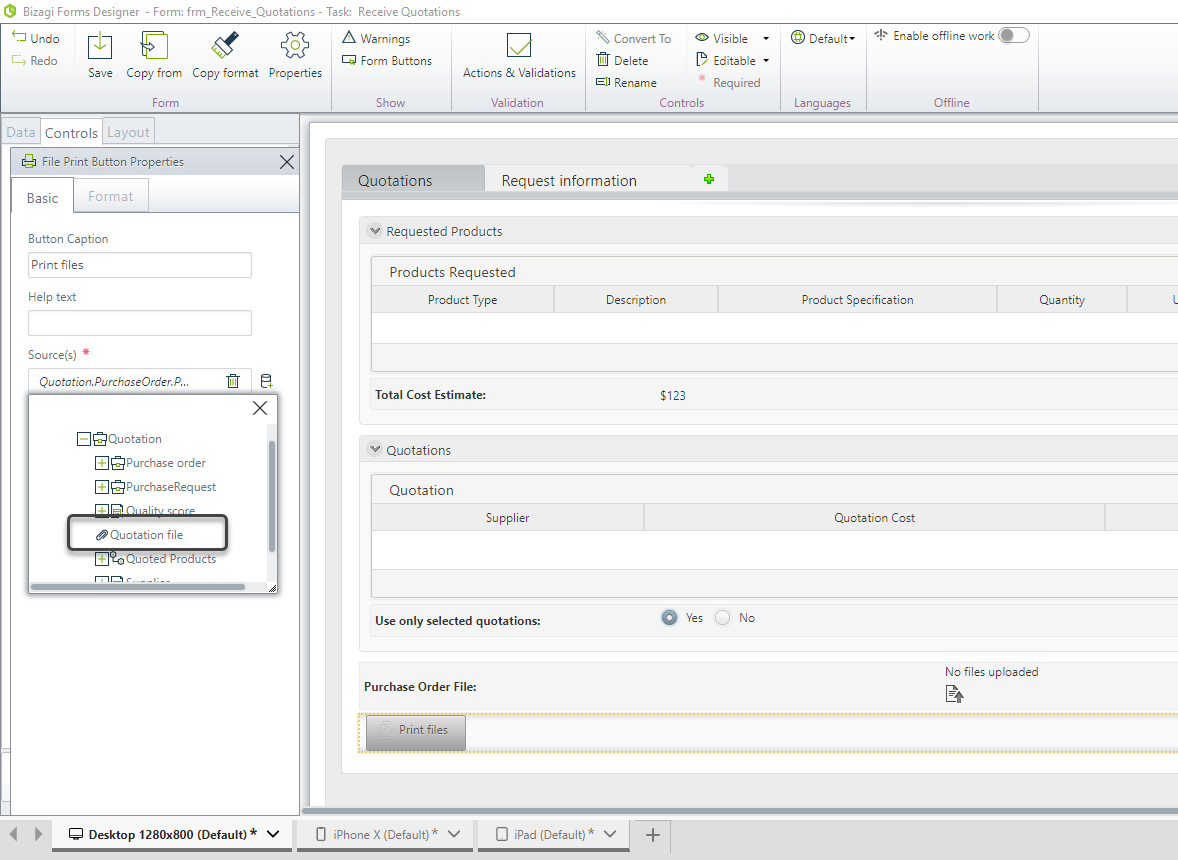
Include the quotations file from the collection. The control will print all records found in the table.
-
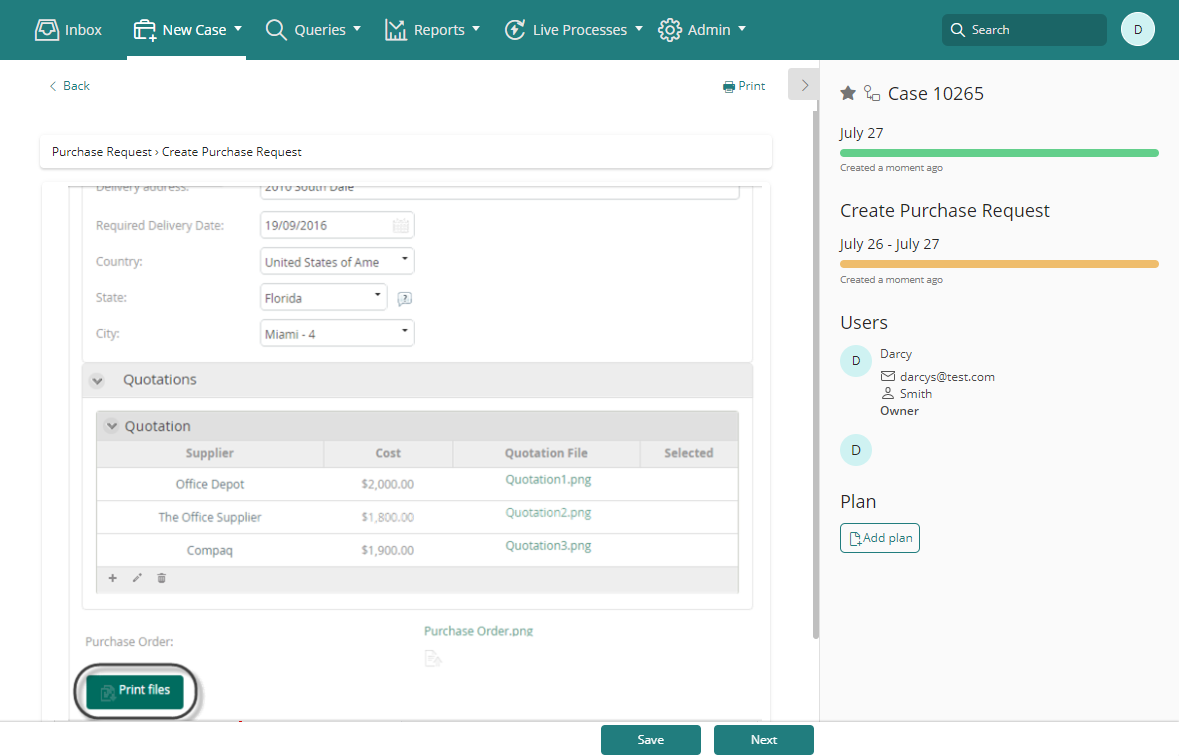
Save the form and go to the Work Portal to test the control.
- Click the File Print Button.
-
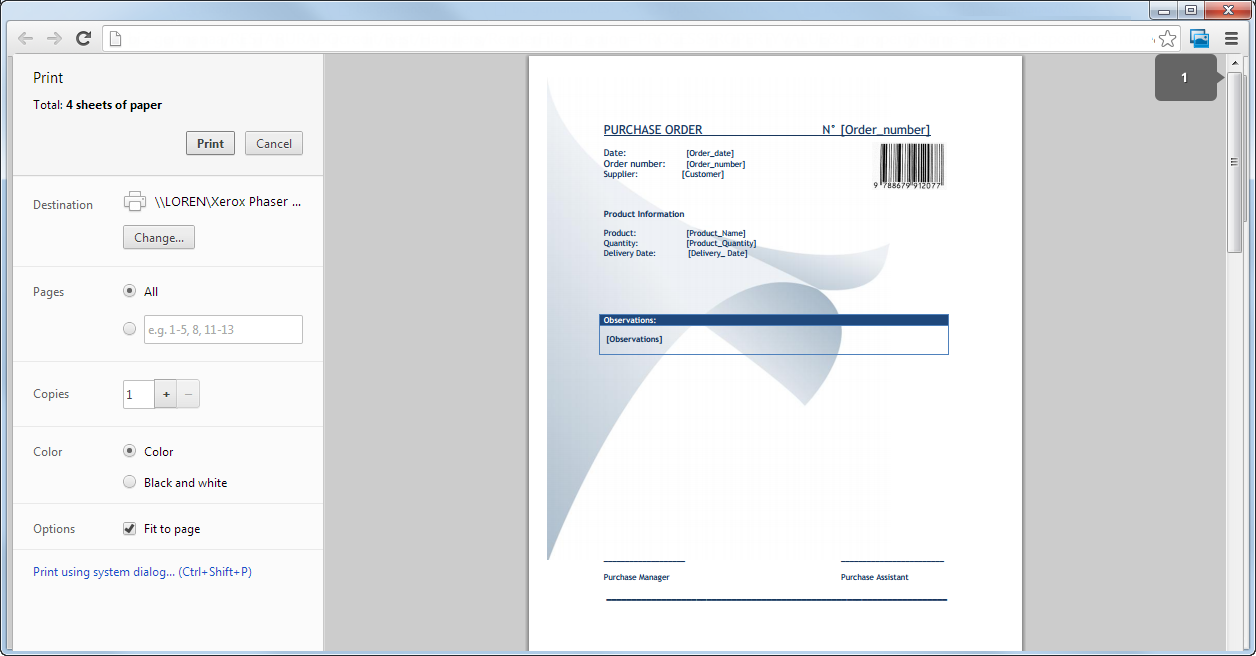
Bizagi generates a consolidated PDF with all documents and opens the print dialog.