SAML2 Configuration with NetIQ
Overview
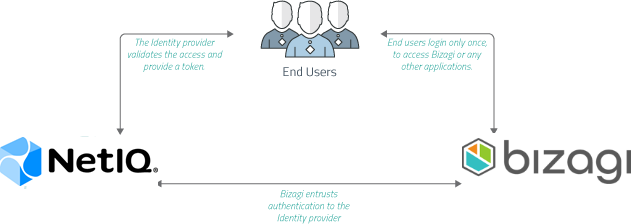
Bizagi supports integration with Identity and Access Management systems (i.e., Identity Managers or Identity Providers) that are SAML 2.0 compliant, such as NetIQ Access Manager.
This section provides a step-by-step guide for configuring both NetIQ and Bizagi to enable integrated authentication in Bizagi with NetIQ Access Manager.
For SAML 2.0, both your Identity Provider and your Bizagi project must support HTTPS.
For more information, refer to Authentication via SAML.
Note:
If you plan to use an authentication method other than Bizagi and are deploying to an environment with no users (commonly during the first deployment), follow these steps to avoid being locked out of the Work Portal:
- Deploy with the authentication method set to Bizagi. This lets you access the Work Portal as the Admon user without credentials.
- In the Work Portal, manually add users or synchronize their information into the WFUser table using SOAP, Excel, LDAP Synchronization, or a Data Synchronization procedure.
- Perform an IISRESET to prevent the Admon user from accessing the Work Portal.
- Use the Management Console to set your preferred authentication method after registering users.
If using LDAP authentication with periodic user synchronization, you can skip these steps. Wait for the next synchronization cycle for users to log in.
Configuration Steps
1. Generate Certificates to Sign Assertions (Mandatory)
This step is not specific to Bizagi.
If guidance is needed, refer to Certificates for SAML 2.0 Authentication.
Ensure you have:
- Certificate to sign assertions (mandatory):
- Format:
.P12or.PFX - Password: Defined during the export of public and private keys.
- Format:
- Certificate to encrypt messages (optional):
- Format:
.P12or.PFX - Password: Defined during the export of public and private keys.
- Format:
Note:
You will need to be in charge of managing your installed certificates (keep track of its expiration date and other relevant maintenance aspects such as changes in your Identity Provider's endpoints).
2. Configure Your IdP in Bizagi
Register the Identity Provider in Bizagi using Bizagi Studio or the Management Console. Refer to Configure a SAML 2.0 IdP in Bizagi.
3. Download the Bizagi Metadata File
Generate the metadata file after configuring the Identity Provider in Bizagi. Refer to Download the Metadata File.
4. Configure Bizagi as a Service Provider in NetIQ Access Manager
Perform the following steps in the NetIQ Access Manager admin panel:
4.1. Log in to NetIQ Access Manager.
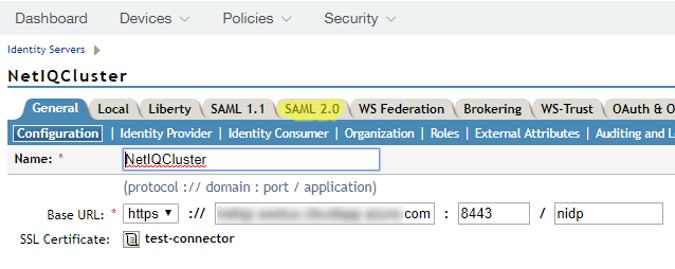
4.2. Navigate to Your Server or Cluster
Go to:
Devices -> Identity Servers -> <YOUR_SERVER>
Replace <YOUR_SERVER> with the name of your configured NetIQ Access Manager server or cluster.
4.3. Enable the SAML 2.0 protocol for your NetIQ Access Manager server (or servers/clusters).
Check the SAML 2.0 box under Enabled Protocols:
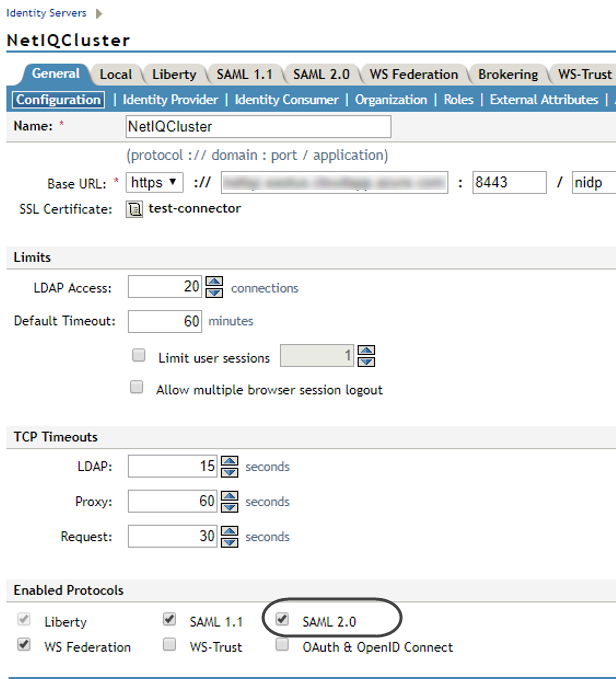
Click OK when done.
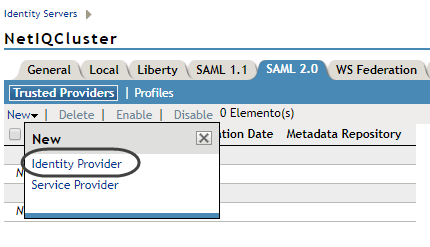
4.4. Register Bizagi as a Service Provider
Click new on the enabled SAML 2.0 tab menu.
Select Service Provider from the drop-down options to register Bizagi so that its connection is trusted:
4.5. Fill in the Details
- Provider type: General
- Source: Metadata Text
- Name: Unique identifier (e.g., Bizagi’s URL).
- Text: Paste the Bizagi
metadata.xmlcontent (from Step #3).
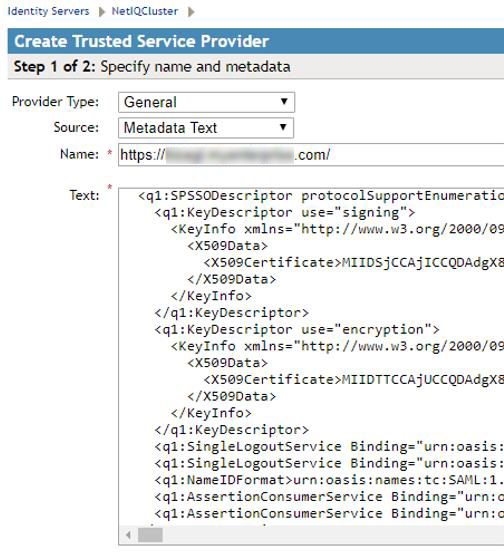
Click Next.
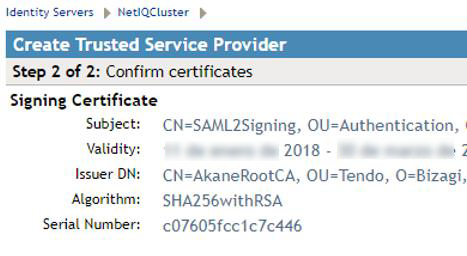
4.6. Confirm the Certificate
Review the certificate's details to make sure they are accurate (the metadata.xml file has the certificate employed by Bizagi). Then click Finish.
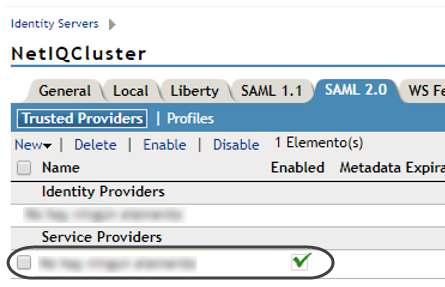
4.7. Configure Attributes
Locate the recently-added Service Provider (Bizagi), and click it.
You can specify which information (attributes) is returned within a response (assertion).
4.8. Locate the Attributes tab. For its Attribute set, select Email.
Use the arrow icons to pass this attribute into the Available list on the right:
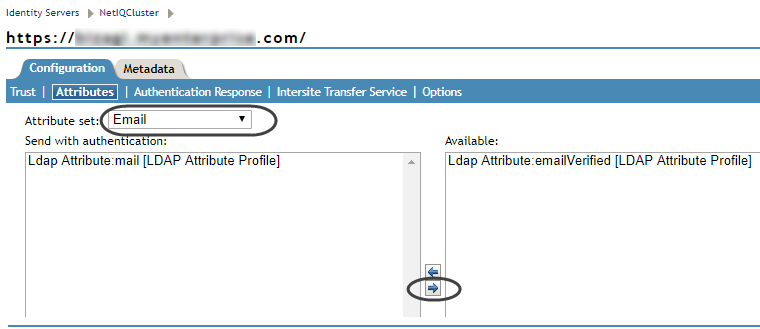
Click Apply when done.
4.9. In the Authentication Response tab, select POST for Binding.
Check the Email checkbox and confirm that its Value shows the corresponding email attribute configuration you selected.
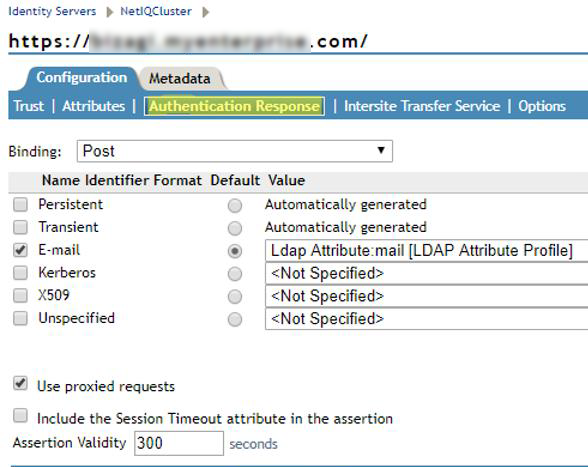
Click Apply when done.
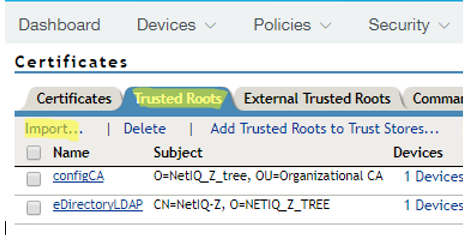
4.10. In the upper menu, select the Security -> Trusted Roots tab.
In that tab, import the certificate so that these are localizable at NetIQ Access Manager's trusted key store.
These steps are not always needed if you are not working with self-signed certificates. If this is you case, then you may skip or simply review steps 2.10 through 2.15.
4.11. Click Import... to install the certificate (.cer, or .crt file):
4.12. Use the Choose File button to locate the certificate. Give it a meaningful name in the Certificate name field:
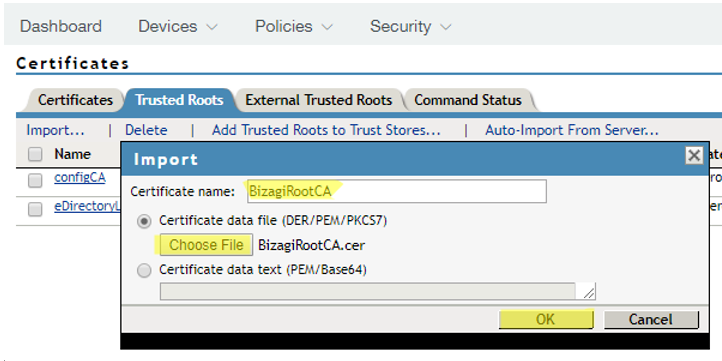
Click OK when done.
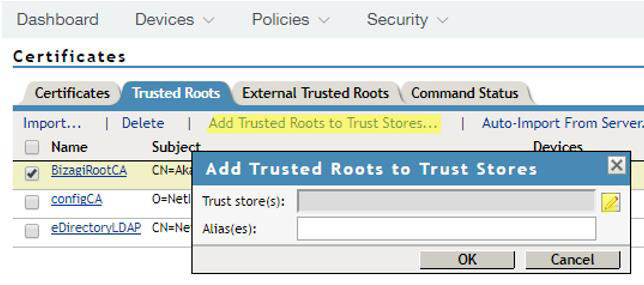
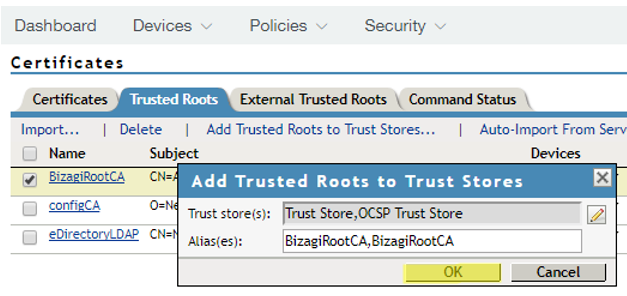
4.13. Click Add Trusted Roots to Trusted Store... and select the certificate you just imported to add it to the root trusted store:
4.14. Select your certificate and trusted stores:
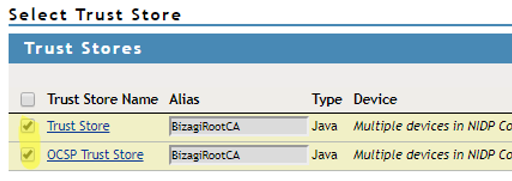
Click OK when done.
4.15. You may need to restart your NetIQ Access Manager services.
4.16. In the upper menu, select Devices -> Identity servers -> .
You should replace with the name of your configured NetIQ Access Manager server/cluster.
4.17. In the SAML 2.0 tab, check the Encrypt assertions checkbox to have NetIQ Access Manager encrypt messages it sends to Bizagi.

Do not check the Encrypt name identifiers checkbox. Save your changes and exit when done.
You have now configured your NetIQ Access Manager Access Manager to rely on SAML 2.0 for an integrated authentication with Bizagi!
Now when you run the Work Portal, Bizagi displays the IdP log-in page and users can be authenticated with your Identity Provider.
Note:
Remember to do this configuration in all your environments, or to deploy security configurations in your target environments, for example, test or production environments.