SAML2 Configuration with PingFederate
Overview
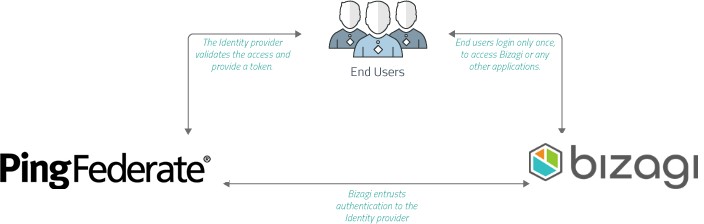
Bizagi supports integration with Identity and Access Management systems (i.e., Identity Managers or Identity Providers) which are SAML 2.0 compliant, such as PingFederate.
This section is a guide to the configuration needed, both in PingFederate and in Bizagi, to have an integrated authentication in Bizagi against PingFederate.
For SAML 2.0, both your Identity Provider and your Bizagi project must support HTTPS.
For introductory information about SAML 2.0, refer to Authentication via SAML.
Note:
If you plan on using an authentication method different than Bizagi and you are performing a deployment to an environment with no users on it (normally this would only be the case for a project's first deployment), follow these steps so that you can correctly configure your users and authentication without getting locked out of the Work Portal:
- Perform the deployment with the authentication method set to Bizagi. This lets you access the Work Portal as the Admon user without providing any credentials.
- Once in the Work Portal, you can manually enter your users, or alternatively, rely on the method of your choice to synchronize your users' information into the WFUser table (SOAP, Excel file, LDAP Synchronization, or performing a Data Synchronization procedure).
- Perform an IISRESET so that the Admon user can no longer access the Work Portal.
- After having your users registered in the Work Portal, use the Management Console to set the authentication method to your preferred one.
If you plan on using LDAP authentication with periodic user synchronization, you may ignore the previous steps since you will only need to wait until the next synchronization happens for your users to be able to log into the Work Portal.
Configuration Steps
1. Generate Certificates to Sign Assertions (Mandatory)
This step is not bound to Bizagi nor restricted by any special requirement of Bizagi (you normally do it yourself).
If you need some guidance or an example on this step, refer to Certificates for SAML 2.0 Authentication.
To proceed with these guided steps, you need to have:
- One certificate to sign assertions (mandatory) in
.P12or.PFXfile format. You need the password for the certificate file, as defined by you when you exported the public and private keys. - One certificate to encrypt messages (optional) in
.P12or.PFXfile format. You need the password for the certificate file, as defined by you when you exported the public and private keys.
Note:
You will need to be in charge of managing your installed certificates (keep track of their expiration dates and other relevant maintenance aspects, such as changes in your Identity Provider's endpoints).
2. Configure Your IdP in Bizagi
After you configure the application in Azure AD, access the Bizagi Studio or the Management Console and register the Identity Provider. Follow the steps in Configure a SAML 2.0 IdP in Bizagi.
3. Download the Bizagi Metadata File
After you configure the Identity Provider in Bizagi, you must generate the metadata file. Refer to Download the Metadata File.
4. Configure Bizagi as Service Provider in PingFederate
4.1. Log in with admin rights to your PingFederate server.
4.2. Access the IdP Configuration menu and locate the SP Connections section.
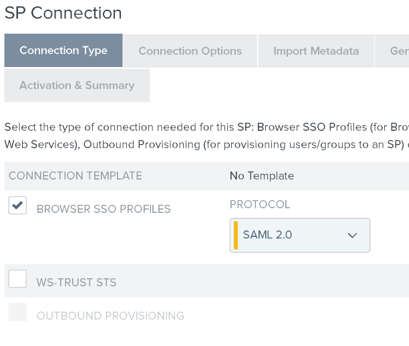
4.3. Click Create New for the Connection type, making sure that SAML 2.0 is selected as the Protocol.
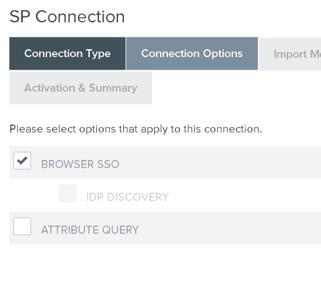
4.4. Check the Browser SSO checkbox on the Connection Options tab.
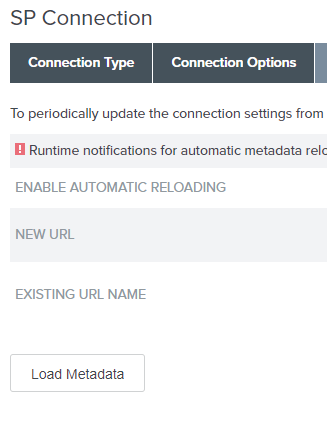
4.5. Use the Load Metadata option on the Import Metadata tab.
Browse for Bizagi's metadata.xml file for further configuration.
4.6. Confirm that Logging Mode is set to Standard, on the General Info tab.
Click Next when done.

4.8. Configure the Web browser and HTTP profile for message exchange.
Click Configure Browser SSO.
4.9. Click the SP-Initiated SSO and SP-Initiated SLO checkboxes on the SAML Profiles tab.

Click Next when done.
4.10. On the Assertion Lifetime tab, set the value for the minutes corresponding to the validity of issued assertions:
- Minutes Before
- Minutes After
You may accept or modify defaults according to your policies.
Click Next when done.
4.11. Click Configure Assertion Creation on the Assertion Creation tab to define which information the response assertions include.
4.12. Select Standard Mapping on the Identity Mapping tab.

4.13. Define the attribute taken as the base for the contract, at the Attribute Contract tab.
Enter in the SAML_SUBJECT either:
domain\usernameusername@domain
If the SAML_SUBJECT has a different format, you can set it to use the email while extending the contract to include the Email attribute:
urn:oasis:names:tc:SAML:1.1:nameid-format:emailAddress
4.14. Click Map New Adapter Instance on the Authentication Source Mapping tab.
4.15. On the Adapter Instance tab, establish a new adapter for IdP Adapter Mapping by clicking Manage Adapter Instances.

You can create a new one or select an existing one.

4.16. On the Assertion Mapping tab, select Use only the Adapter Contract values in the SAML assertion.
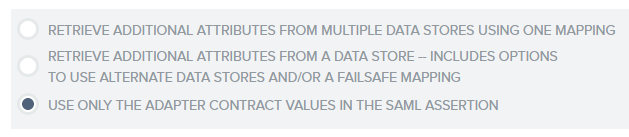
Click Next when done.
4.17. Select Adapter in the first drop-down list (Source) and Mail for the second one (Value), the SAML_SUBJECT fields on the Attribute Contract Fulfillment tab.

If the contract was extended in step #4.13 with the Email attribute, you need to select the same options from the drop-down lists (first Adapter, then Mail) for the Email field that appears.
4.18. Skip the configuration presented on the Issuance Criteria tab.
Click Next.
4.19. Click Configure Protocol Settings in the Browser SSO section and review Protocol Settings.
The configuration should be automatically filled out based on Bizagi's metadata file. Key considerations:
- On the Allowable SAML Bindings tab, select only POST and REDIRECT.
- On the Signature Policy tab, enforce that assertions are always signed, and signatures are required for Authn requests.
- On the Encryption Policy tab, select The Entire Assertion for encryption.
4.20. Click Configure Credentials on the Credentials tab to define security measures for messages between PingFederate and Bizagi.
4.21. Browse in the Digital Signature Settings tab for the certificate to sign assertions that are sent to Bizagi.
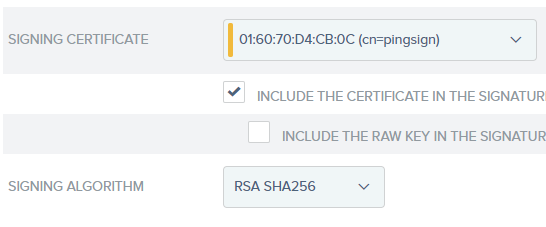
Select either SHA1 or SHA256 for the algorithm. This should match the algorithm defined in Bizagi parameters.
4.22. Define how the certificate will be validated by PingFederate when Bizagi signs messages.
Go to Manage Signature Verification Settings.
4.23. Select UNANCHORED in the Trust Model tab to support self-signed certificates.
4.24. In the Signature Verification Certificate tab, select the public key employed by Bizagi for signing purposes.
If not listed, use the Manage Certificates button to import it.

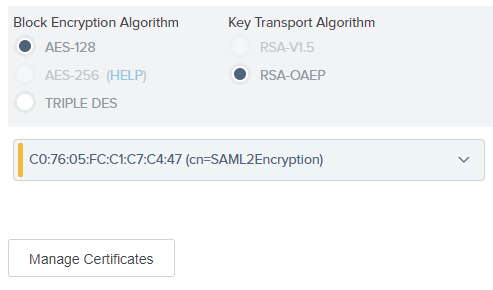
4.25. If you have enabled in Bizagi, that assertions will be encrypted, you need to select the certificate and algorithm used for this purpose (and follow this step and # 2.26).
For this, move to the Select XML Encryption Certificate tab and browse for the certificate.
Select AES-128 as the Block Encryption Algorithm and RSA-OAEP as the Key Transport Algorithm.
If your certificate is not listed in the drop-down list, you can import it using the Manage Certificates button.
4.26. Move to the Select Decryption Keys tab and browse for the certificate Bizagi uses to encrypt messages sent to PingFederate.
If not listed, use the Manage Certificates button to import it.

4.27. Ensure the Connection Status is set to Active on the Summary page.

Make sure your changes are saved and exit when done.
Additional Step
When you configured settings in Bizagi, you left the Identity Provider Metadata File Path blank.
To complete that setting, you need to obtain PingFederate metadata file.
Once you have this file's URL, go back to Bizagi and set it in this key:
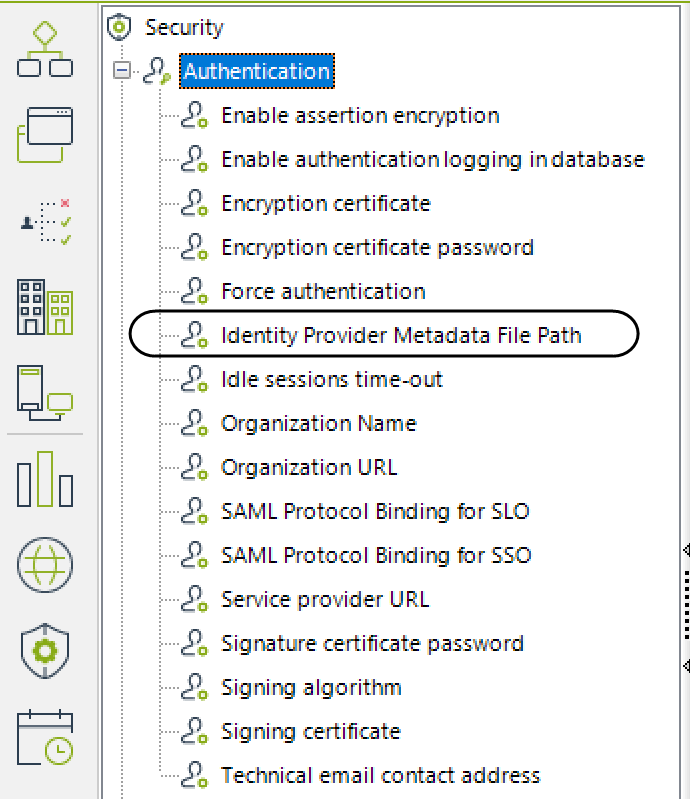
Save your changes You have configured your PingFederate to rely on SAML 2.0 for an integrated authentication with Bizagi!
- Obtain the PingFederate metadata file.
- In Bizagi, set the file's URL in the key SAML_BizagiParams2PingF.
Save your changes.
You have configured your PingFederate to rely on SAML 2.0 for an integrated authentication with Bizagi!