Silent Installation of Bizagi Studio
Overview
The silent installation is an unattended installation performed by a system administrator on a user's or multiple users' workstations remotely. This section explains how to install Bizagi Studio Server through a silent installation, enabling deployment to multiple workstations.
Note:
This option is available only with admin rights.
Before You Start
Ensure the following before proceeding:
- PCs or laptops comply with the minimum requirements as described in System Requirements.
- The Bizagi Studio installer has been downloaded as described in Downloading Bizagi Studio.
- You have system admin rights to deploy the installation on user workstations.
Alternatives
When planning a silent installation, consider one of the following alternatives:
- Create a .msi file: Suitable for use with
msiexecor system management software like Microsoft's SCCM. - Record an .iss file: Record an installation to create an
.issfile for massive deployments.
Note:
If installing a new version over an existing installation, use the same method as the initial installation (e.g.,.msior.iss). If using a different method, uninstall the existing version first. See Uninstall Bizagi Studio.
Installation with a .msi File
For this alternative, you use an administrative installation and carry out the following:
Through this alternative, prerequisites such as Microsoft .NET Framework 4.8 and redistributable C++ 2013 are not installed; as opposed to when running the regular and assisted installation. For this alternative, you need to have Microsoft .NET Framework 4.8 and redistributable C++ 2013 previously installed.
1. Create a Bizagi Studio .msi File
Use a command prompt with admin rights and execute the following: [Bizagi_Installer] -a
Consider:
•[Bizagi_Installer]: should be replaced by the location of Bizagi Studio .exe installer, including the full path to this file.
The name of the installer should be Bizagi Studio Setup.exe inside quotation marks.
For further information on these options, refer to http://helpnet.flexerasoftware.com/installshield22helplib/installshield22helplib.htm.

This command starts an assisted procedure to unpack the installer's content into a .msi, and you should specify a network location while carrying out the assisted steps:

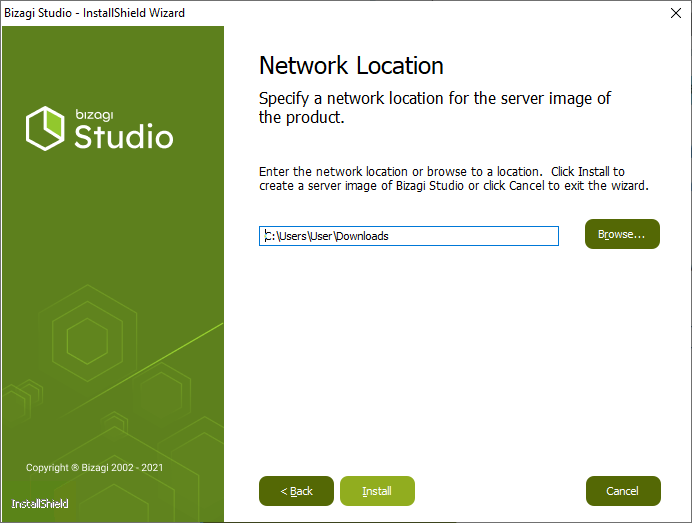 When done, you are able to locate Bizagi Studio.msi at the network path as specified during the assisted steps.
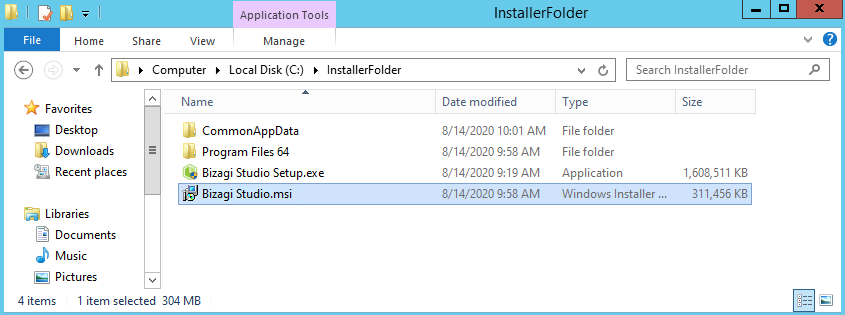
If you want to execute the files in a different machine, make sure you take all the files unpacked as shown below.
2. Deploy the installation by relying on the .msi file Use the msiexec command to run Bizagi Studio.msi from the network path, while using ISSETUPDRIVEN=1 to avoid pop-ups, as follows:
"[Network_location]\Bizagi Studio.msi" /qn companyname=[Company_name]
Consider:
•[Network_location]: should be replaced by the network path as specified during the assisted steps (where Bizagi Studio.msi is at)
•[Company_name]: use this command in case you own an Enterprise subscription of Studio Collaboration Services. Type in your company's name.
 If you want to print logs, consider the following command:
/L*v [path][fileName].log
for example
C:\Users\User\Downloads>msiexec /i "C:\Users\User\Downloads\Bizagi Studio.msi" /qn companyname=WholeProduct /L*v C:\temp\BizagiInstallLog.log
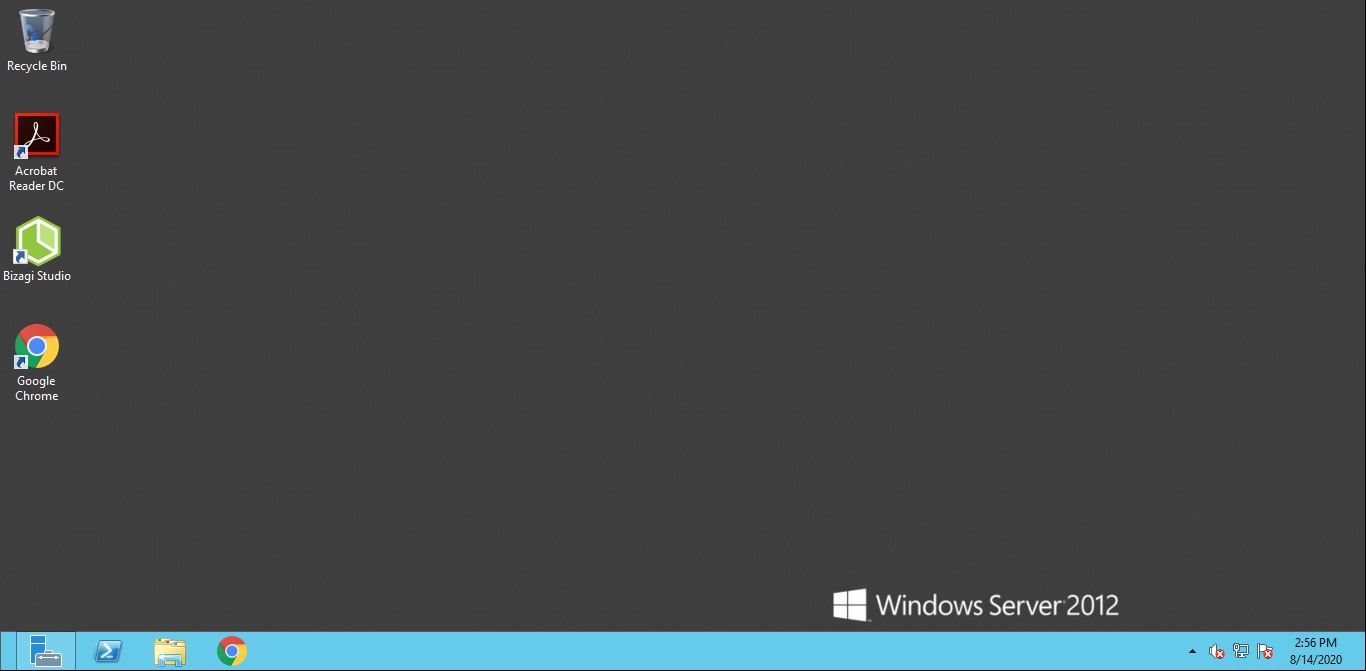
After a successful installation, Bizagi Studio is presented as an installed program and display its shortcut:
 For further information on these options, refer to http://helpnet.flexerasoftware.com/installshield22helplib/installshield22helplib.htm.
Installation with an .iss file
Bizagi Studio installer relies on InstallShield and so, through command-line options you may create a .iss file to make use of a preset configured installation. This process should be executed for EACH Bizagi version; that is, an .iss file should be created for each Bizagi version.
To do so, carry out the following:
1. Use InstallShield 's commands to register .iss instalation
Use InstallShield 's commands such as /r, /f1 and optionally /verbose (most useful to troubleshoot), to record the configuration for a installation as follows:
[Bizagi_Installer] /r /f1"[Output_ISS]"
 Consider:
•[Bizagi_Installer]: should be replaced by the location of the BizagiStudio .exe installer, including the full path to this file (ideally a shared drive). The name of the installer should be Bizagi Studio Setup.exe inside quotation marks.
•[Output_ISS]: should be replaced by the location where you want to create the ISS configuration file, including how you want to name this file. Usually, when this option is left unspecified, the ISS file will be created as C:\Windows\setup.iss. Make sure that you define the .ISS extension.
Consider: •A full path for all options above is recommended (not using relative paths). •You may also use quotes for such paths, to avoid issues when these have blank spaces. •No blank spaces should be left between the option and its path value. For further information on these options, refer to http://helpnet.flexerasoftware.com/installshield22helplib/installshield22helplib.htm.
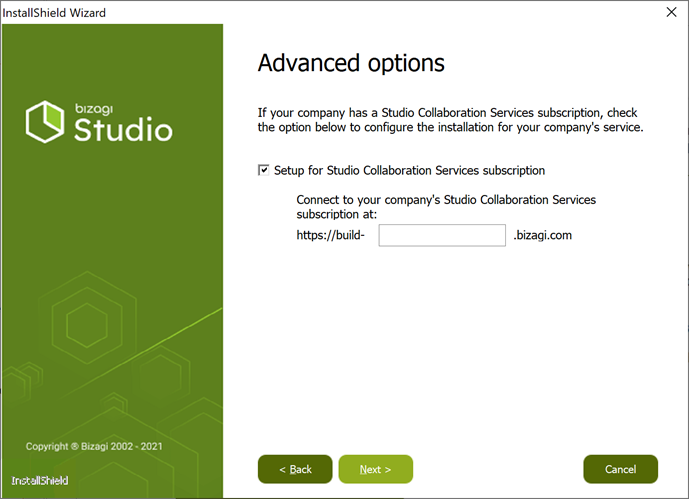
Once the command is entered, follow regular steps of an assisted installation as presented by the wizard and instructed at Quick start installation. If you want you can set the URL of the Studio Collaboration Services. If not, leave the checkbox unselected.
 After a successful procedure, Bizagi Studio is presented as an installed program and display its shortcut.

2. Deploy the installation by relying on the .iss file Use InstallShield 's commands such as /s, /f1 and optionally /verbose, to run a silent installation of Bizagi Studio as follows:
[Bizagi_Installer] /s /f1"[ISS_file]" /verbose"[Output_Log]"

Consider:
•[Bizagi_Installer]: should be replaced by the location of the Bizagi Studio .exe installer, including the full path to this file (ideally a shared drive). The name of the installer should be Bizagi Studio Setup.exe.
•[ISS_file]: should be replaced by the location where you created the ISS configuration file as in a previous step.
•[Output_Log]: should be replaced by the location where you want to store a verbose log, including how you want to name this file.
For example
C:\Users\User\Downloads>"Bizagi Studio Setup.exe" /s /f1"C:\Users\User\Downloads\ISSstudioInstaller.ISS" /verbose"C:\Users\User\Downloads\InstallerLog.log"
Consider: •A full path for all options above is recommended (not using relative paths). •You may also use quotes for such paths, to avoid issues when these have blank spaces. •No blank spaces should be left between the option and its path value. For further information on these options, refer to http://helpnet.flexerasoftware.com/installshield22helplib/installshield22helplib.htm.
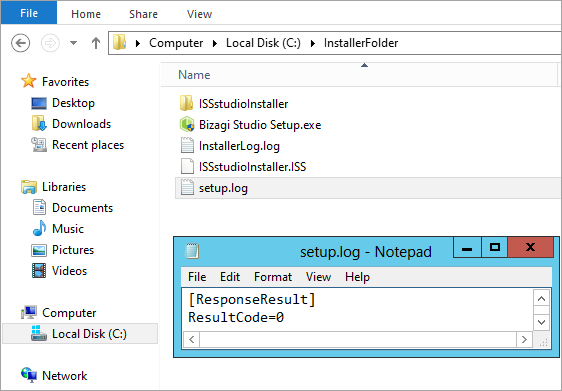
Note that this silent installation will create a setup.log file on the local path. After a successful silent installation, the process exits with a 0 (zero) error status code. Alternatively, you may rely on the verbose log to troubleshoot:
 InstallShield have the following ResultCodes:
| Result Code | meaning |
|---|---|
| 0 | success |
| -1 | General error |
| -2 | Invalid mode |
| -3 | Required data not found in the ISS file |
| -4 | Not enough memory available availableess |
| -5 | File does not exist |
| -6 | Cannot write to the response fileuccess |
| -7 | Unable to write the log file |
| -8 | Invalid path to the InstallShield silent response file |
| -9 | Not a valid list type (string or number) |
| -10 | Data type is invalid |
| -11 | Unknown error during setup |
| -12 | Dialogs are out of order |
| -51 | Cannot create the specified folder |
| -52 | Cannot access the specified file or folder |
| -53 | Invalid option selected |
You may also verify a successful installation by locating the appropriate logs at the Event Viewer.