Creating a custom self-signed certificate
Browsers have strengthened the security policies and require that web applications opened use secure protocols like HTTPS. Because Bizagi's Work Portal is accessed using web browsers you must set all your Work Portal environments using HTTPS. This article explains how you set it in your different environments.
Browsers that require HTTPS
• Chrome from version 58. It also requires that the certificate must have the Subject Alternative Name field (SAN).
• Edge
Note: Although other browsers might not ask for a certificate to use the HTTPS protocol, it is advisable to configure HTTPS for all your environments (development, test, and production).
Set HTTPS for your environments
To set the HTTPS protocol you need to follow these steps:
- Create or purchase a digital certificate
- Certificate for Development and Test environments
- Certificate for the Production environment
- Set the HTTPS binding in the IIS
- Add the certificate to your server trusted store (applies when the certificate is not signed by a Certifying Authority)
Certificate for Development and Test environments
For the development or test environment, you can either use purchased certificates (if you already have), signed certificates by a certifying authority (CA), or you can use self-signed certificates. If you use self-signed certificates it is important that the certificate has the Subject Alternative Name field (SAN). To generate a self-signed certificate with Subject Alternative Name you can follow these steps:
Open the Powershell command prompt as an administrator, and use the following command:
New-SelfSignedCertificate -FriendlyName <name> -DnsName <DNS> -CertStoreLocation cert:\LocalMachine\My
Where:
-
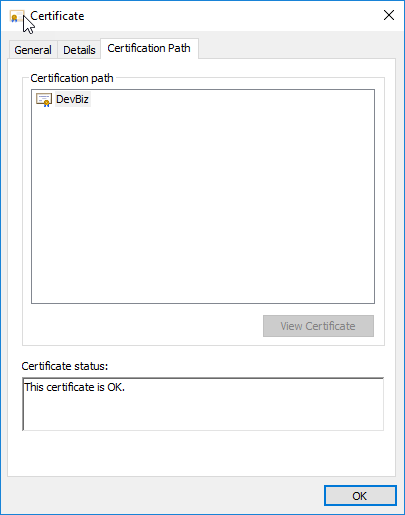
<name>: is a friendly name you can give to the certificate. For example, DevBizagi -
<DNS>: this is the DNS associated to your site in the server (IIS). If you are using localhost as your DNS it is recommended that you include all possible options to access localhost, for example:
-DnsName "localhost","127.0.0.1","localhost.domain.com","*.domain.com"
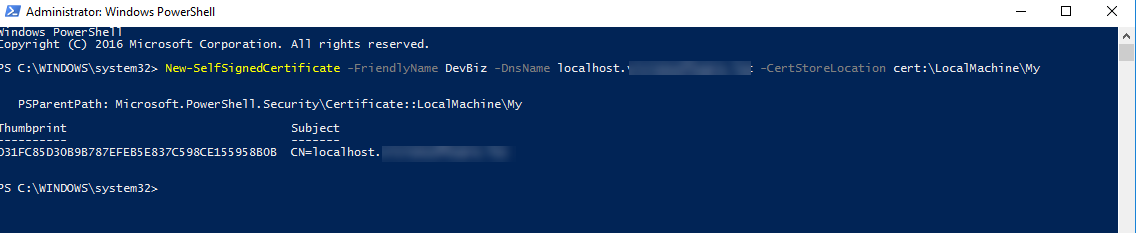
This command creates a self-signed certificate using a Subject Alternative Name. If you have multiple DnsNames or need other certification storage, see further information about this command New Self Signed Certificate.
Note:
If you cannot use Powershell as an administrator you can use SDK tools. The procedure is described in How to create a digital certificate with subjectAltName support. For this procedure you need to have a certifying authority defined by your IT administrator.
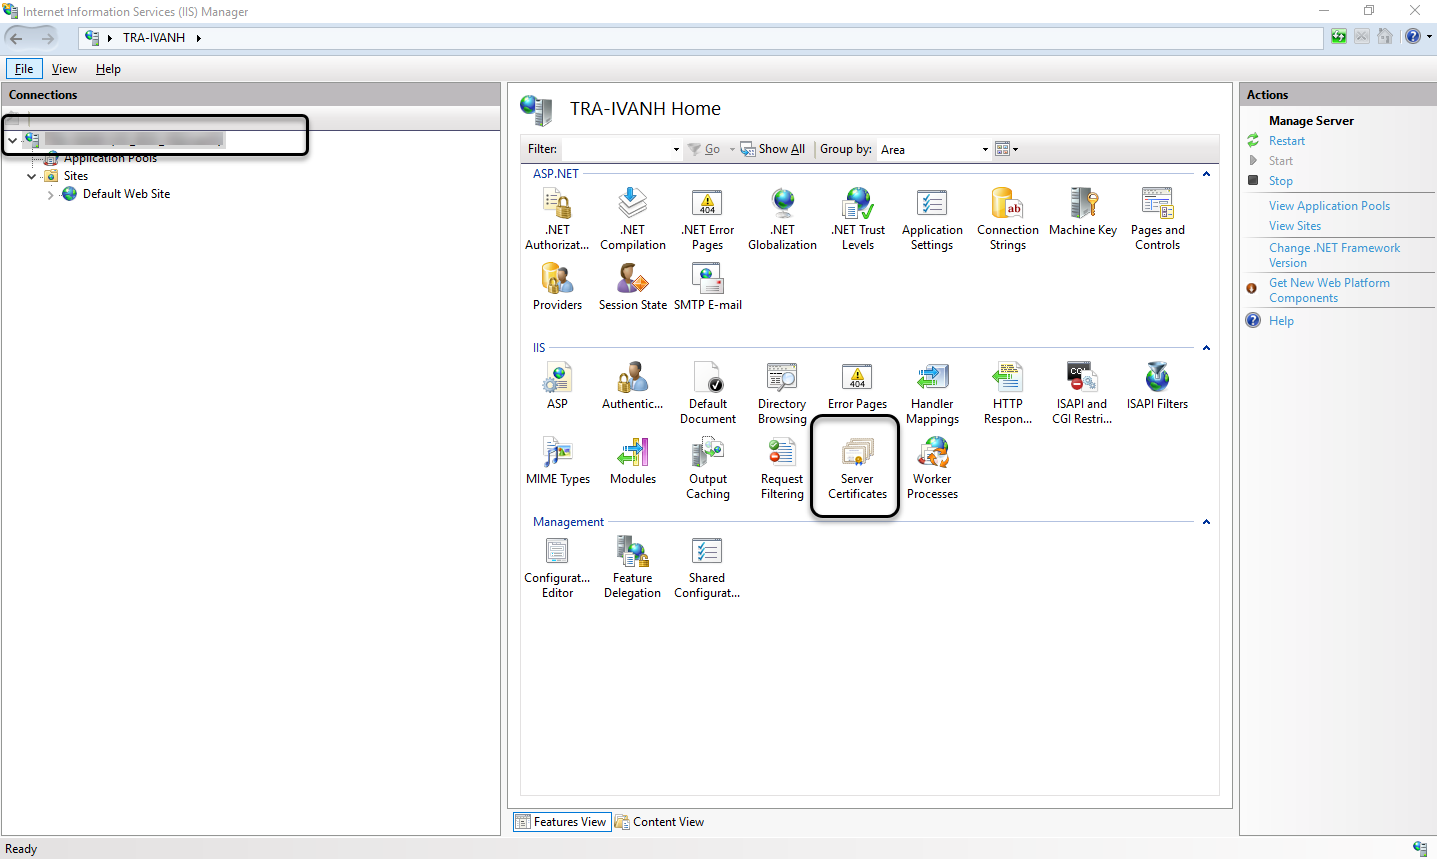
To review the certificate you can open the Internet Information Services Manager (IIS), select your server main node, and click Server Certificates.
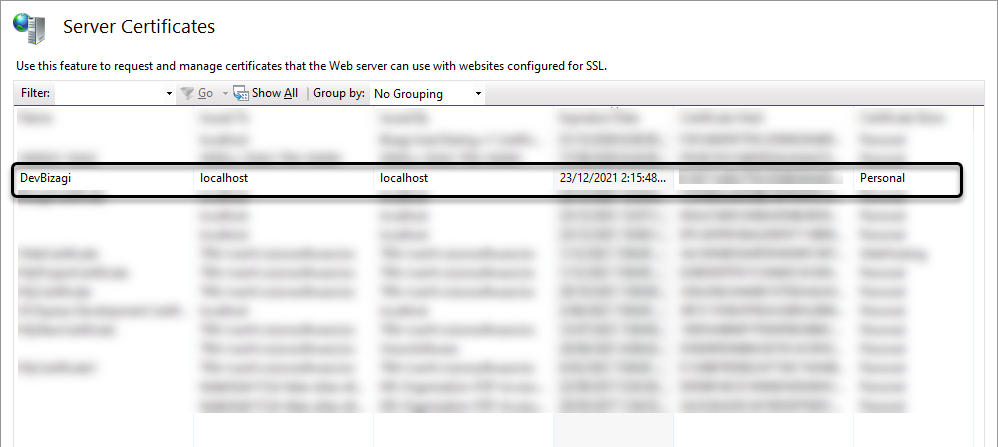
You can find the certificate created using the command:
Certificate for Production environments
In production environments, you cannot use self-signed certificates. Therefore, you need to acquire a certificate from a Certifying Authority (CA), here are some CAs:
- DigiCert
- Symantec
- Sectigo
- RapidSSL
- GeoTrust
- Thawte
Some IT administrators in organizations have their own CA. You will need a signed certificate by the CA defined by your IT administrator.
After obtaining the certificate you can proceed to set the HTTPS binding in the IIS.
Set the HTTPS binding in the IIS
Once you have a valid certificate for your server, specify the bindings in the Work Portal's web site (by default, at Default Web site). Add a new binding. Select the HTTPS type and type the port, usually 443 for HTTPS. Then select the SSL certificate using the certificate mentioned before.
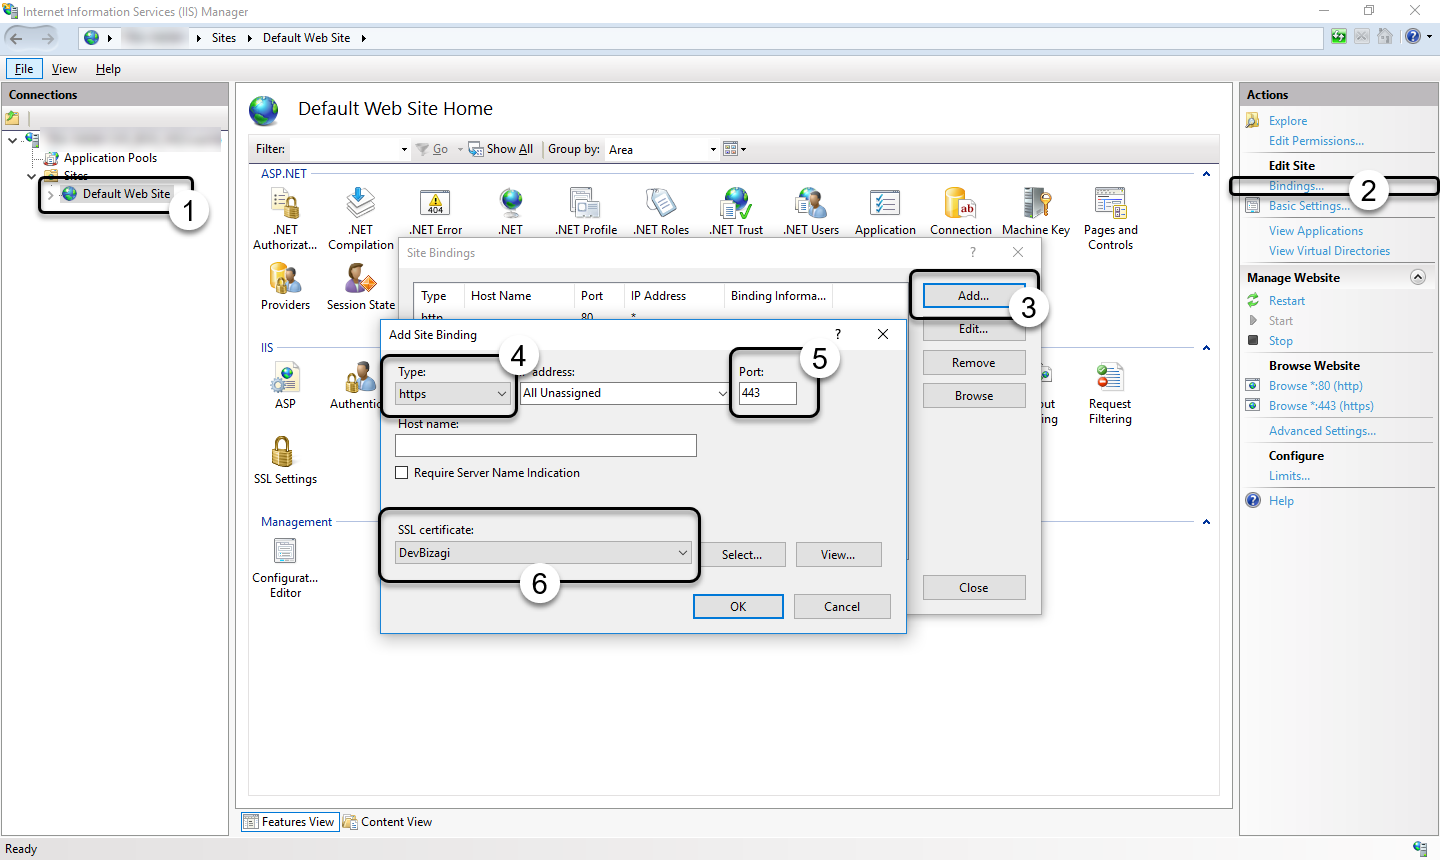
Click OK to save this configuration.
All sites within the Default Web Site, such as the Work Portal, can now be accessed using the HTTPS protocol.
Note:
When using HTTPS, consider editing the web.config file to specify<add key="PROTOCOL" value="HTTPS"/>.
This applies when using case links in process notifications, as described at Notifications using case links.
Add the certificate to your server trusted store
To include the certificate to be trusted by the server Certification Authorities Store. Open the Windows Run dialog box, by searching in windows the word run:

On the Console File menu, click Add/Remove Snap In. Select Certificates and click Add.
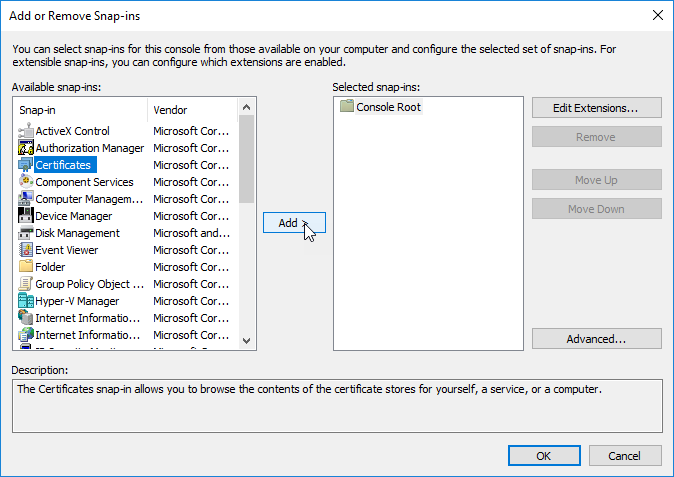
Select Computer Account and click Next. Select Local computer and click Finish. Then click Ok.
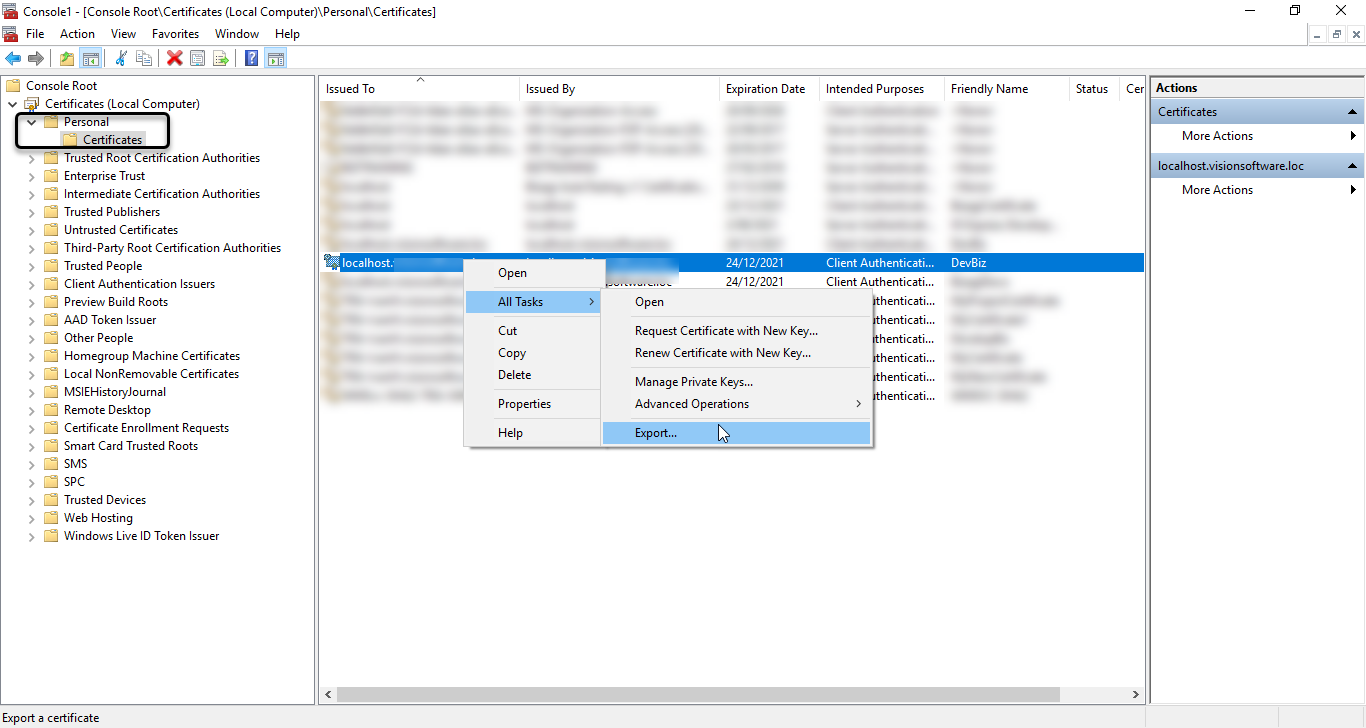
Open the Personal Folder and Click the Certificates folder. Right-click the Certificate with the friendly name created with the command. Select All Tasks, and click Export.
In the Wizard, click Next. Select Yes, export the private key and click Next. Export the certificate in PFX format.
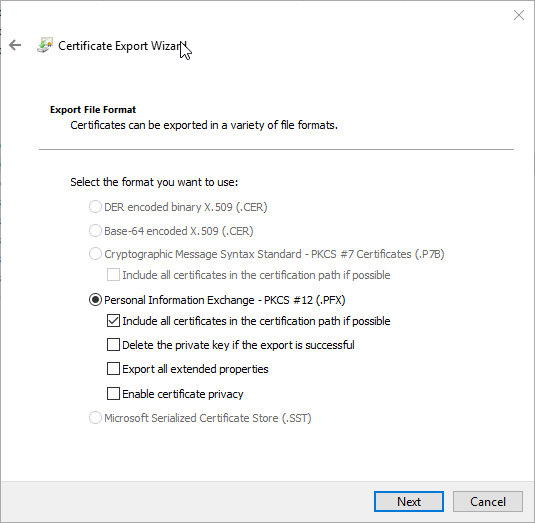
Define a password and Click Next.
Define a folder and a name to export the file. Finally click finish. Now you have the certificate exported.
Under the same MMC window, now select the Trusted Certification Authorities. Right-click the Certificates folder and click All Tasks / Import.
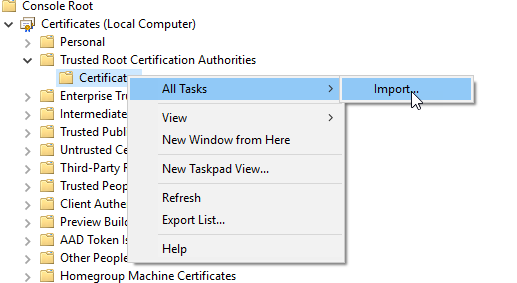
In the import wizard, click Next, and then Select the file exported previously. In the next step, type the password used when exporting the certificate. and Select the Trusted Root Certification Authorities store.
After downing that if you review your certificate in the IIS the status must be OK.
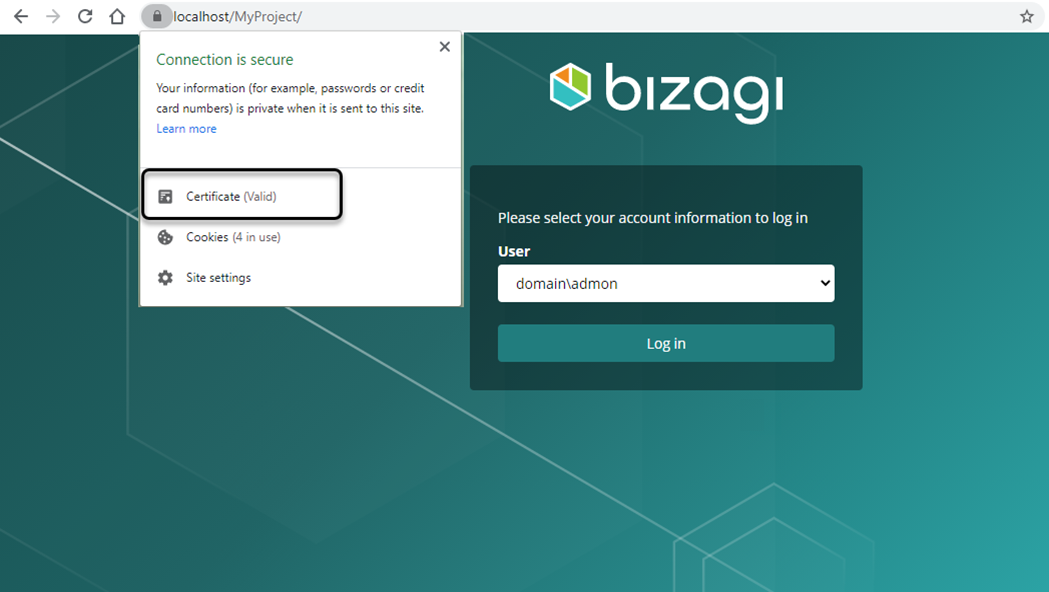
You can also review that the certificate is valid when you access your Work Portal, clicking the lock icon next to the URL:
Note:
If the browser still shows the certificate as not valid in Chrome, make sure that you reset Google Chrome (closing all tabs opened in the task manager) and reset your web application server (IIS).