Project and database server setup
Project and database server setup
To setup your project and database server, you need to follow a series of setups described in this section.
Before you start
You will first need to define:
- The database server having a SQL Server or Oracle instance installed. Refer to Database server requisites for further information.
- The server to be the project server, hosting the Bizagi project.
- It is recommended to use a different dedicated server to host your Bizagi project, though you may use the same Database server to use Bizagi Studio and host your Bizagi project according to the characteristics of your implementation.
- The users that will work on the project, by connecting from their workstations to the central server.
What you need to do
For a teamwork collaboration setup, follow these steps:
- Install the database server
- Install the IIS in the project server
- Install Bizagi Studio in the project server
- Create the Bizagi project at the project server
- Include authorization entries at the project server for your users
- Setup the process developers workstations
1. Install the database server
First you need to install a database server where the collaborative project's database is going to be stored. See the database requisites.
You can choose either SQL or Oracle. The database server can be installed in the same physical central server, or in a separated server. We recommend, if possible, to use a separate database server, so you can perform maintenance and security tasks easily for each server.
Make sure you have the following features checked:
| Component | Feature or element to install | Check | Comments |
|---|---|---|---|
| Install a database engine (see Database prerequisites) | Install a database engine | □ | SQL Server instance |
| Set up the collation | □ | Use case-insensitive (CI), not a Turkish collation. We recommend SQL_Latin1_General_CP1_CI_AS | |
| Enable TCP/IP for the database instance | □ | ||
| Define authorized login accounts. See Advanced configuration of SQL login accounts | □ | Define the security of the SQL logins. |
2. Install the IIS in the central server
The Work Portal is a web-based application that must be run in the Internet Information Services (IIS). Review the IIS configuration.
For the IIS to work you need to activate the following Windows Features:
//
3. Install Bizagi Studio at the project server
Install Bizagi Studio by running the installer with administration rights at the project server.
Carry out the installation steps described at Quick start setup, but this time you may skip the option to install a bundled SQL Server instance and use the corporate instance of your database server.
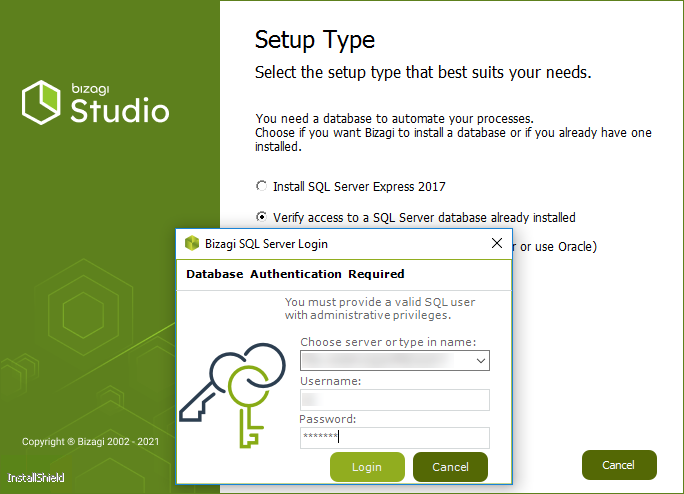
The SQL credentials will be used from the different workstations connecting to the central server. Make sure that the SQL connection string used is one that workstations can resolve. It can be a Fully Qualified Domain Name (FQDN).
You may verify access to your database if you will be using a SQL Server instance:
4. Create the Bizagi project in the project server.
Upon a completed installation, create a new Bizagi project in the central server, as described at Creating a new project.
Recall that in order to create a Bizagi project, you need a server admin account.
If you already have some progress on an existing project, it is best that you create a new project at this server.
Then, you may easily import your progress by creating a backup of your existing project's database, and restoring this backup into the new project's database. See how to restore a backup of your Bizagi database.
Note:
If you are using a SQL Server database, and you are relying on advanced configuration of SQL Server login accounts, make sure you create the project by specifying the use of an authorized login account.
You will need a Process administrator login account or an account with higher privileges, as described at Advanced configuration of SQL Server login accounts.
5. Include authorization entries at the project server for your users
At the project server, make sure you add as users all project developers' accounts into the Bizagi Administrators group.
Notice that this group is created automatically by Bizagi's installation and by default, only the server administrator is included.
The Bizagi Administrators group is a Windows users group that has the following characteristics:
- The purpose of this group is to provide governance over Bizagi Studio and the Management Console as desktop applications in the server.
- Users of this group have standard permissions. Therefore, permissions at the server, features, or services level are not included.
- Users included within the Bizagi Administrators group can access Bizagi Studio or the Management Console. This validation assures that other users of your server have no access to your Bizagi development environment.
- Users included in this group can perform administrative tasks such as: create new projects, delete projects, upgrade projects, or select a webserver. Therefore, the Bizagi Administrators group acts as a security measure to control your development environment.
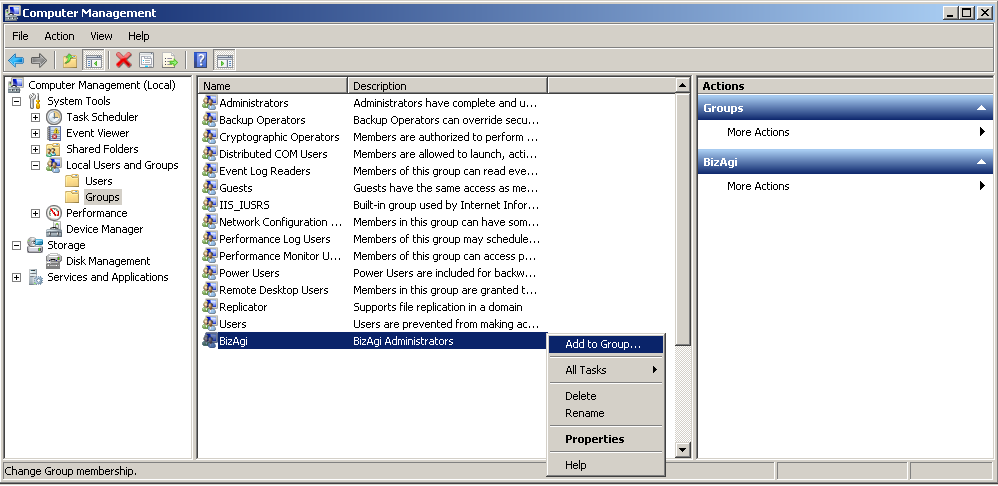
To add users or active directory groups into this group (Bizagi), browse the local management options to locate the local user and groups item.
Right-click on the Bizagi group to use the Add to group option:
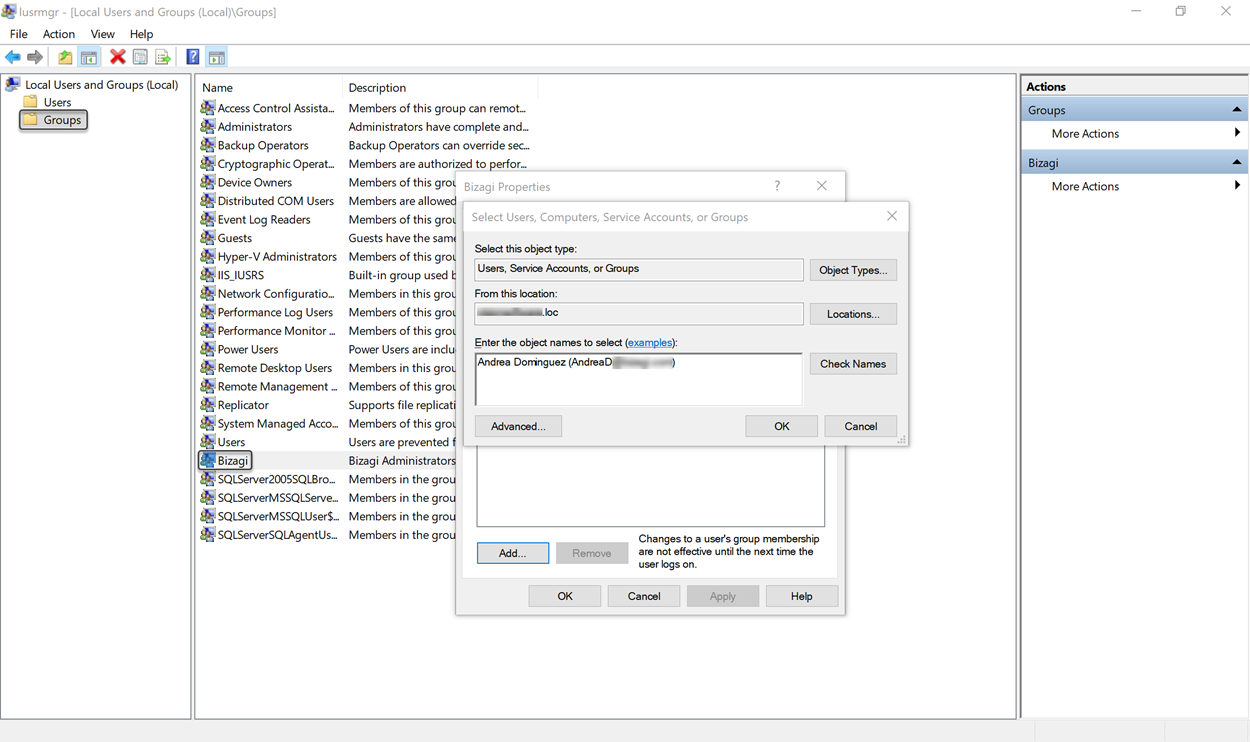
Then choose specific users or active directory groups which will be authorized to open the project:
Note:
You may also rely on Bizagi Studio's security feature to define authorization options for who can work in which processes. For more information about this option, refer to Bizagi Studio security. Bizagi allows you to add individual users or active directory groups.
Technical requirements
The following technical requirements are applicable between different endpoints.
| PORT TYPE | PORT NUMBER | FOR COMMUNICATION BETWEEN |
|---|---|---|
| TCP | 5679 | • Developer workstations using Bizagi Studio and the Development server using Bizagi Studio. |
| TCP | As defined by your database's instance service (e.g, 1433 by default for SQL Server, 1521 by default for Oracle). | • Developer workstations using Bizagi Studio and the Database server. This connection is performed using encryption. • The Development server using Bizagi Studio and the Database server. |
| TCP | Usually port 80 for HTTP (or port 443 for HTTPS) | • Developer workstations using Bizagi Studio and the Development server using Bizagi Studio. |
Users connecting to the created project to work on the implementation do not need administrator rights but an authorized entry at the Bizagi group.
The next step is to set up the process developers' workstations.